
Advanced modes
Taking photos
The “advanced” modes, or PASM modes, are used by experienced photographers because they make it possible to adjust the camera’s exposure settings, including shutter speed, aperture, and sensitivity. In this way, your DxO ONE gives you the same degree of control as a DSLR.


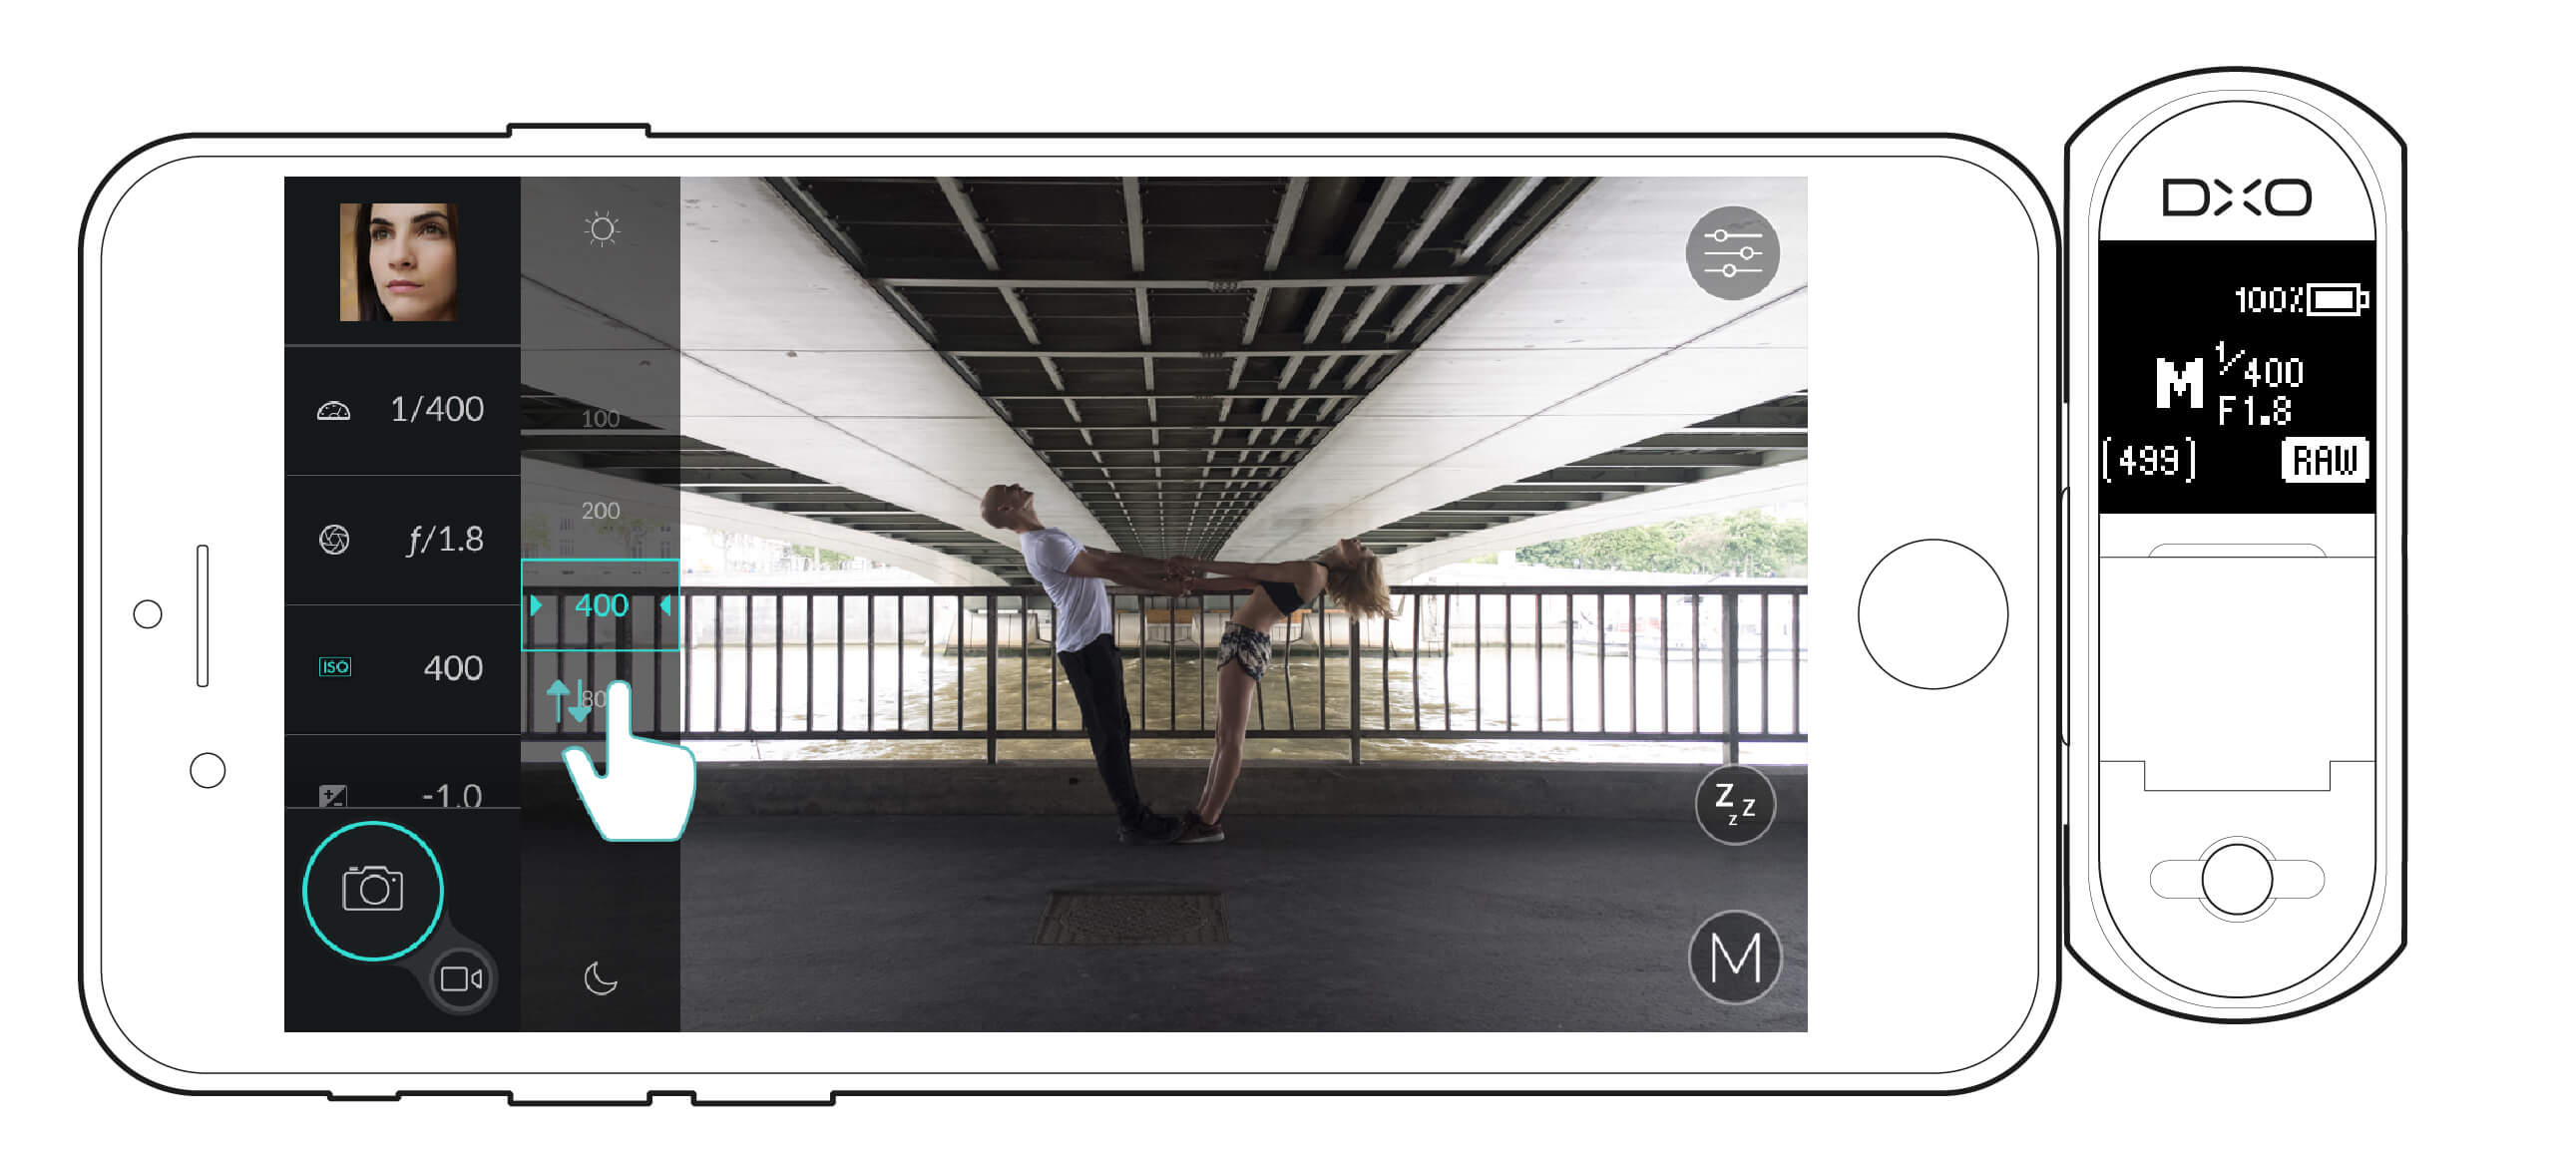
When one of the advanced modes is selected, the left-hand toolbar will expand to display the controls:
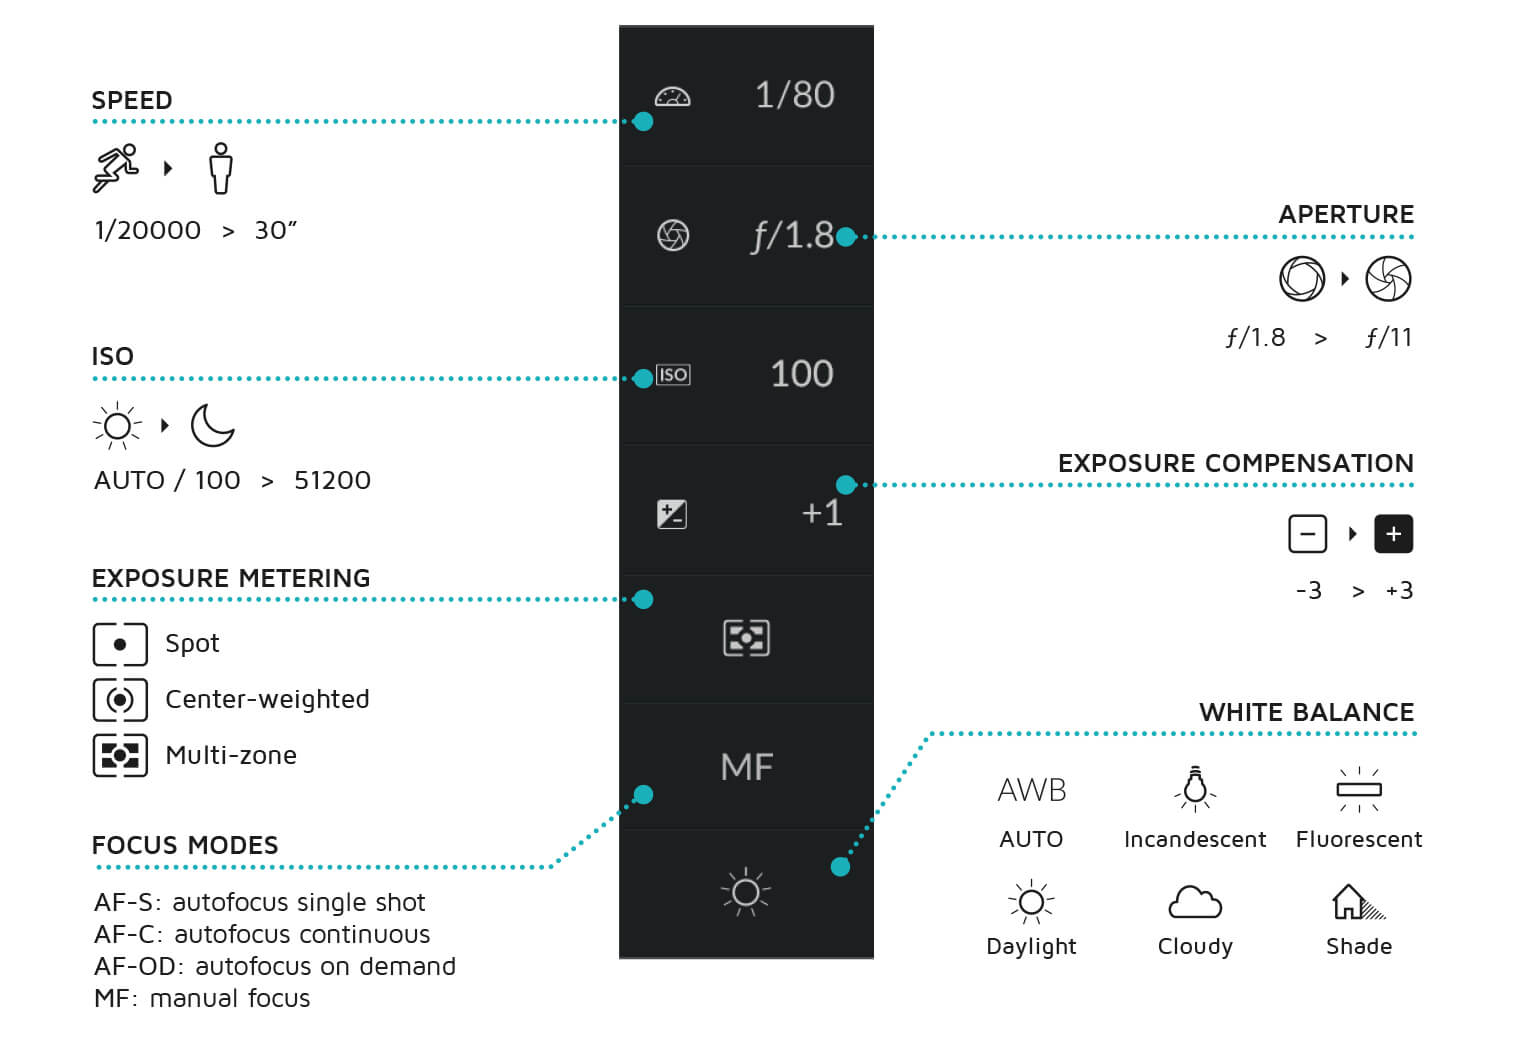
Each of these setting options is described in detail in section “Shooting settings”.
-

P mode – Program
The Program mode is primarily an automatic mode. However, it still lets you control your shooting settings by allowing you to choose a shutter speed/aperture combination that is different from the one suggested by the camera. In this case, the exposure and ISO sensitivity level stay the same.
This mode lets you immediately adjust either the aperture to suit your desired depth of field, or the shutter speed to capture precise movement or create a blur to suggest motion.
Use this mode for:


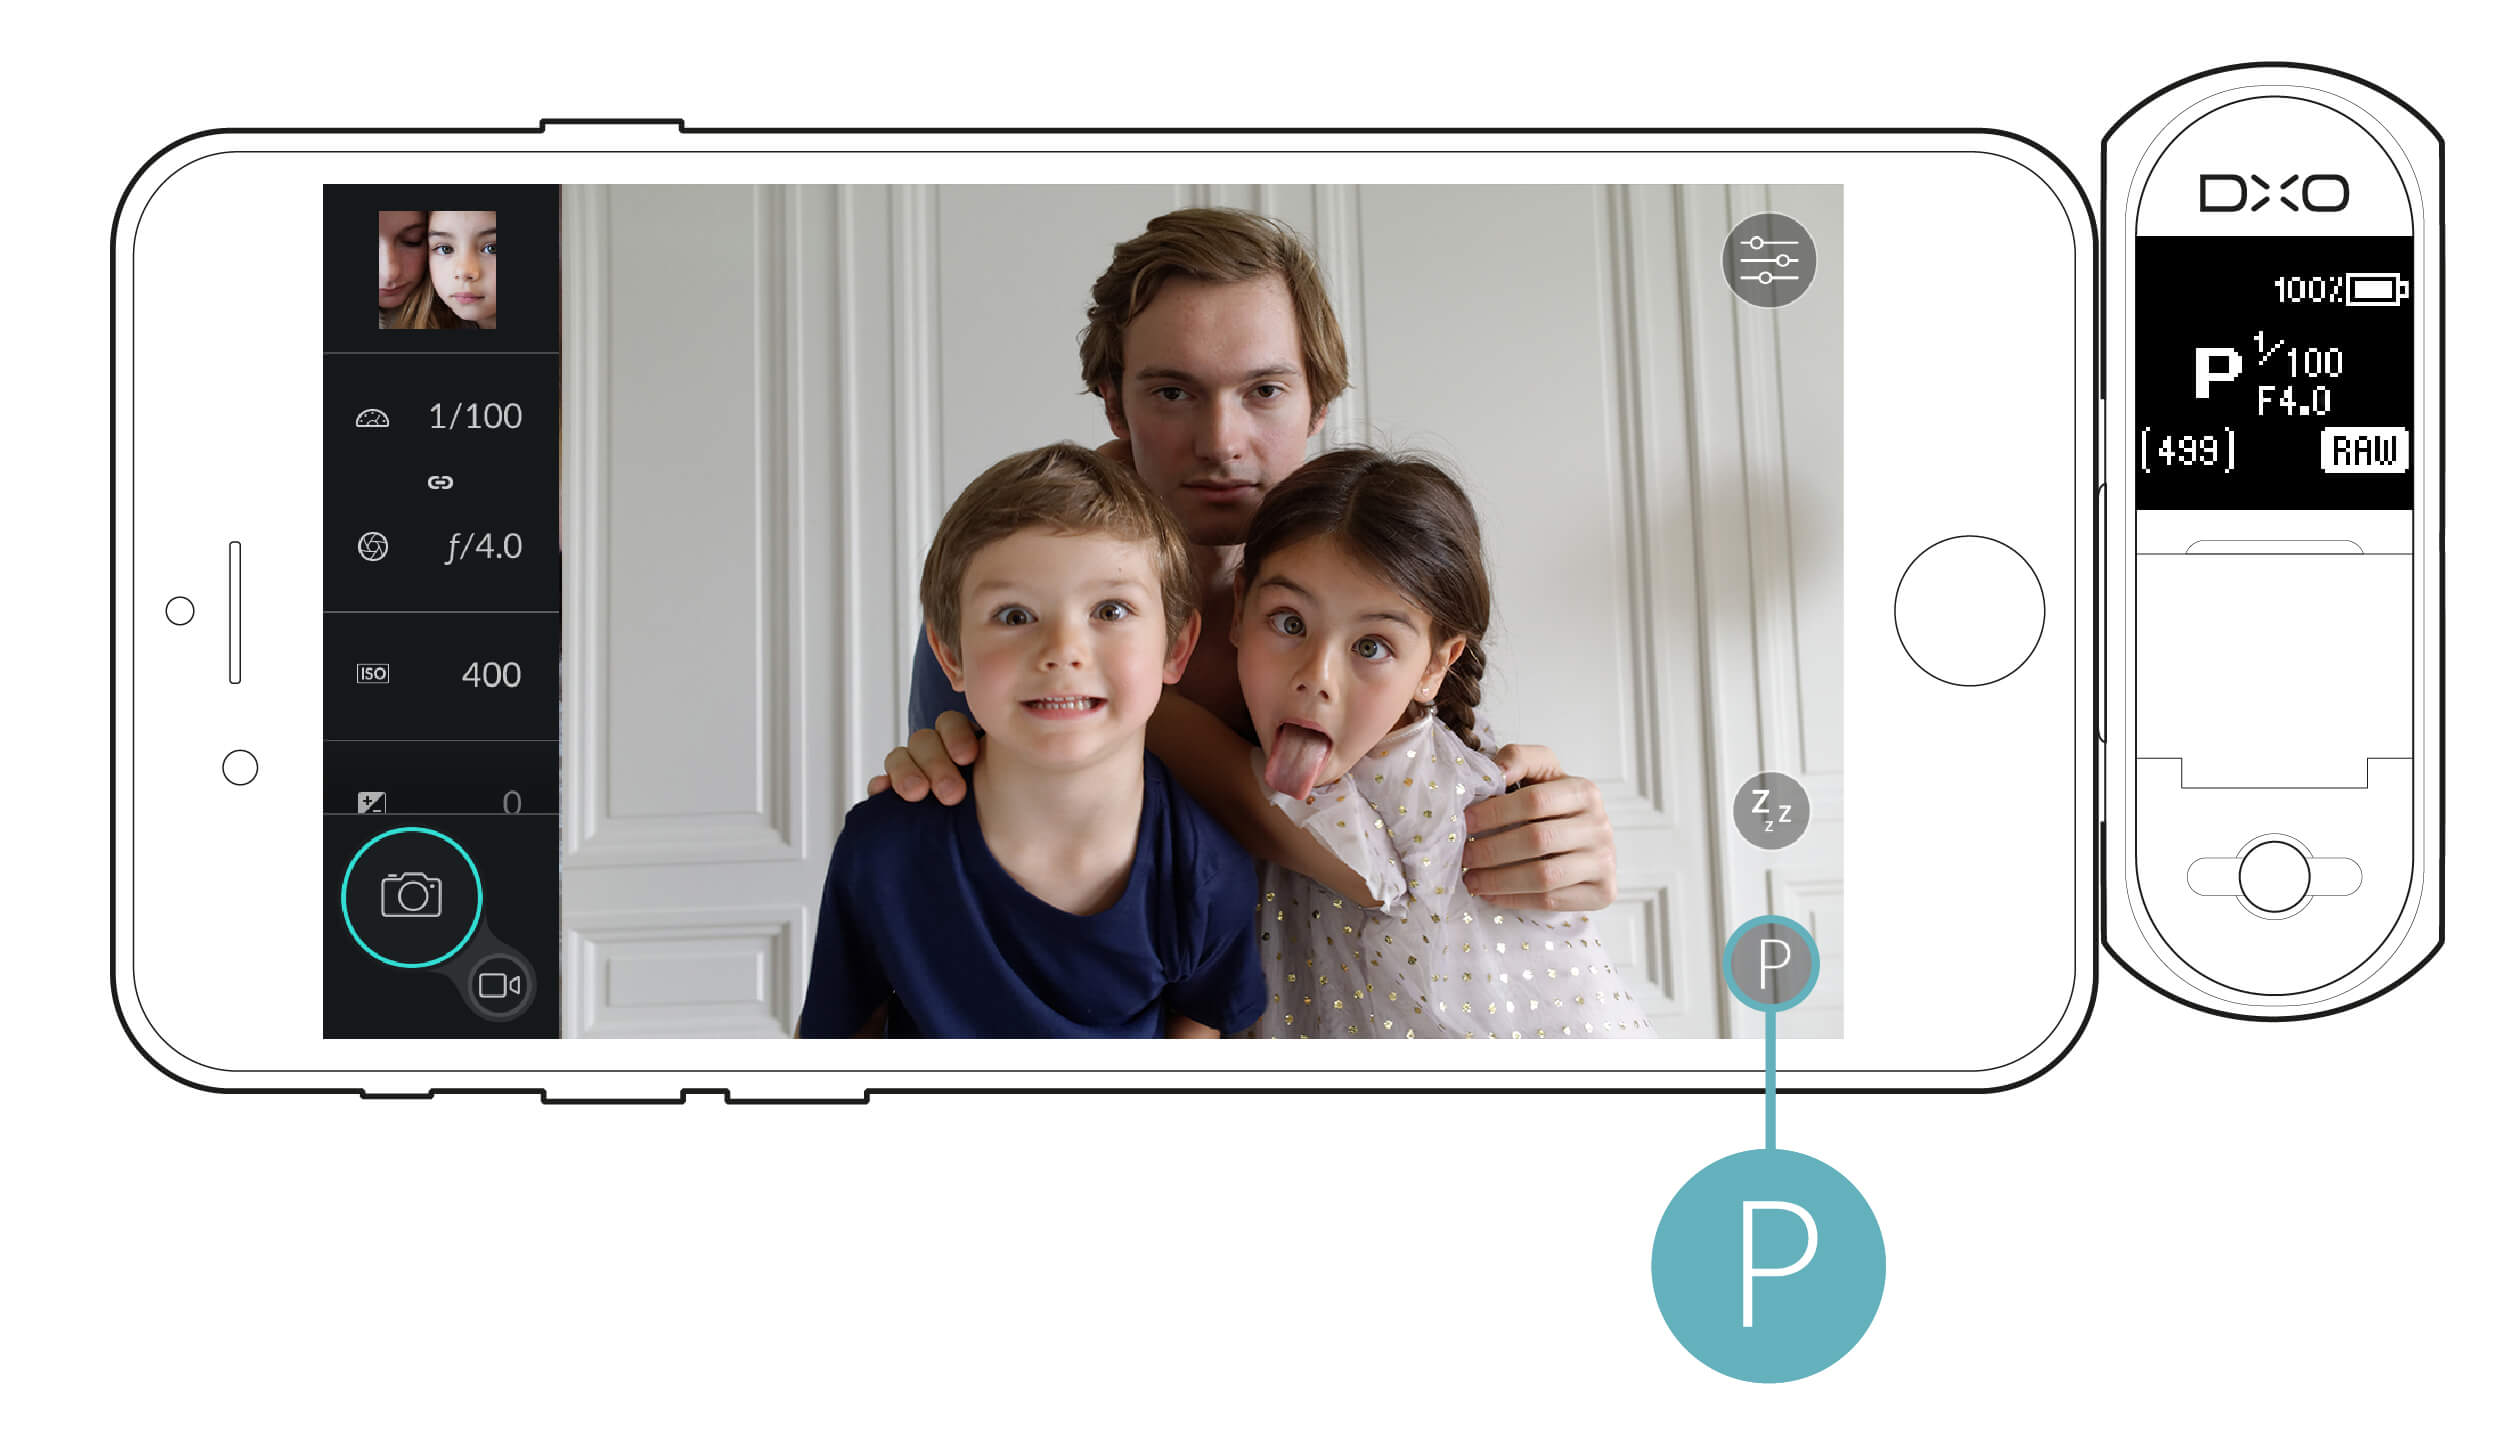


The settings will also be displayed on the DxO ONE’s OLED screen.
Examples:
-

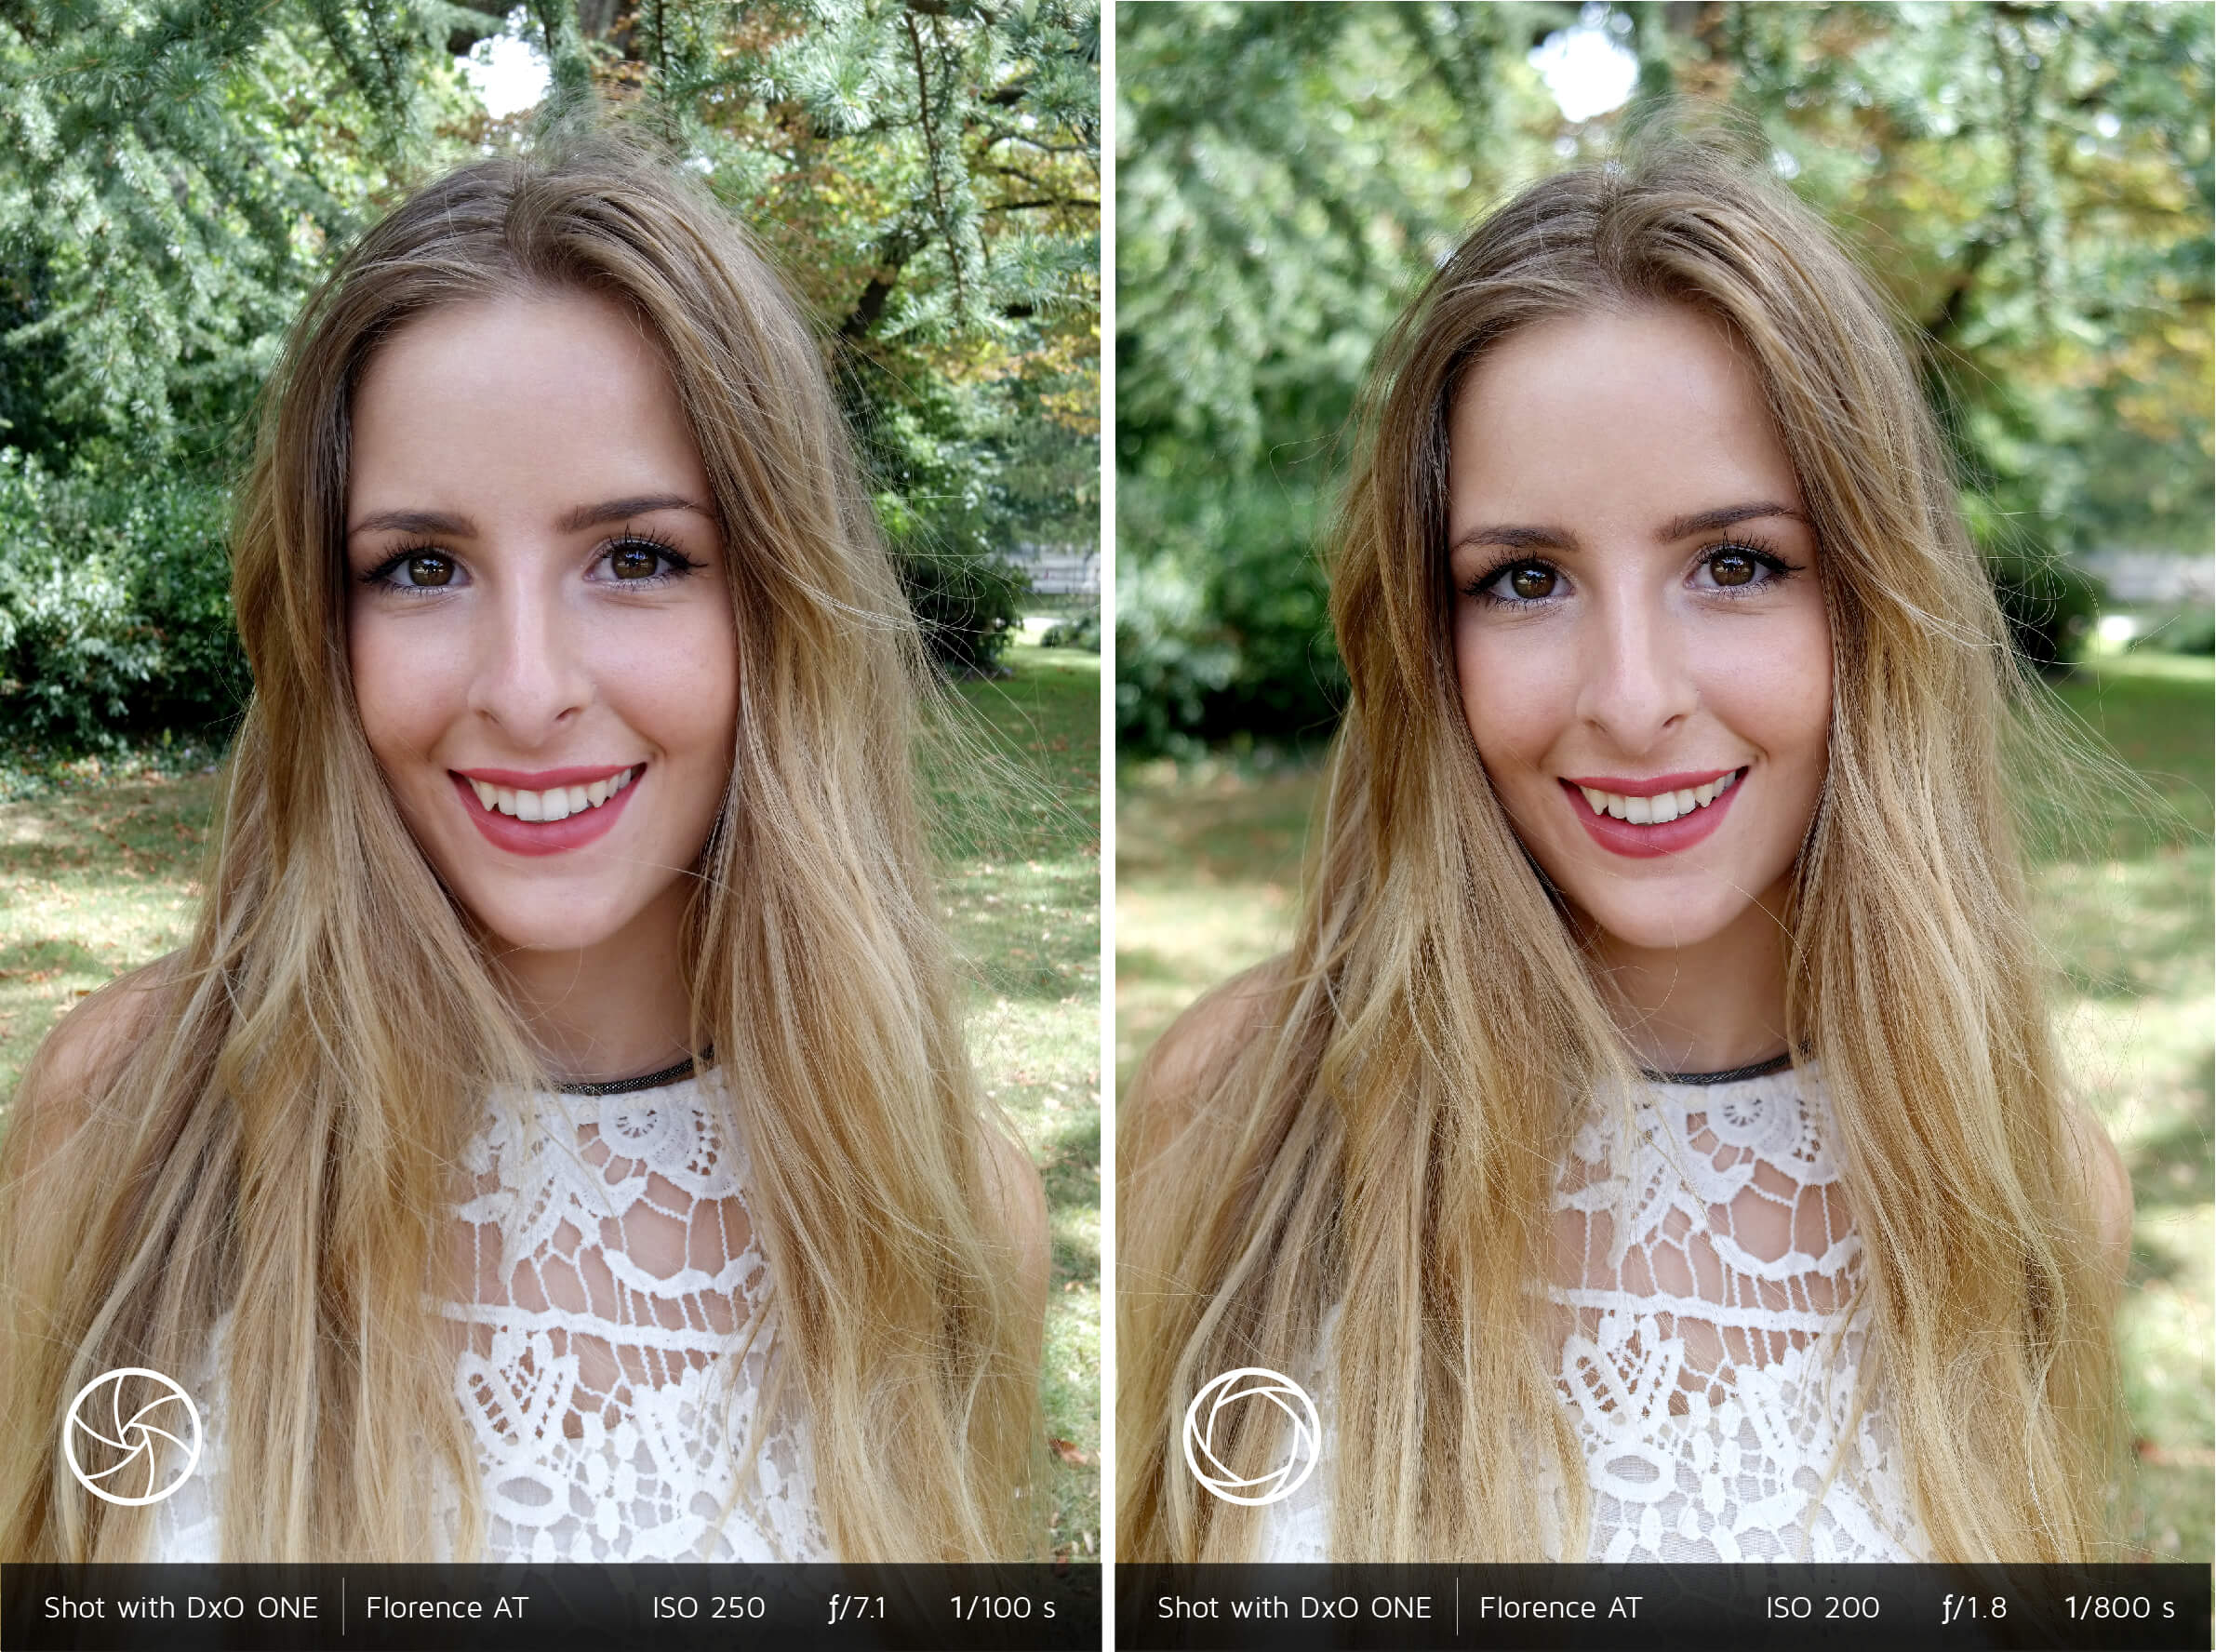
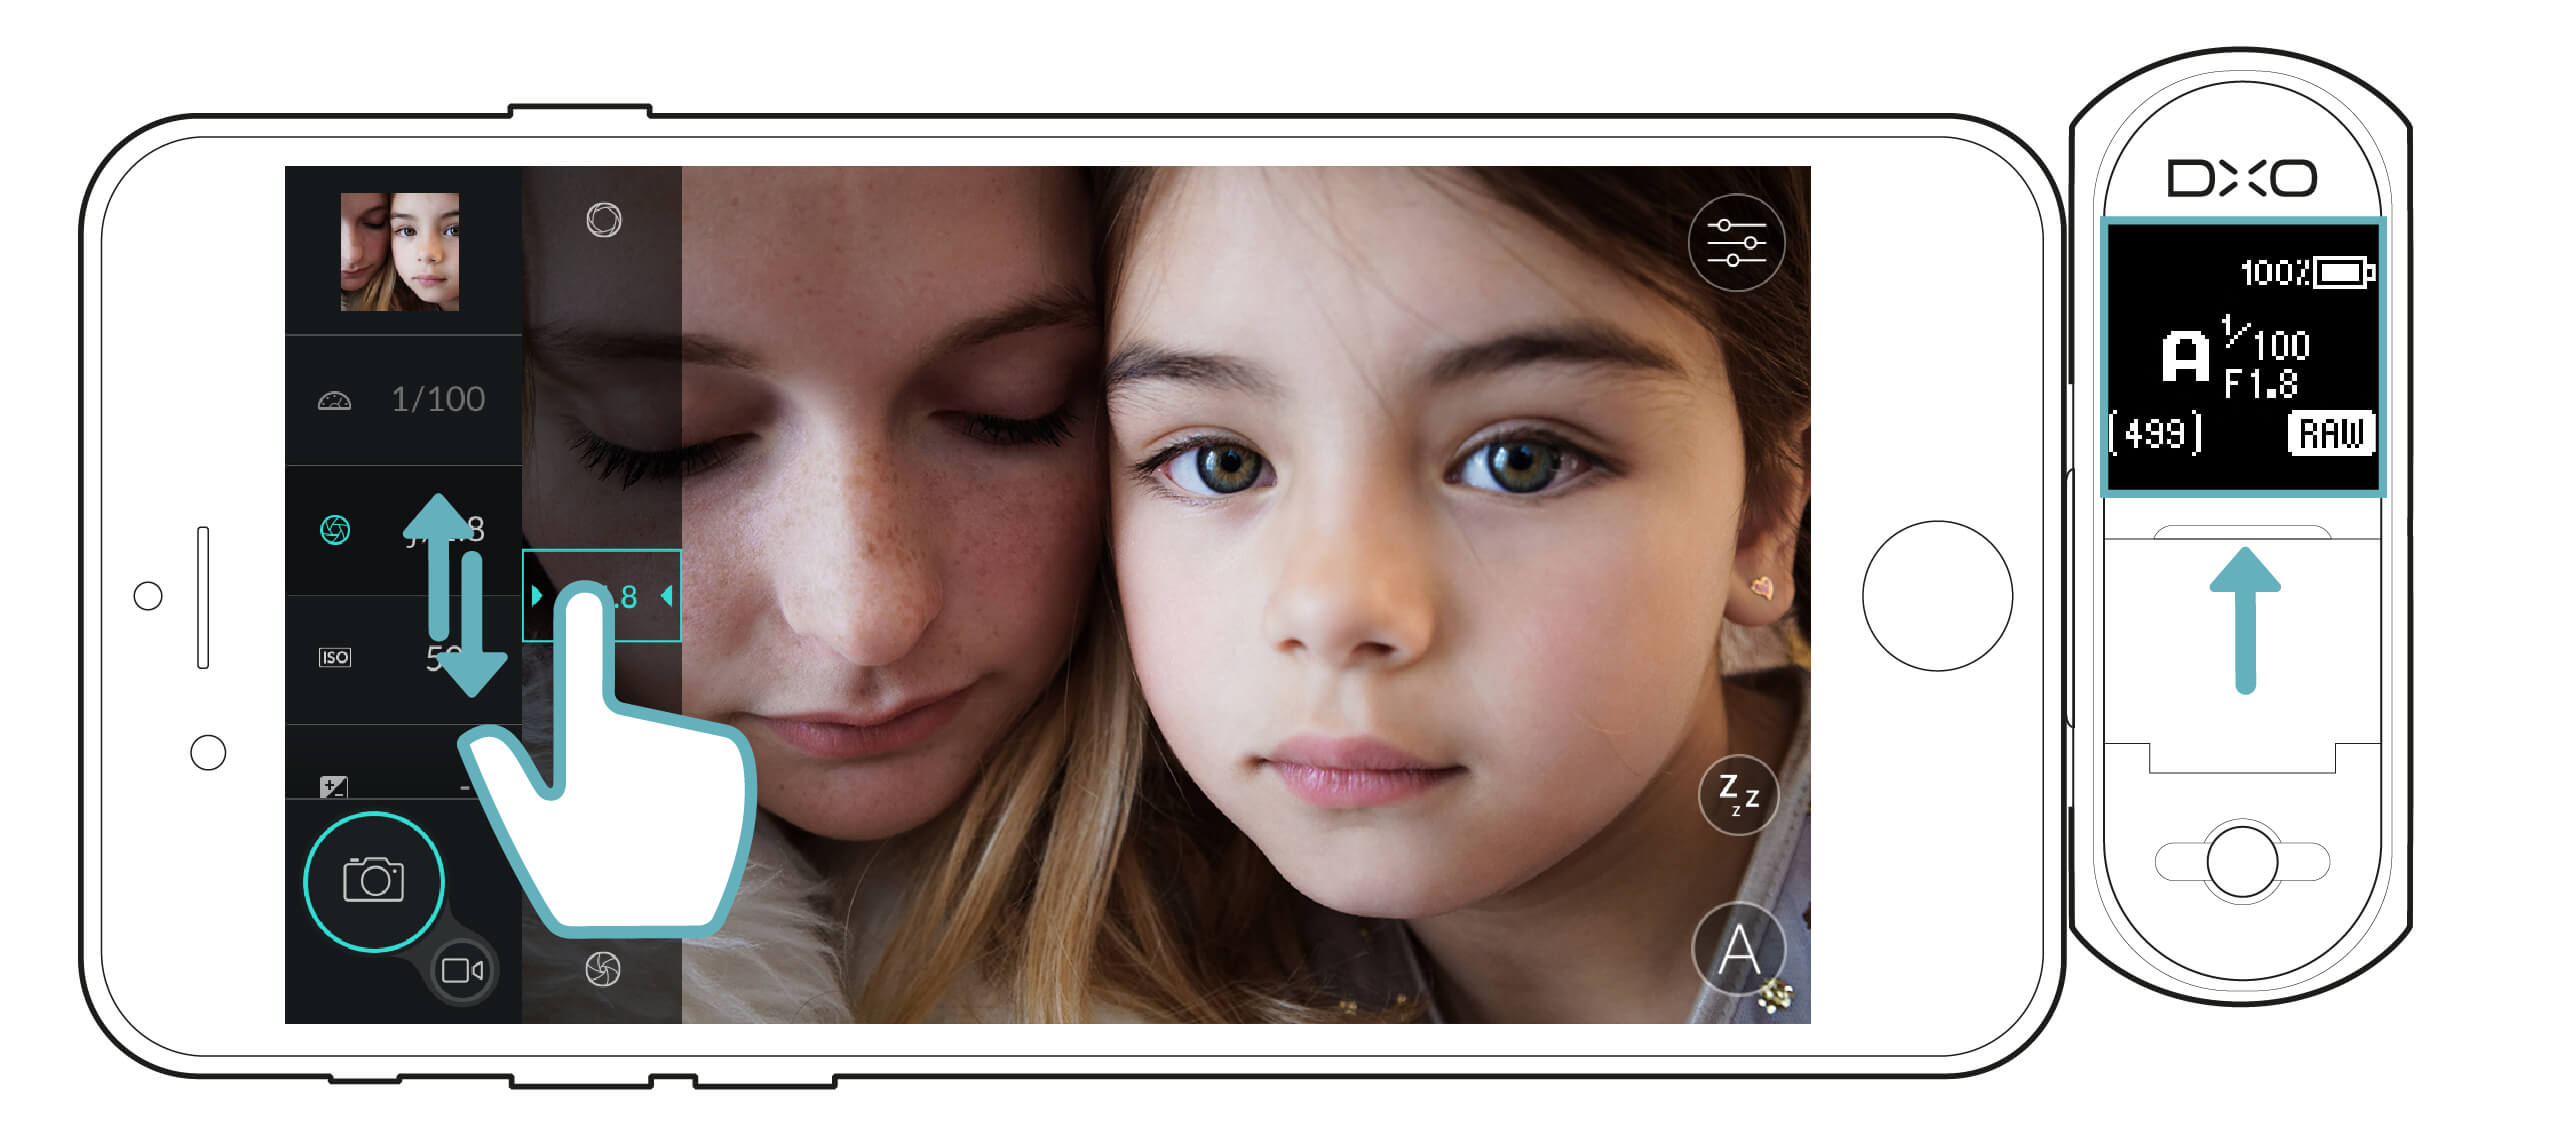
Outdoor portrait: When shooting outdoors, the automatic control feature offers a balanced shutter speed/aperture combination, e.g. 1/500 s with ƒ/4.5. If you want to separate the subject’s face from the background with a subtle background blur, tap on the shutter speed and aperture icons in the left-hand toolbar, then move the sliding menu down to widen the aperture.
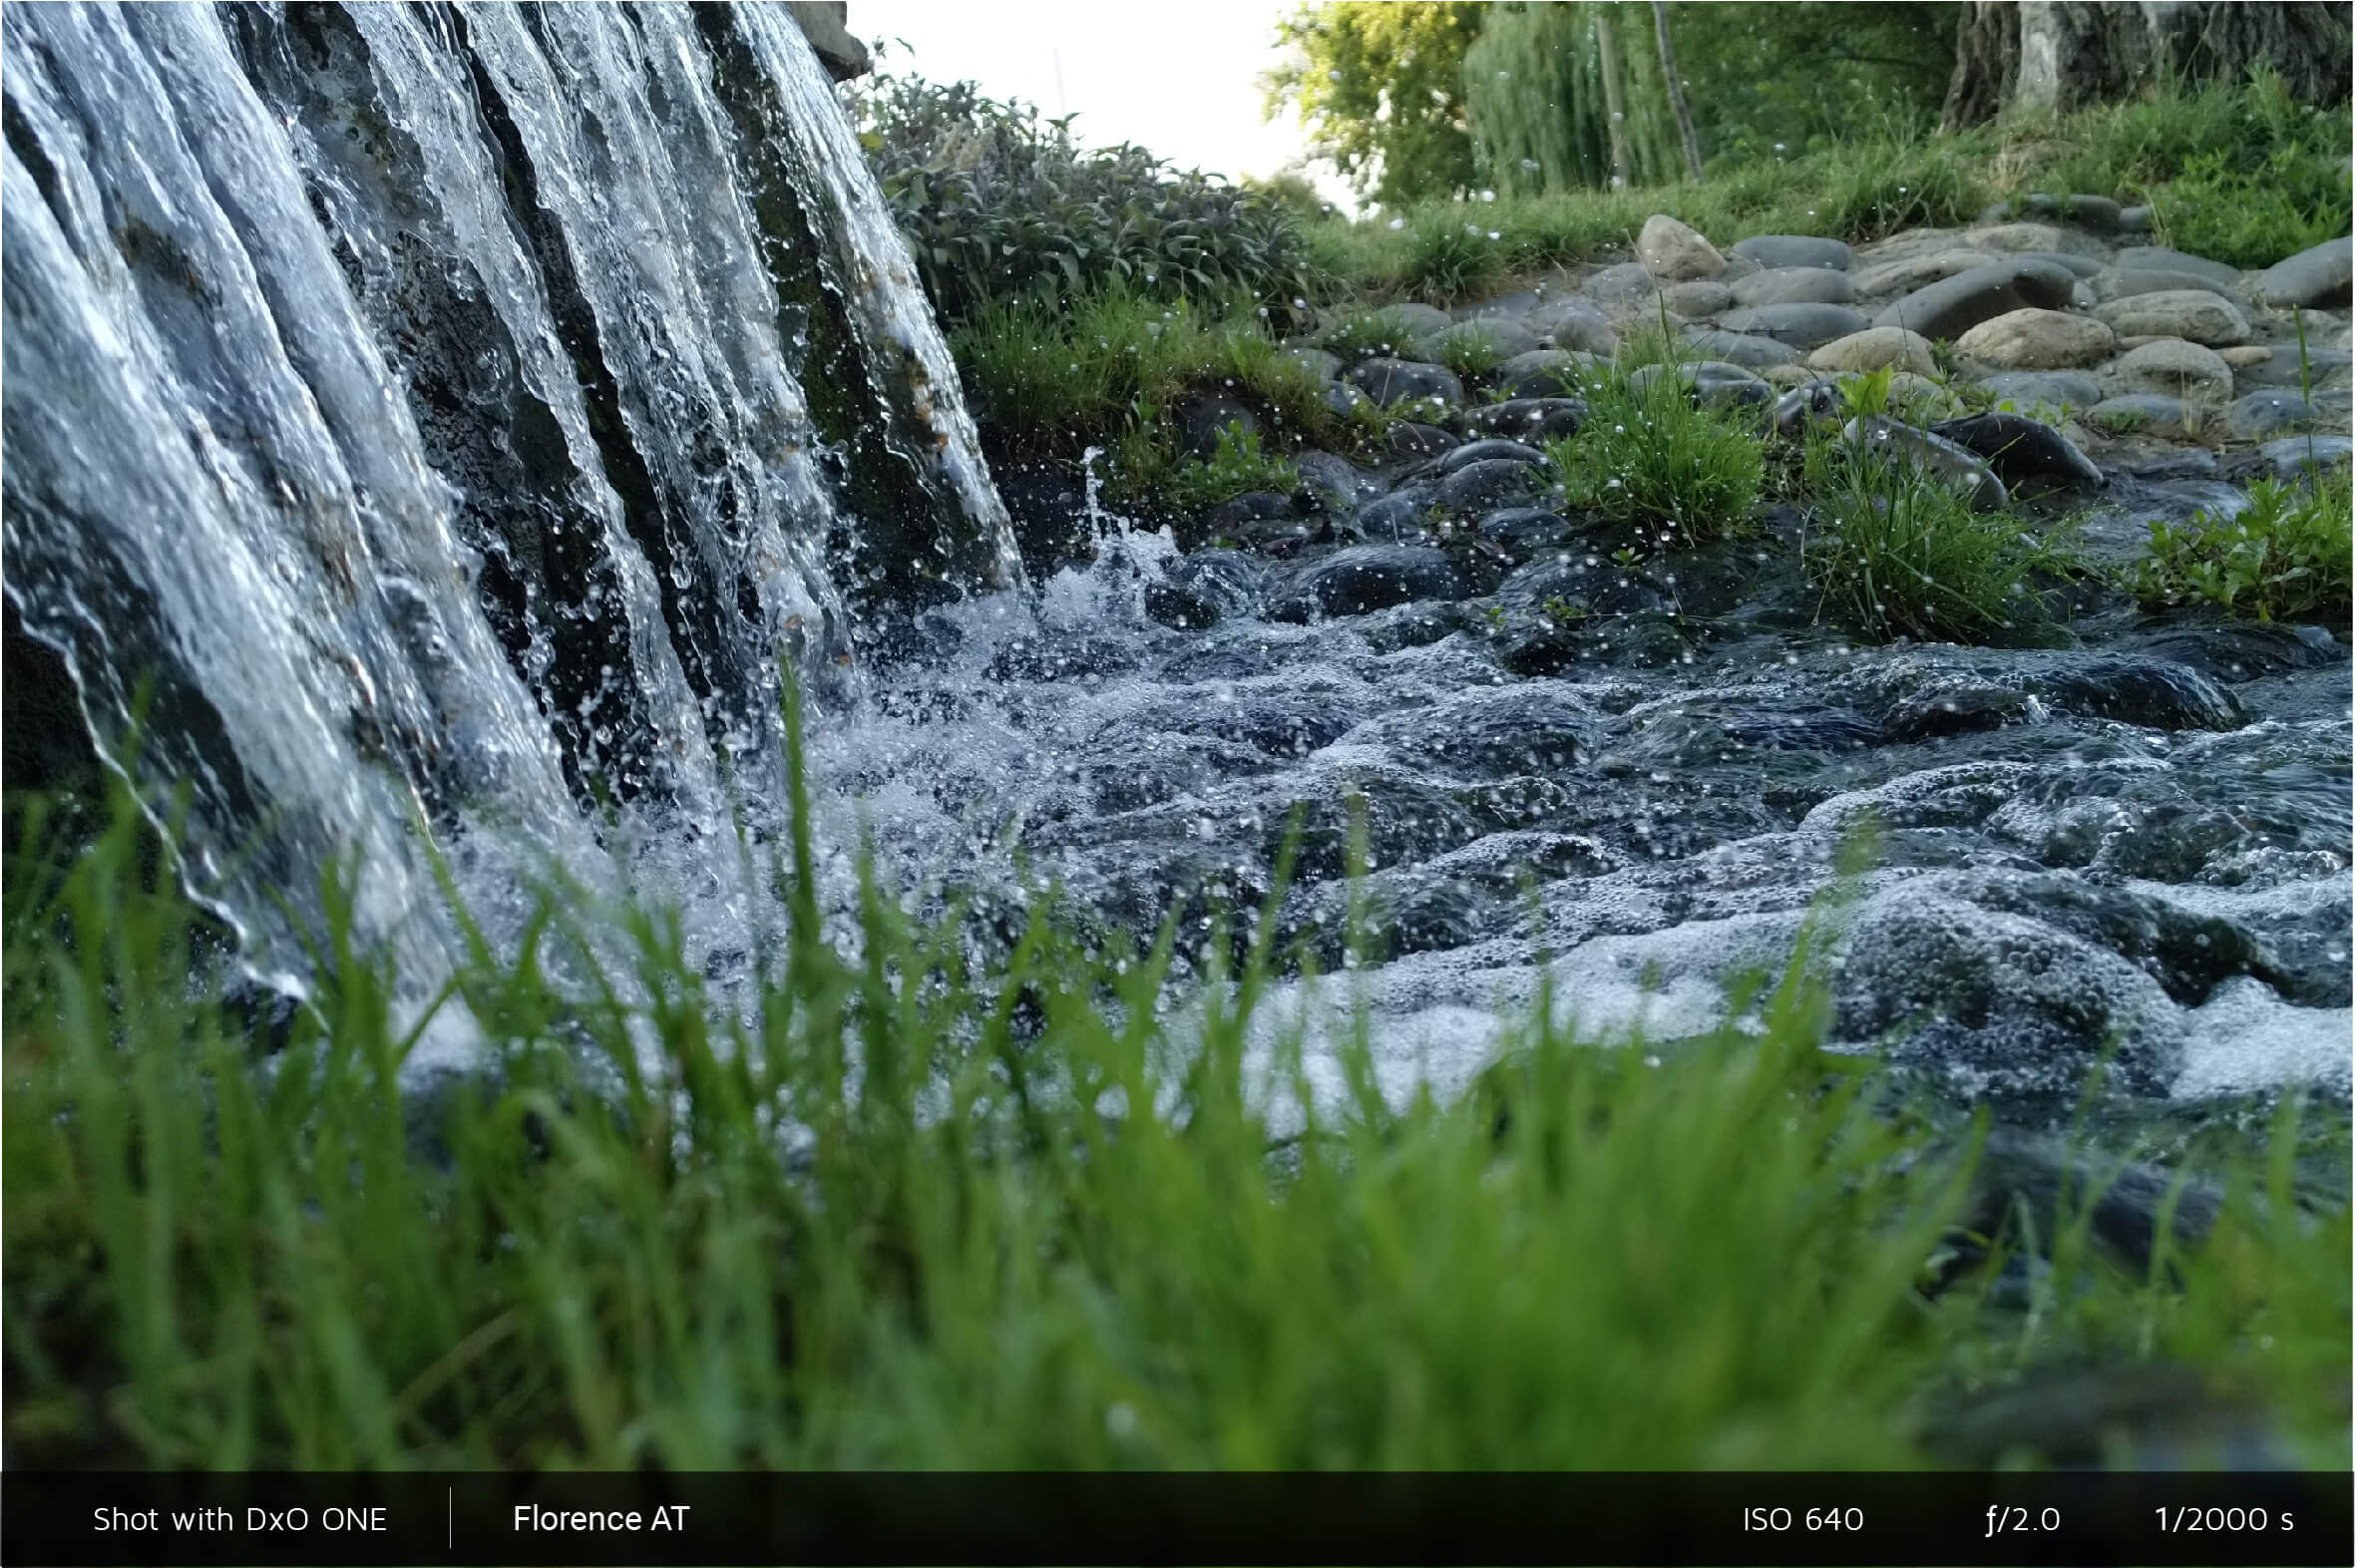
The effect is shown on the menu on either side: wide aperture and fast-moving subject at the top, narrow aperture and static subject at the bottom. You can adjust the program to reach up to 1/2,500s with ƒ/2.
-
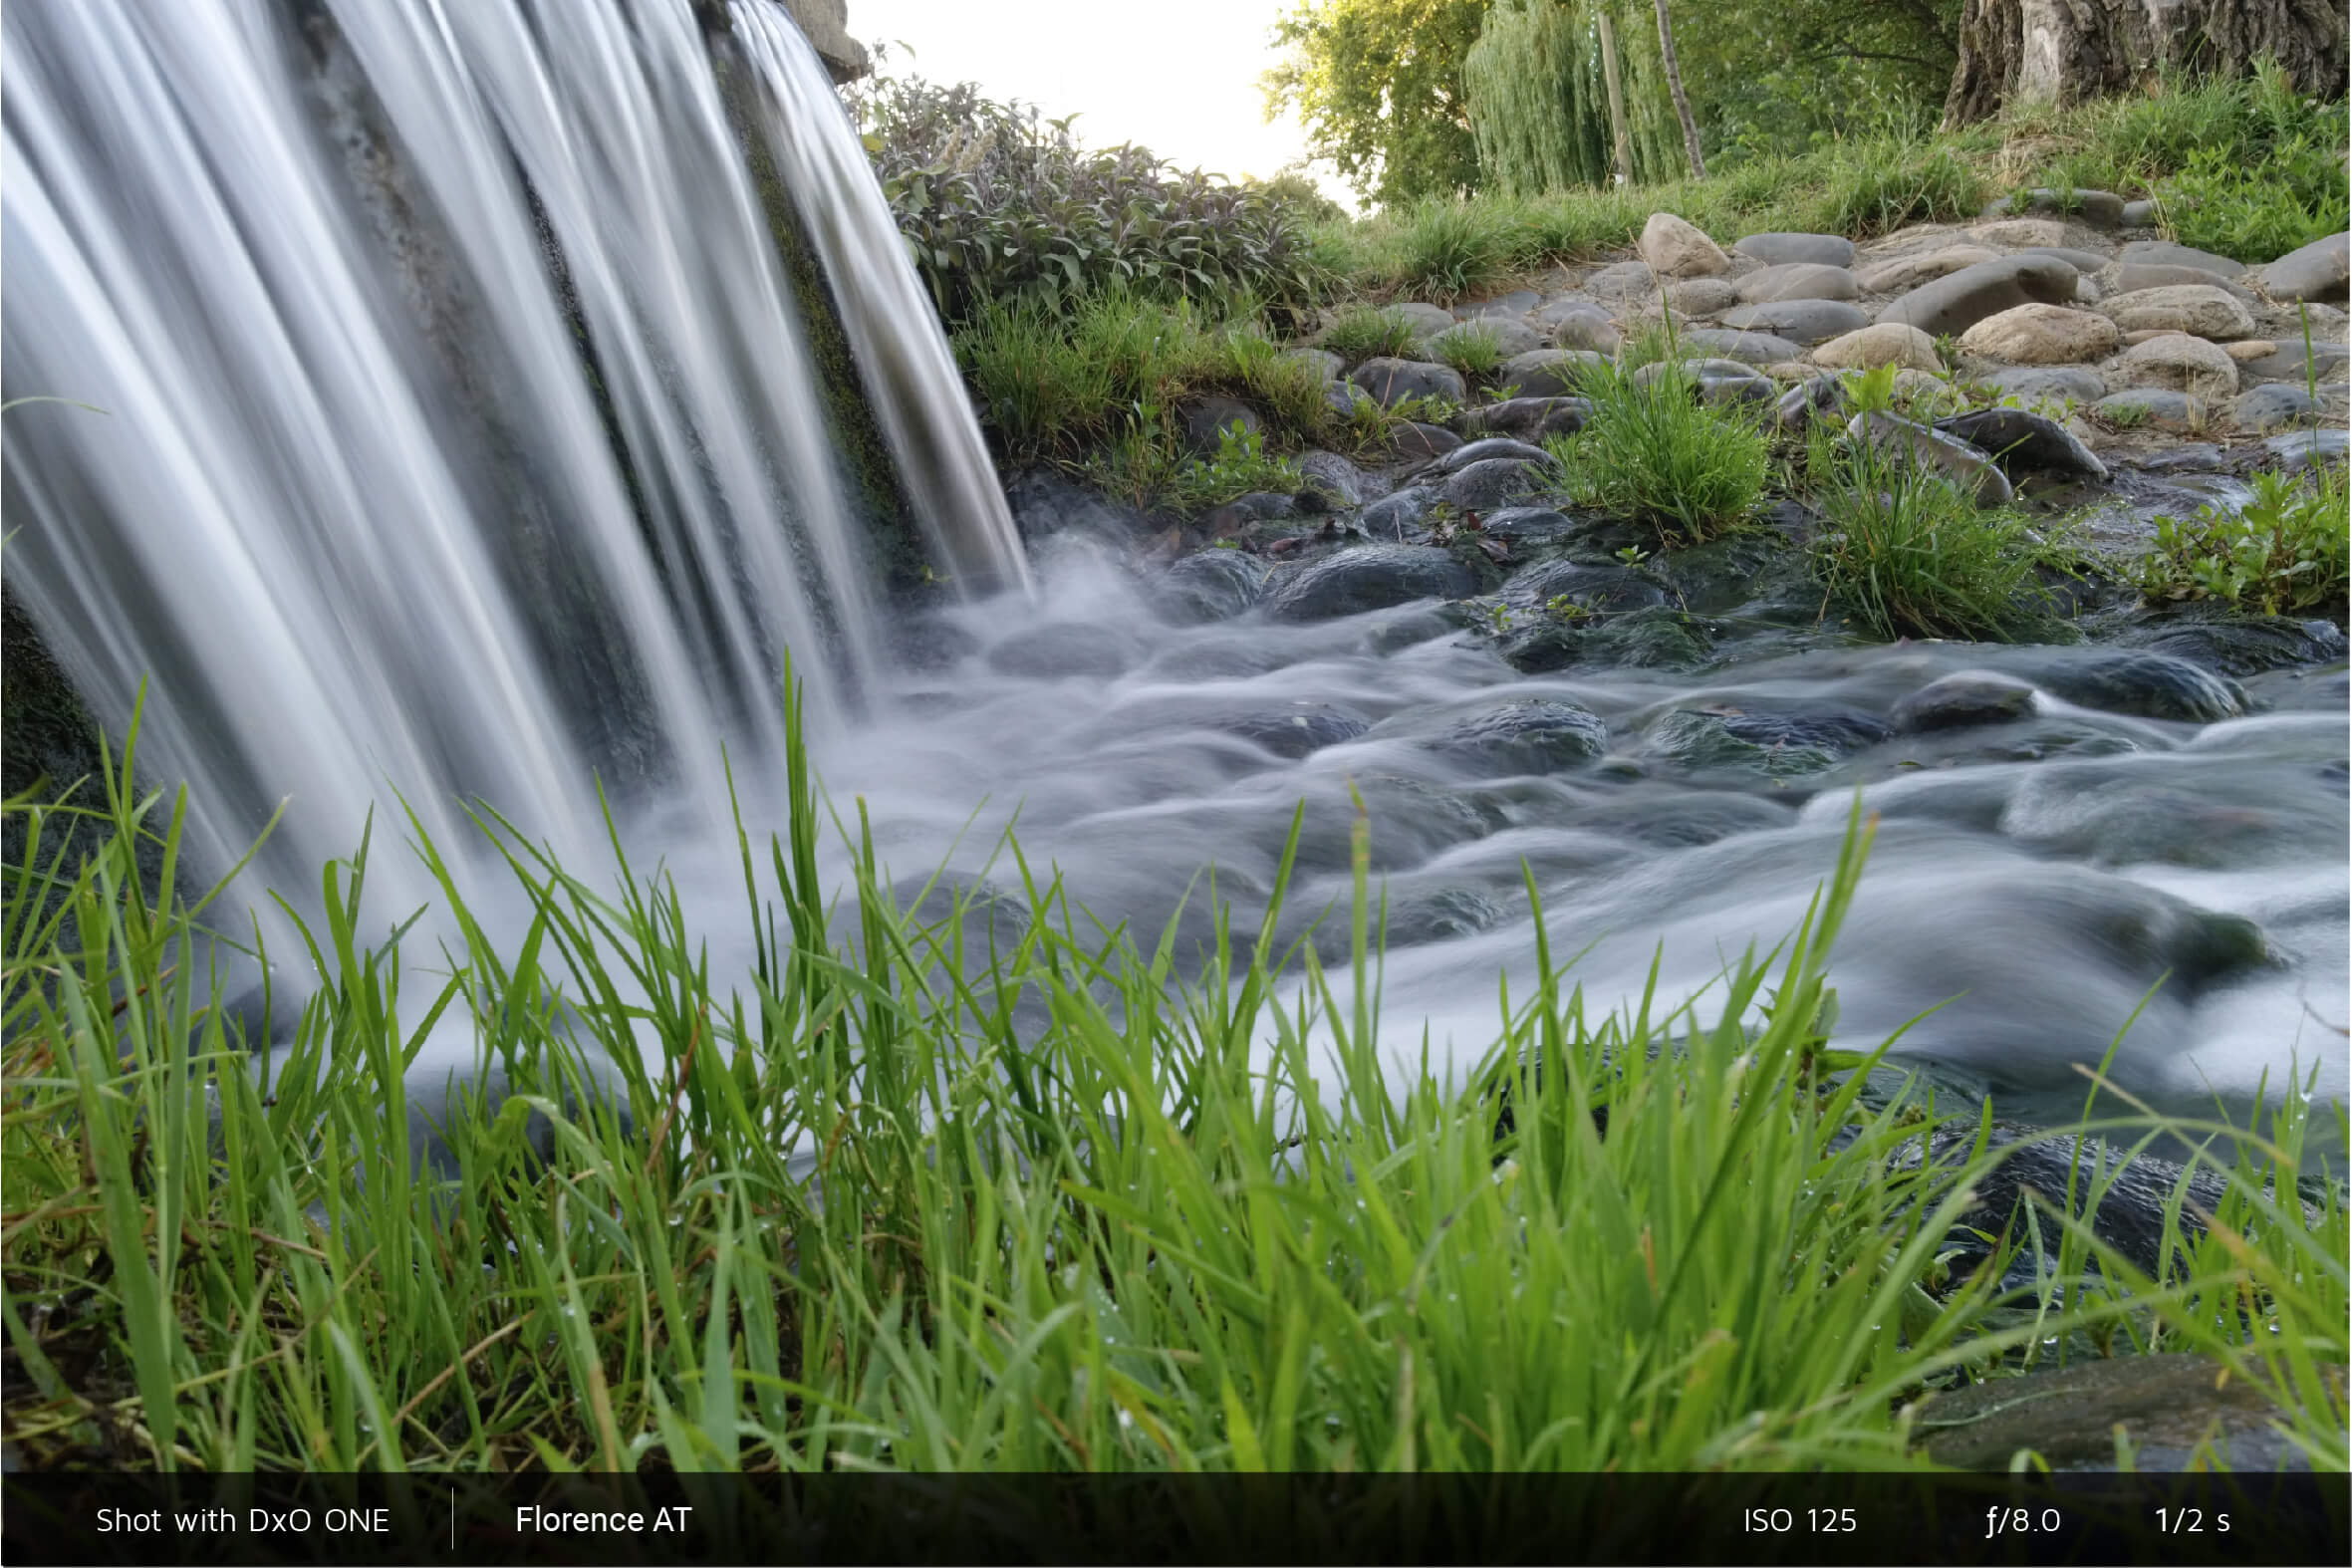
Motion blur: Conversely, you can narrow the aperture even more to increase the exposure time and produce a motion blur in the background. This effect gives the impression of speed.
You can also set the ISO sensitivity at a given value to minimize digital noise in low light conditions. Please note this will force the DxO ONE to select a slower shutter speed or a wider aperture, which may lead to a motion blur or too shallow a depth of field.
-

A mode – Aperture priority
A mode – Aperture priority, is semi-automatic. In this mode, aperture must be adjusted manually. The DxO ONE then automatically chooses the shutter speed and ISO sensitivity that will provide the correct level of exposure.
Use this mode for:
Select  to launch Aperture priority mode.
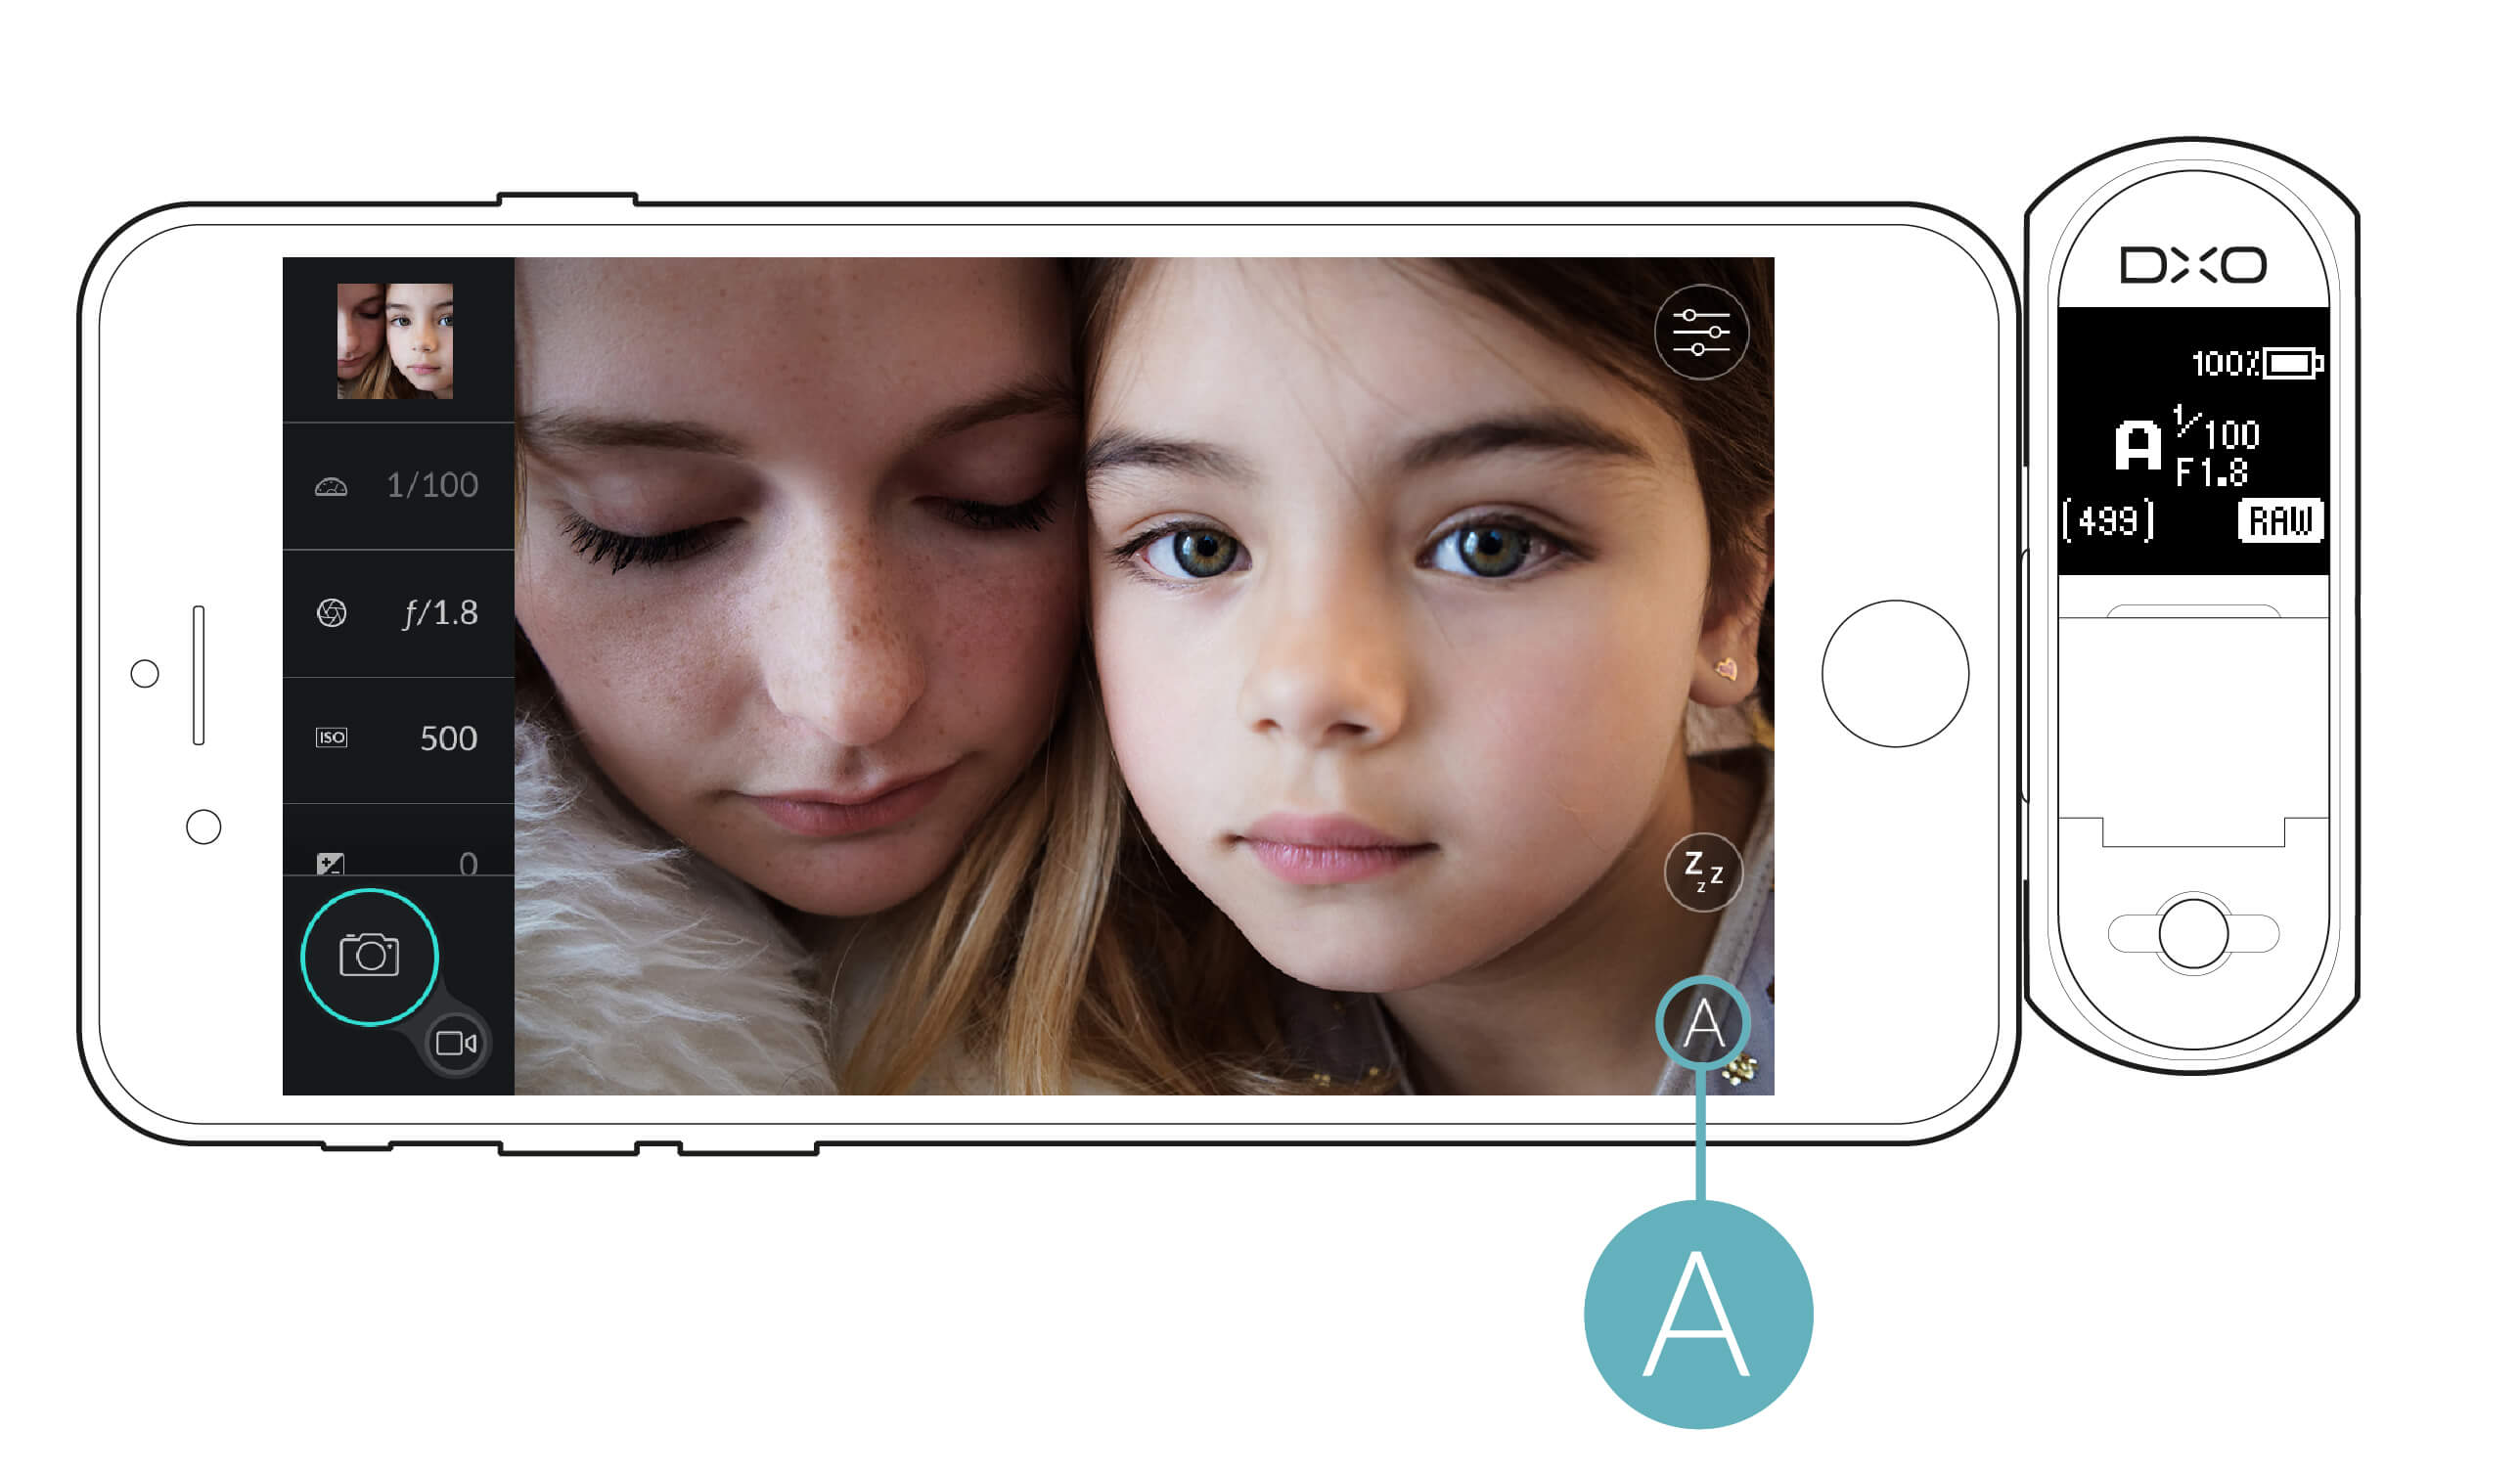
This mode lets you change the Aperture setting options. Tapping the aperture control icon will open the aperture slider. To adjust the aperture, move the aperture slider up or down to select the desired setting. You’ll immediately see how the new setting changes the image’s depth of field.
The settings will also be displayed on the DxO ONE’s OLED screen.
-

S mode – Shutter priority
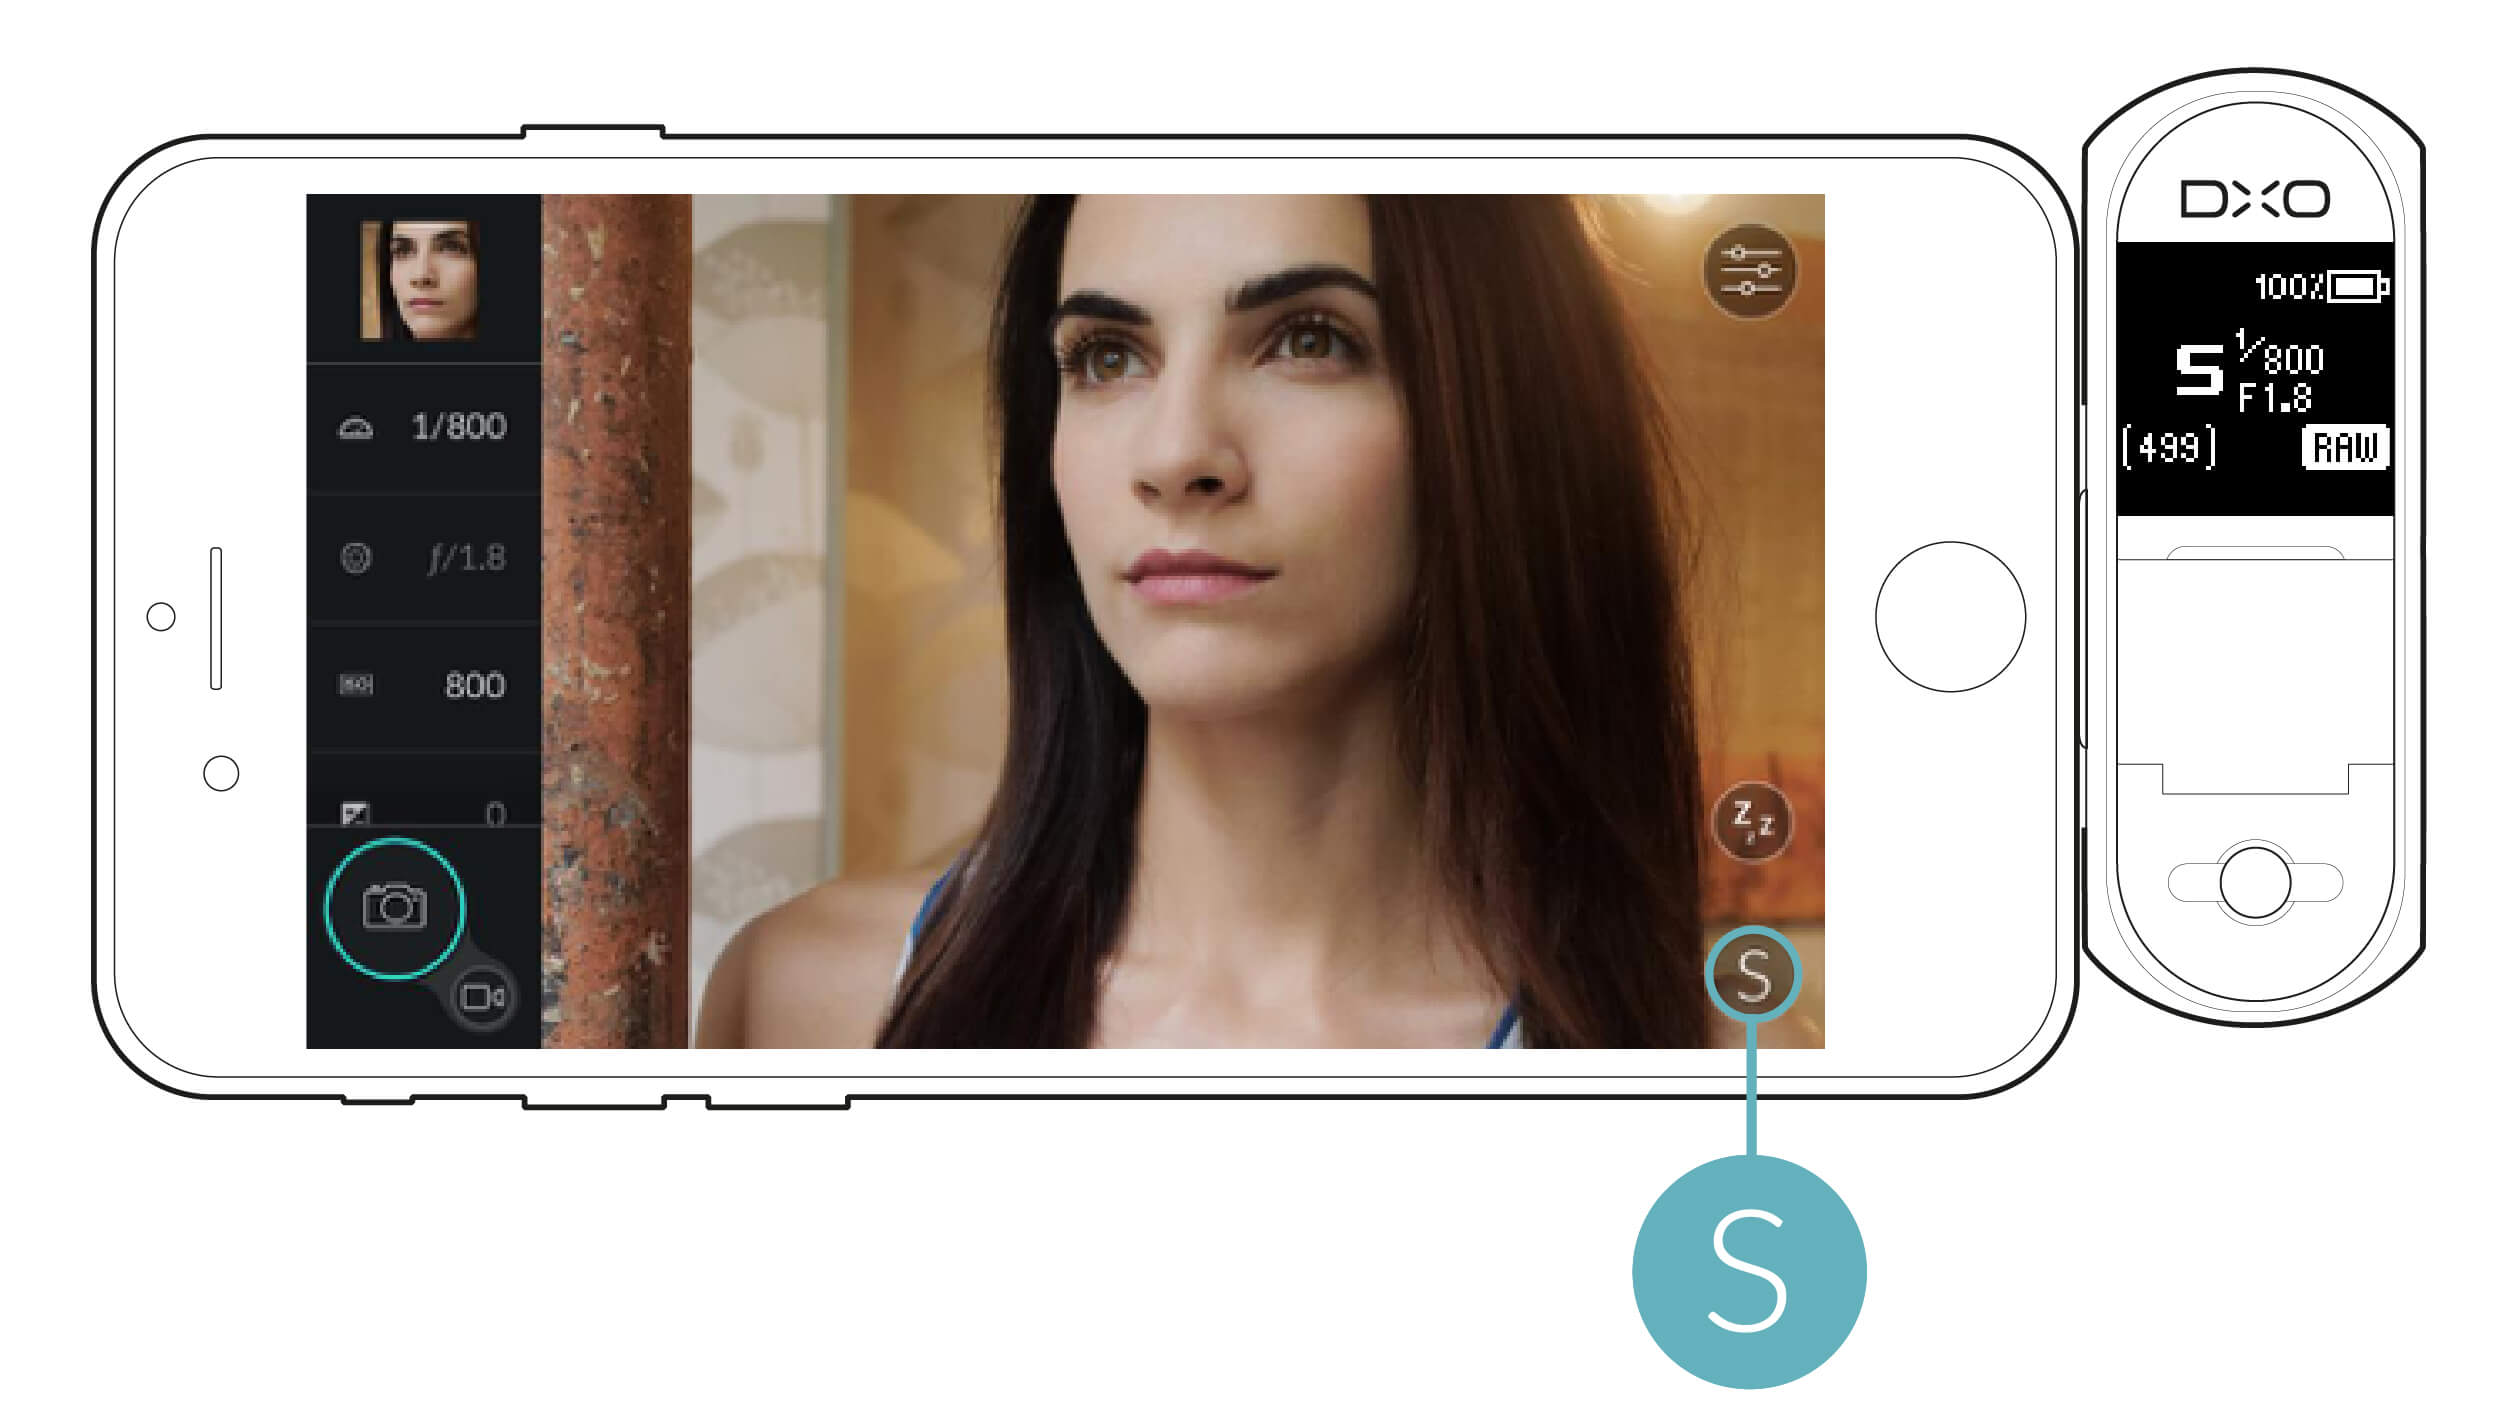
S mode – Shutter priority is also a semi-automatic mode. In this mode, you set the shutter speed, and the DxO ONE automatically chooses the aperture and ISO sensitivity levels to produce the correct exposure.
Use this mode for:

In artificial lighting, certain speeds can produce colored bands on your images.
-

M mode – Manual
M mode – Manual lets you adjust all the camera’s settings, including shutter speed, aperture, and sensitivity. Unlike the automatic and semi-automatic modes, adjusting these settings does not affect any other setting. If you wish, you can work in Manual mode while keeping automatic ISO sensitivity level.
Use this mode for:


You can immediately see how your chosen aperture setting affects the depth of field, just as in A mode.
In M mode, the exposure level shown on the screen does not correspond to the actual exposure level of the final image. Monitor the exposure indicator at the bottom of your screen to see if you start to stray from the camera’s optimum exposure levels.
You can use the Auto ISO sensitivity option to have the camera automatically select the exposure while still maintaining control over the depth of field via the aperture and motion blur via shutter speed.
For taking long-exposure photographs in daylight or maintaining a wide aperture without over-exposing your images, you can use a neutral density filter. This reduces the amount of light that enters the lens without affecting image quality. A selection of filters and the “Optical Adapter,” an accessory that lets you add lenses to your DxO ONE, are sold separately on our online store.
In artificial lighting, certain speeds can cause colored bands to appear on your images. For more information on this subject, see section “Shooting settings” .
 Download page