
Creating a Time-lapse video
Recording videos
![]() Programing your Time-lapse
Programing your Time-lapse
To program a Time-lapse, you must first decide on how long you would like to record and the interval between each photograph—and this all depends on what you are going to photograph. A sunset can last several hours, whereas a street scene can last a few minutes.
If you’re not sure about how long the Time-lapse should last, choose a longer timeframe. You can manually stop the Time-lapse once you’ve taken enough photographs.
Setting the interval
The interval is the most important setting in a Time-lapse, as it will determine the length and fluidity of the video sequence. It must be appropriate for the subject. The shorter the interval, the longer and more fluid your sequence will be. Here are a few examples you can use to determine the right interval for your subject:
-
 Street scenes: a photo every two seconds.
 -
Fast-moving clouds: a photo every three seconds.
-
Clouds moving at an average speed: a photo every three seconds.
-
Slow-moving clouds or a sunset with clouds: a photo every 10 seconds.
-
Sunrise or sunset without clouds: a photo every 30 seconds.
-
Night scenes: a photo every 30 seconds.
The minimum interval between two photos depends on your selected file format and the write speed of your card. You should take this into account, especially when shooting RAW files and/or if your card doesn’t have a fast write speed. The application will show a warning if you’ve chosen too short an interval.
The DxO ONE application calculates and displays the number of images that should be taken depending on the duration and interval of your time-lapse. Make sure your memory card has enough space, especially if you are using RAW files.
The duration of your video will depend on your time-lapse settings and the number of images per second in the video. The application will let you choose between 15, 25, and 30 images per second. The play time will be half as short with 30 images per second as a video with 15 images per second.
Programming a Time-lapse
The DxO ONE makes programing a Time-lapse especially easy:
-
 Attach your smartphone to the DxO ONE or activate Wi-Fi remote control.
 -
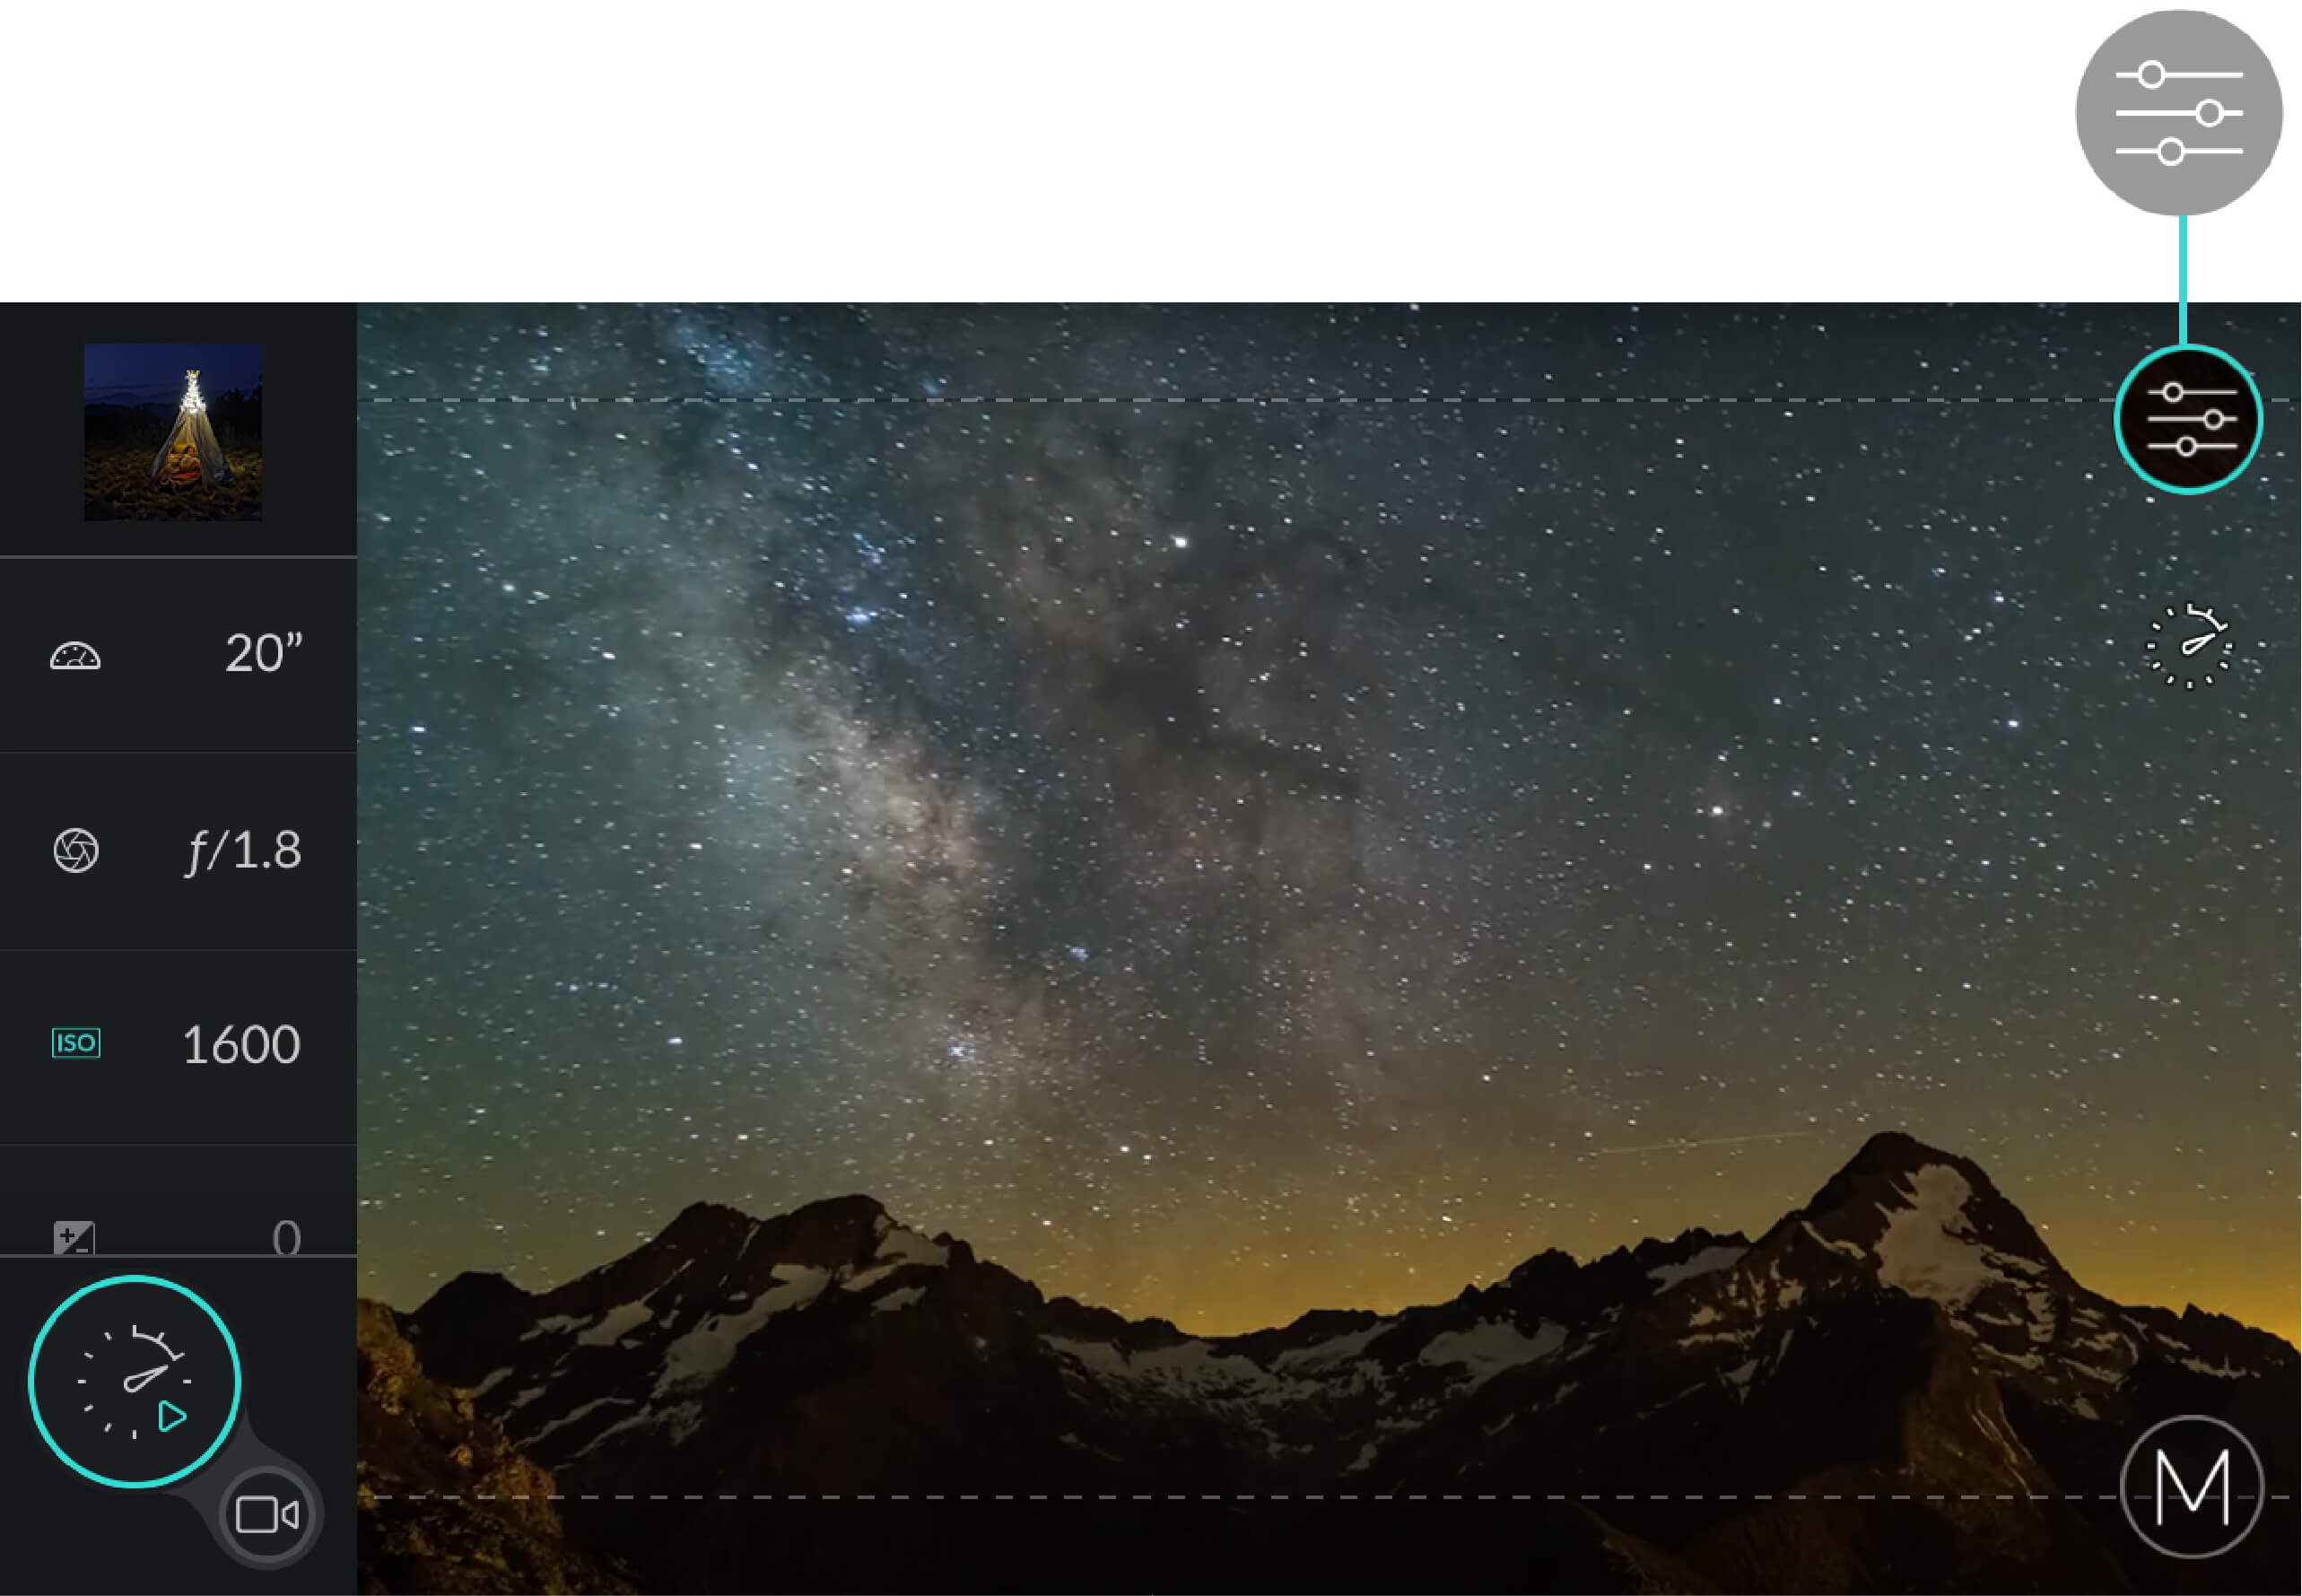
 In the viewfinder screen, click on the settings access button in the upper right.
-
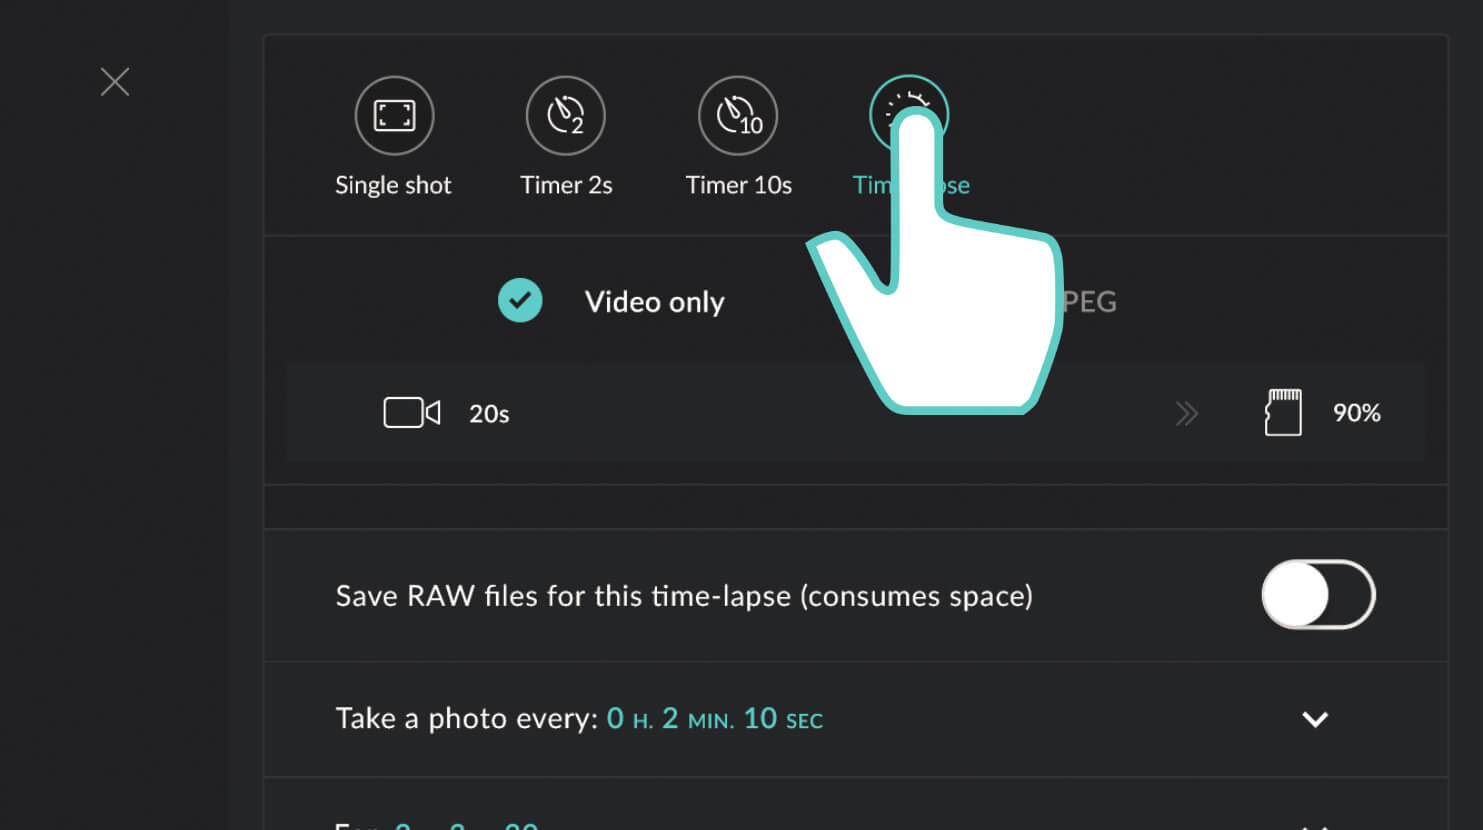
 In the camera mode selection section, click on the Time-lapse button to the right of the Timer buttons.
-
 Select your camera mode:
-
Video only: the DxO ONE will record a video sequence. The duration of the video, which is determined by the interval and recording time, will be displayed in the status bar. Use this mode to obtain a video that you can share instantly or to check the result before using a more involved recording method.
-
JPEG : the photos will be saved only in this format. Use this mode if you don’t want to make a video and just want to use specific photos, or when you want to assemble the video yourself in post-production.
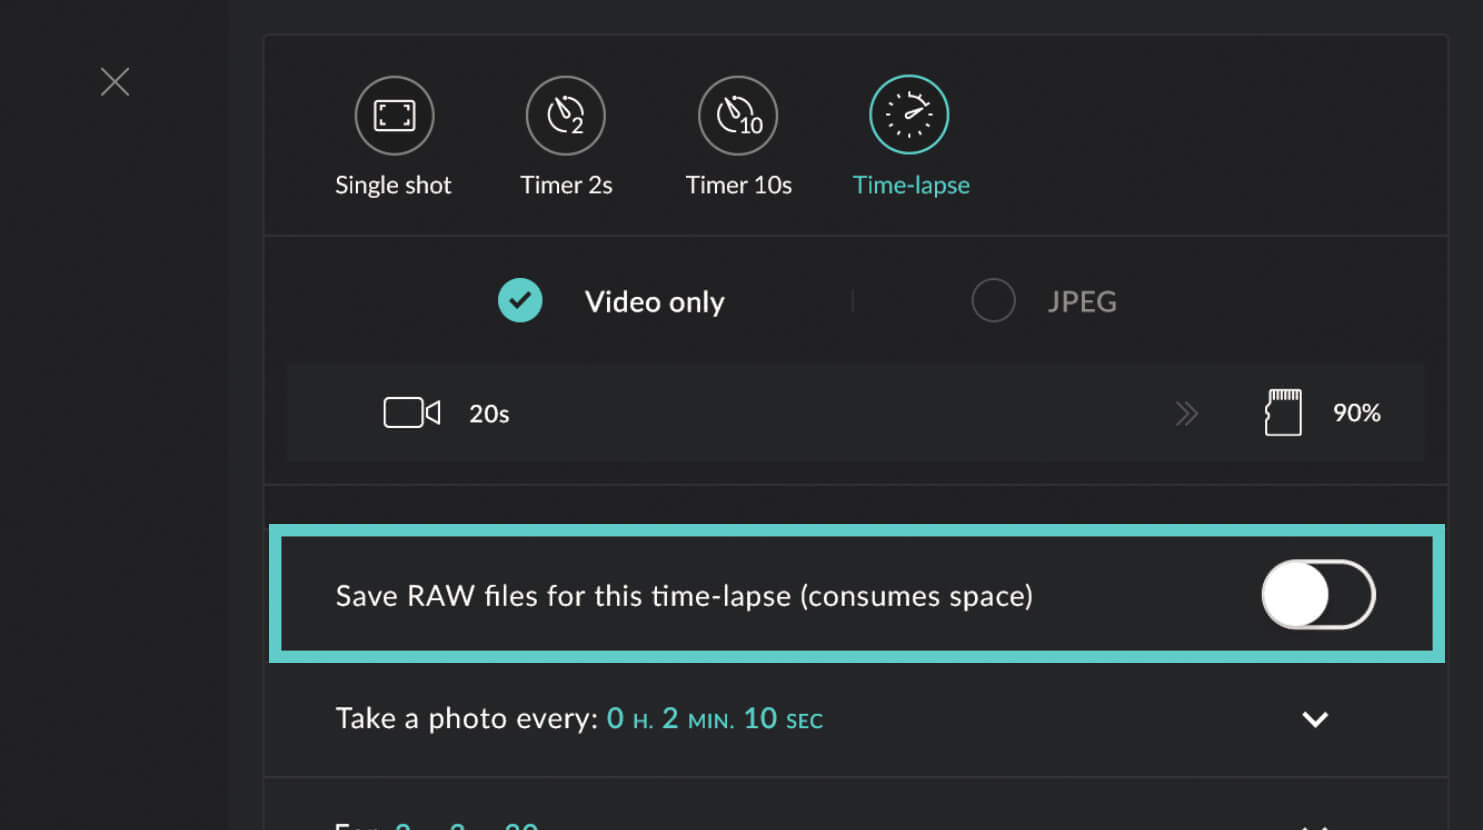
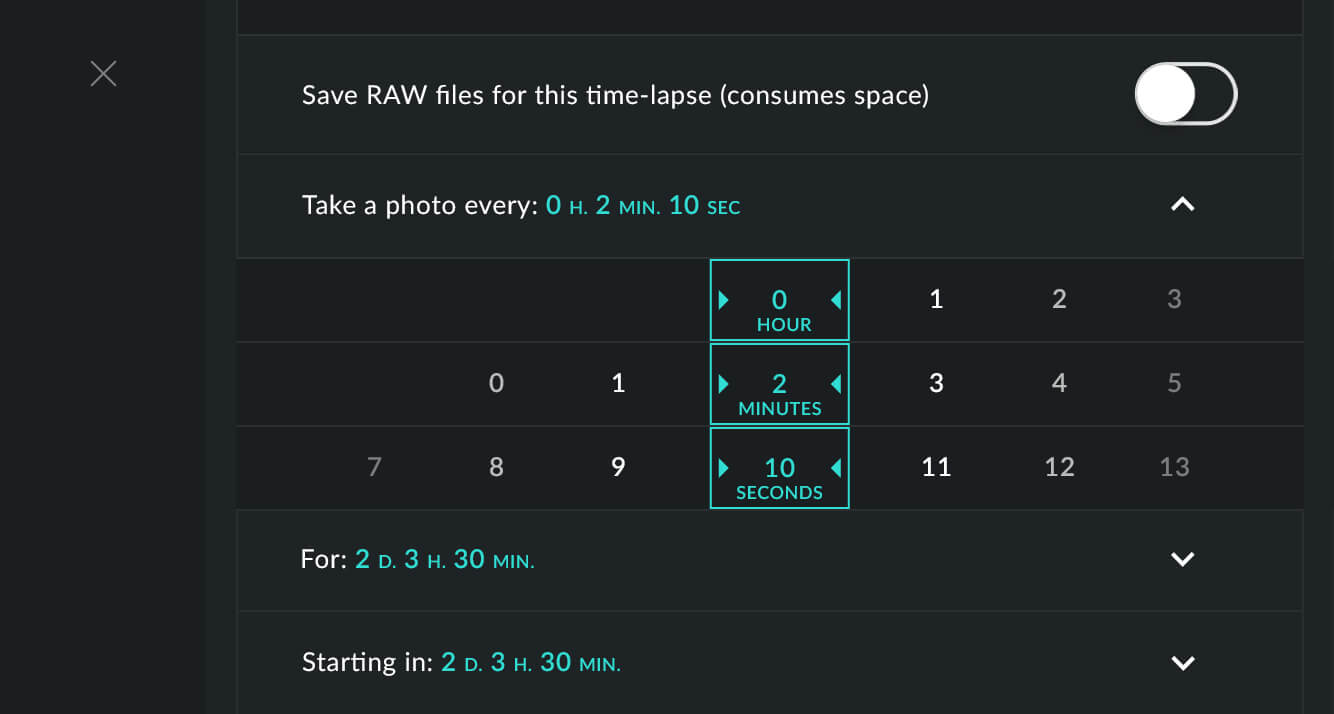
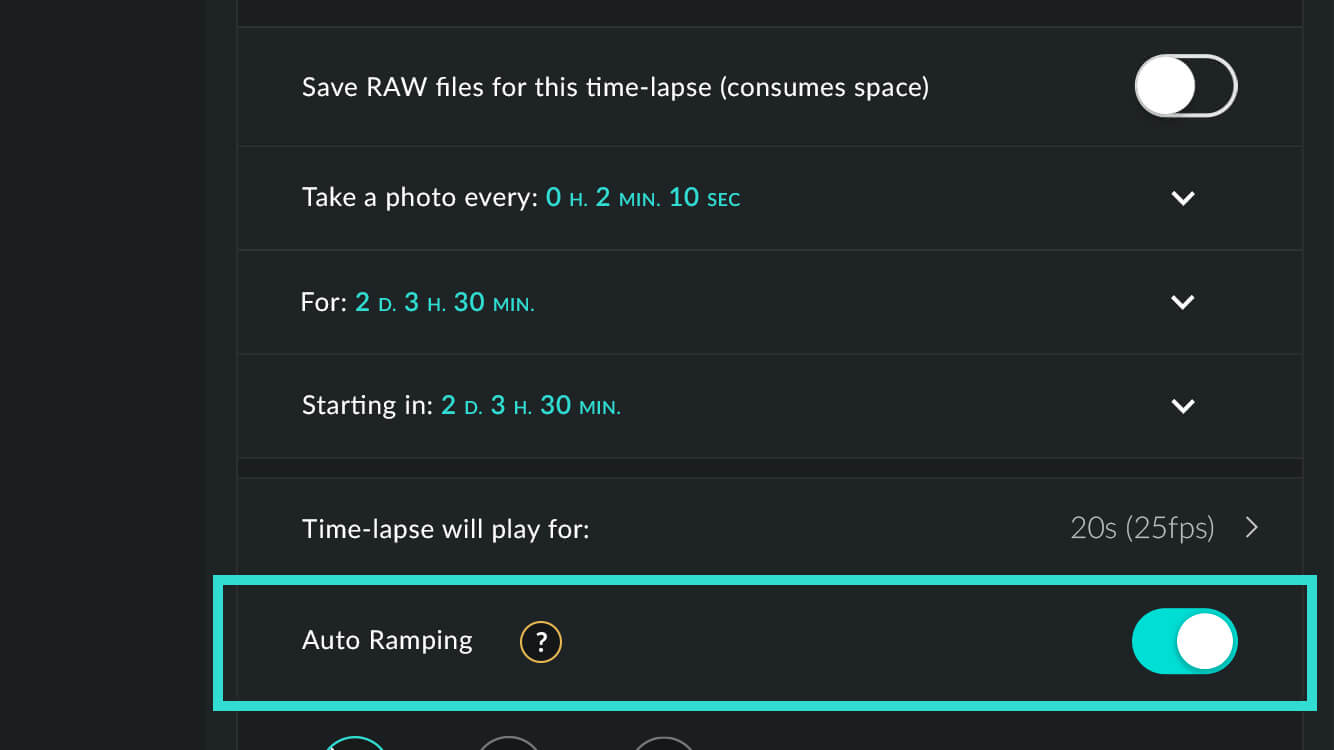
If you want to edit your photos before publishing, turn on the option to simultaneously save RAW files (with videos or JPEGs) by clicking on the button just below. In this case, the buttons will be labeled “Video + RAW” and “JPEG + RAW.”
-
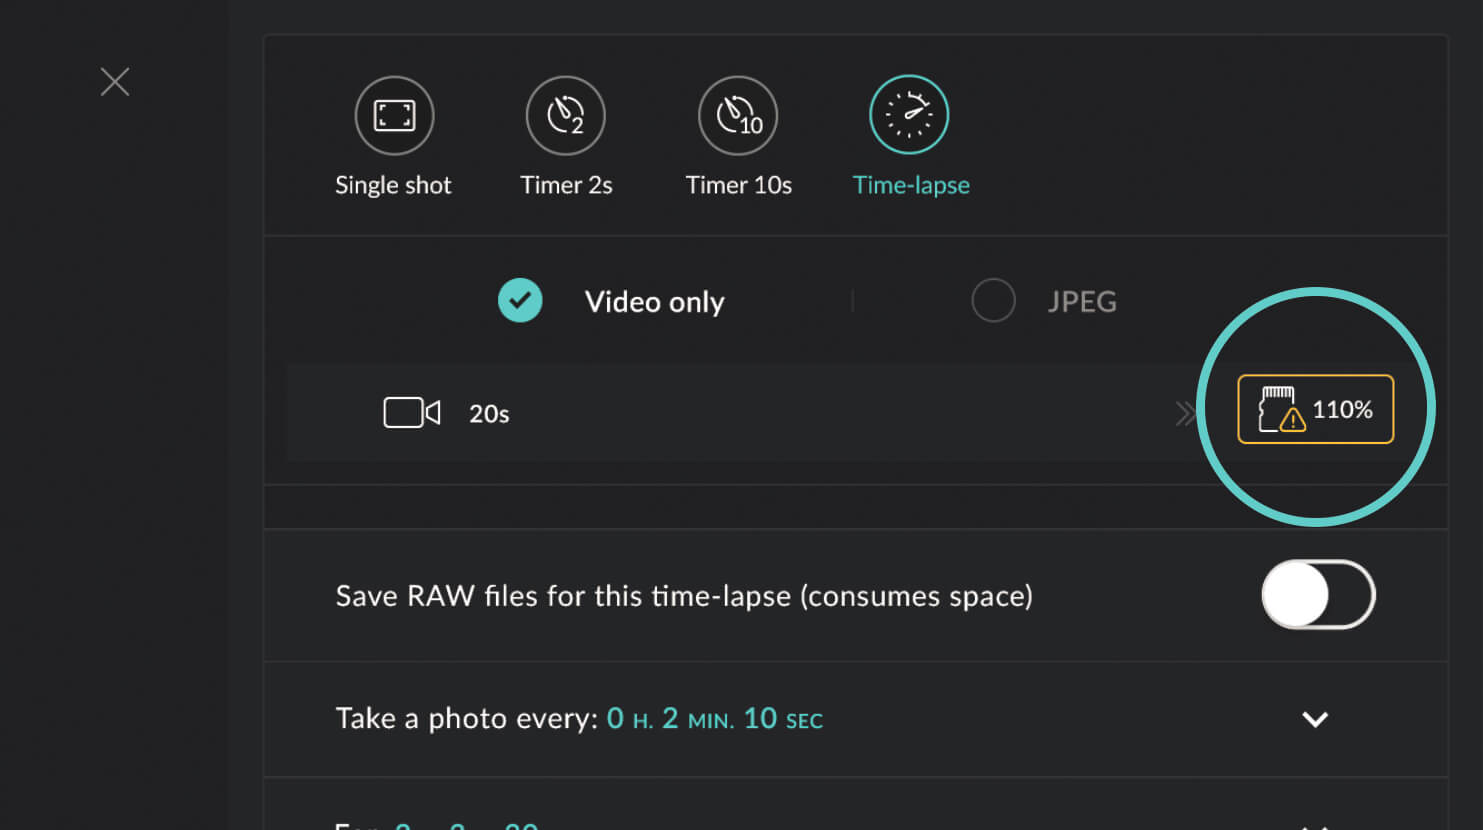
 Check the capacity of your memory card and battery. If either is insufficient, the application will display the following warnings:
-
microSD card: insufficient memory is indicated by an amber warning light and frame. The app will also predict how full the card will be at the end of the time-lapse. Tap the icon to display the required storage capacity and how much capacity remains.
-
Battery: insufficient battery power is indicated by an amber light and frame. Tap the icon for more information about remaining battery power.
-
 Program the interval between each photo (see the suggested intervals in the “Determining the interval” section above) by clicking the “Take a photo every” line:
-
Scroll to the side to select the number of hours, minutes, and/or seconds between each photo.
-
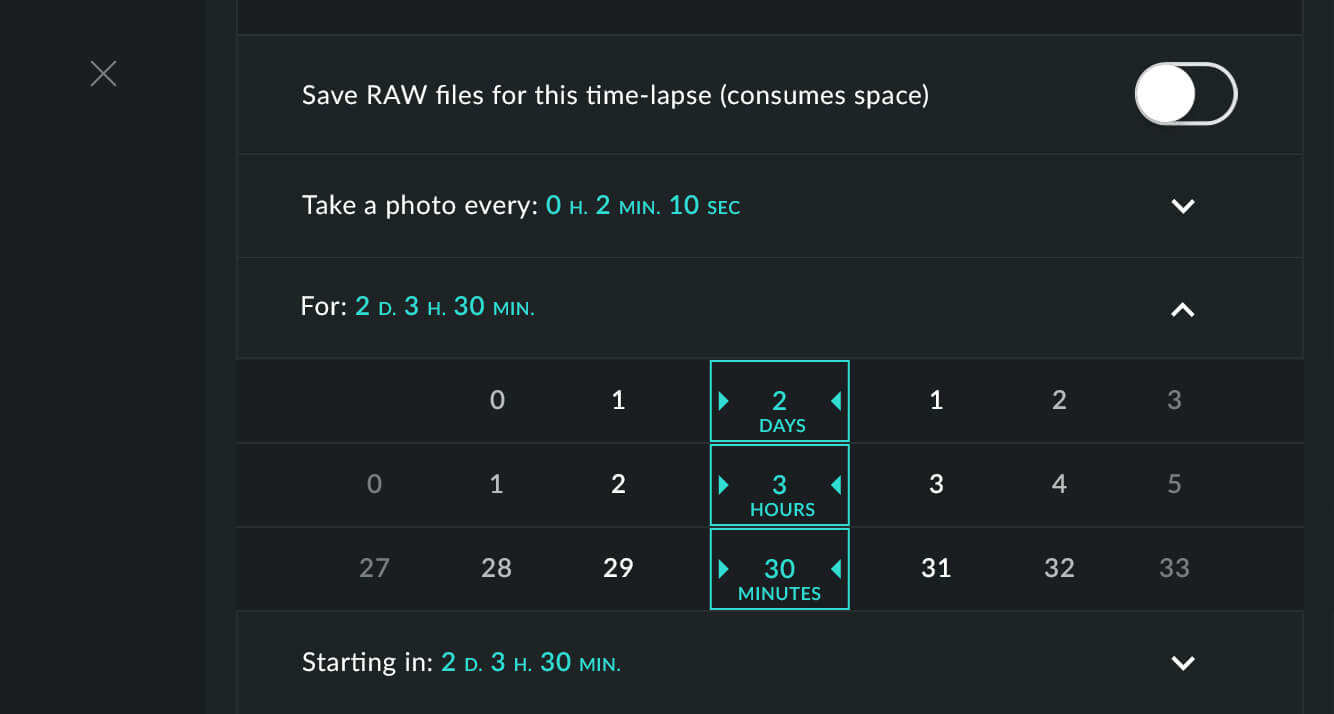
 Program the duration of the camera sequence by clicking on the “For” line:
-
Scroll to the side to select the number of days, hours, and/or minutes you would like your time-lapse to last.
-
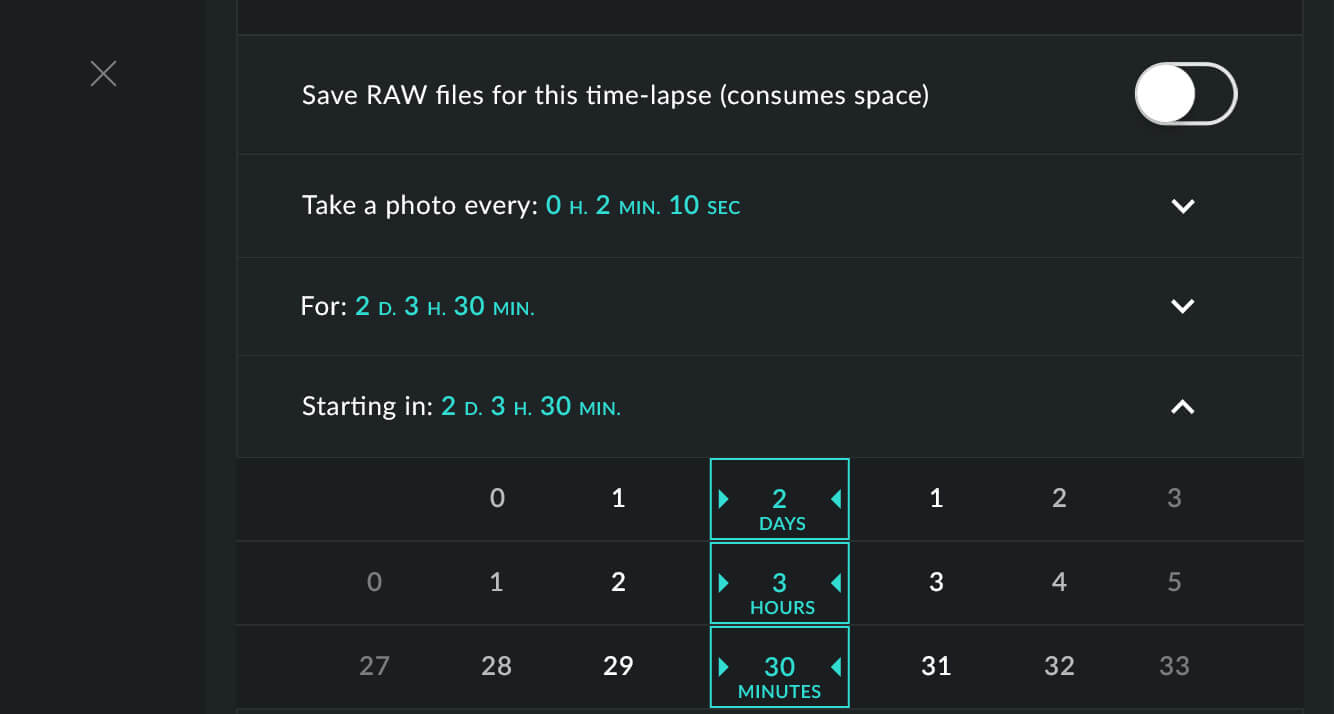
 Program the Timer by clicking on “Start in”:
-
Scroll to select the number of hours, minutes, and/or seconds to determine when you want to starting shooting.
-
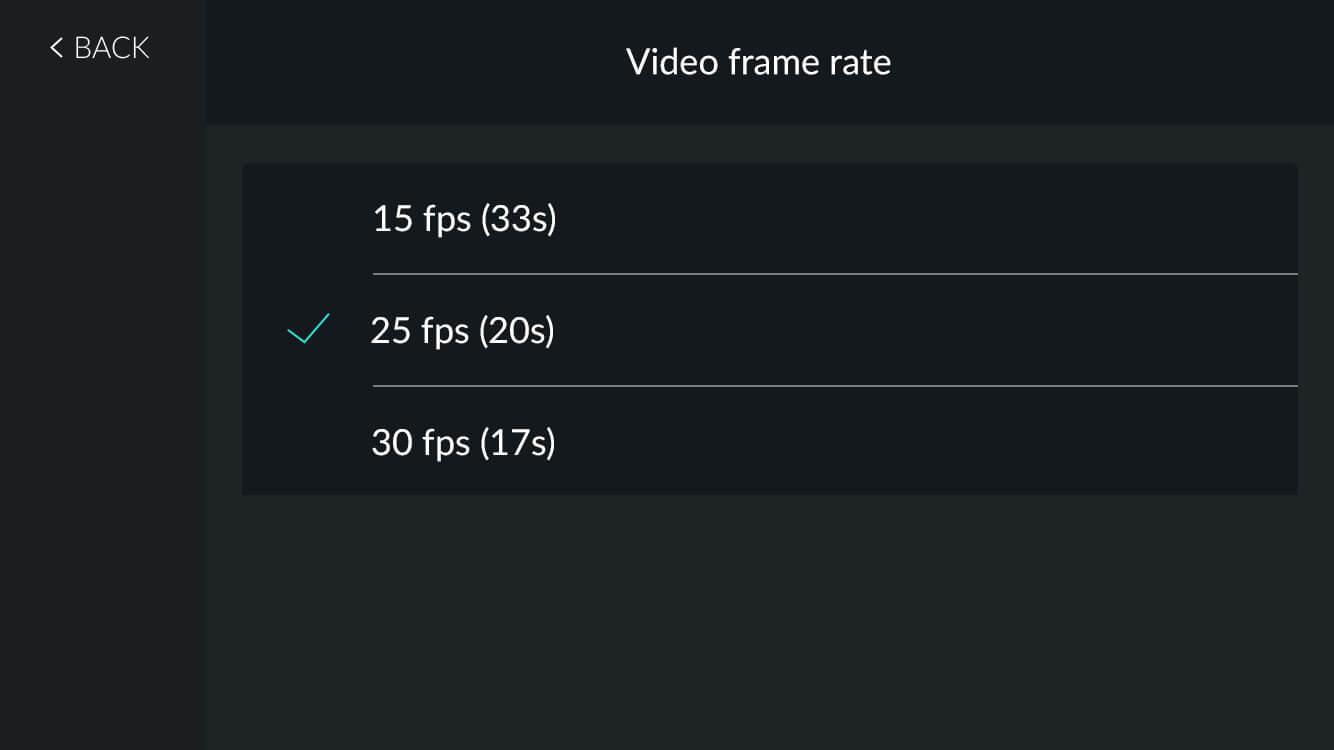
 If you selected the video production option, the duration of the video the DxO ONE will produce after the Time-lapse is displayed. Set the play time by clicking “Time-lapse play time.” The duration of the video will depend on the duration of the Time-lapse (set at Step 7 above) and the photo interval. The fluidity of the sequence depends on the number of images per second. If the video is too short (less than 10 seconds), increase the duration of the Time-lapse or reduce the interval. If it is too long, reduce the duration of the Time-lapse or increase the interval. Of course, everything depends on your subject.
The default setting for the number of images per second is 30 images/second. A slower value (15 or 25 images/second) increases the length of the video and reduces its fluidity.
-
 Check that Auto Ramping mode is turned on. This mode lets you create a Time-lapse with homogeneous images free from any abrupt changes in exposure or color.
Calculating the total number of images
The DxO ONE application calculates and displays the number of images that should be taken depending on the duration and interval of your time-lapse. Make sure your memory card has enough space, especially if you are using RAW files.
The duration of your video will depend on your time-lapse settings and the number of images per second in the video. The application will let you choose between 15, 25, and 30 images per second. The play time will be half as short with 30 images per second as a video with 15 images per second.
You can turn on Auto Ramping mode if you want to use the Time-lapse feature as an intervalometer (in order to use individual images), or if you are making a Time-lapse video with a very long interval (several minutes between each photo). In these cases, make sure to set the aperture manually by using the A or M mode, and/or set the focus by using the manual focus option if necessary.
 Download page