
Remote control
One camera, four uses
-

Connecting via an existing Wi-Fi network
-
 Make sure your iPhone is connected to a local Wi-Fi network.
-
 Plug the DxO ONE into your iPhone and turn it on to open the iOS application.
-
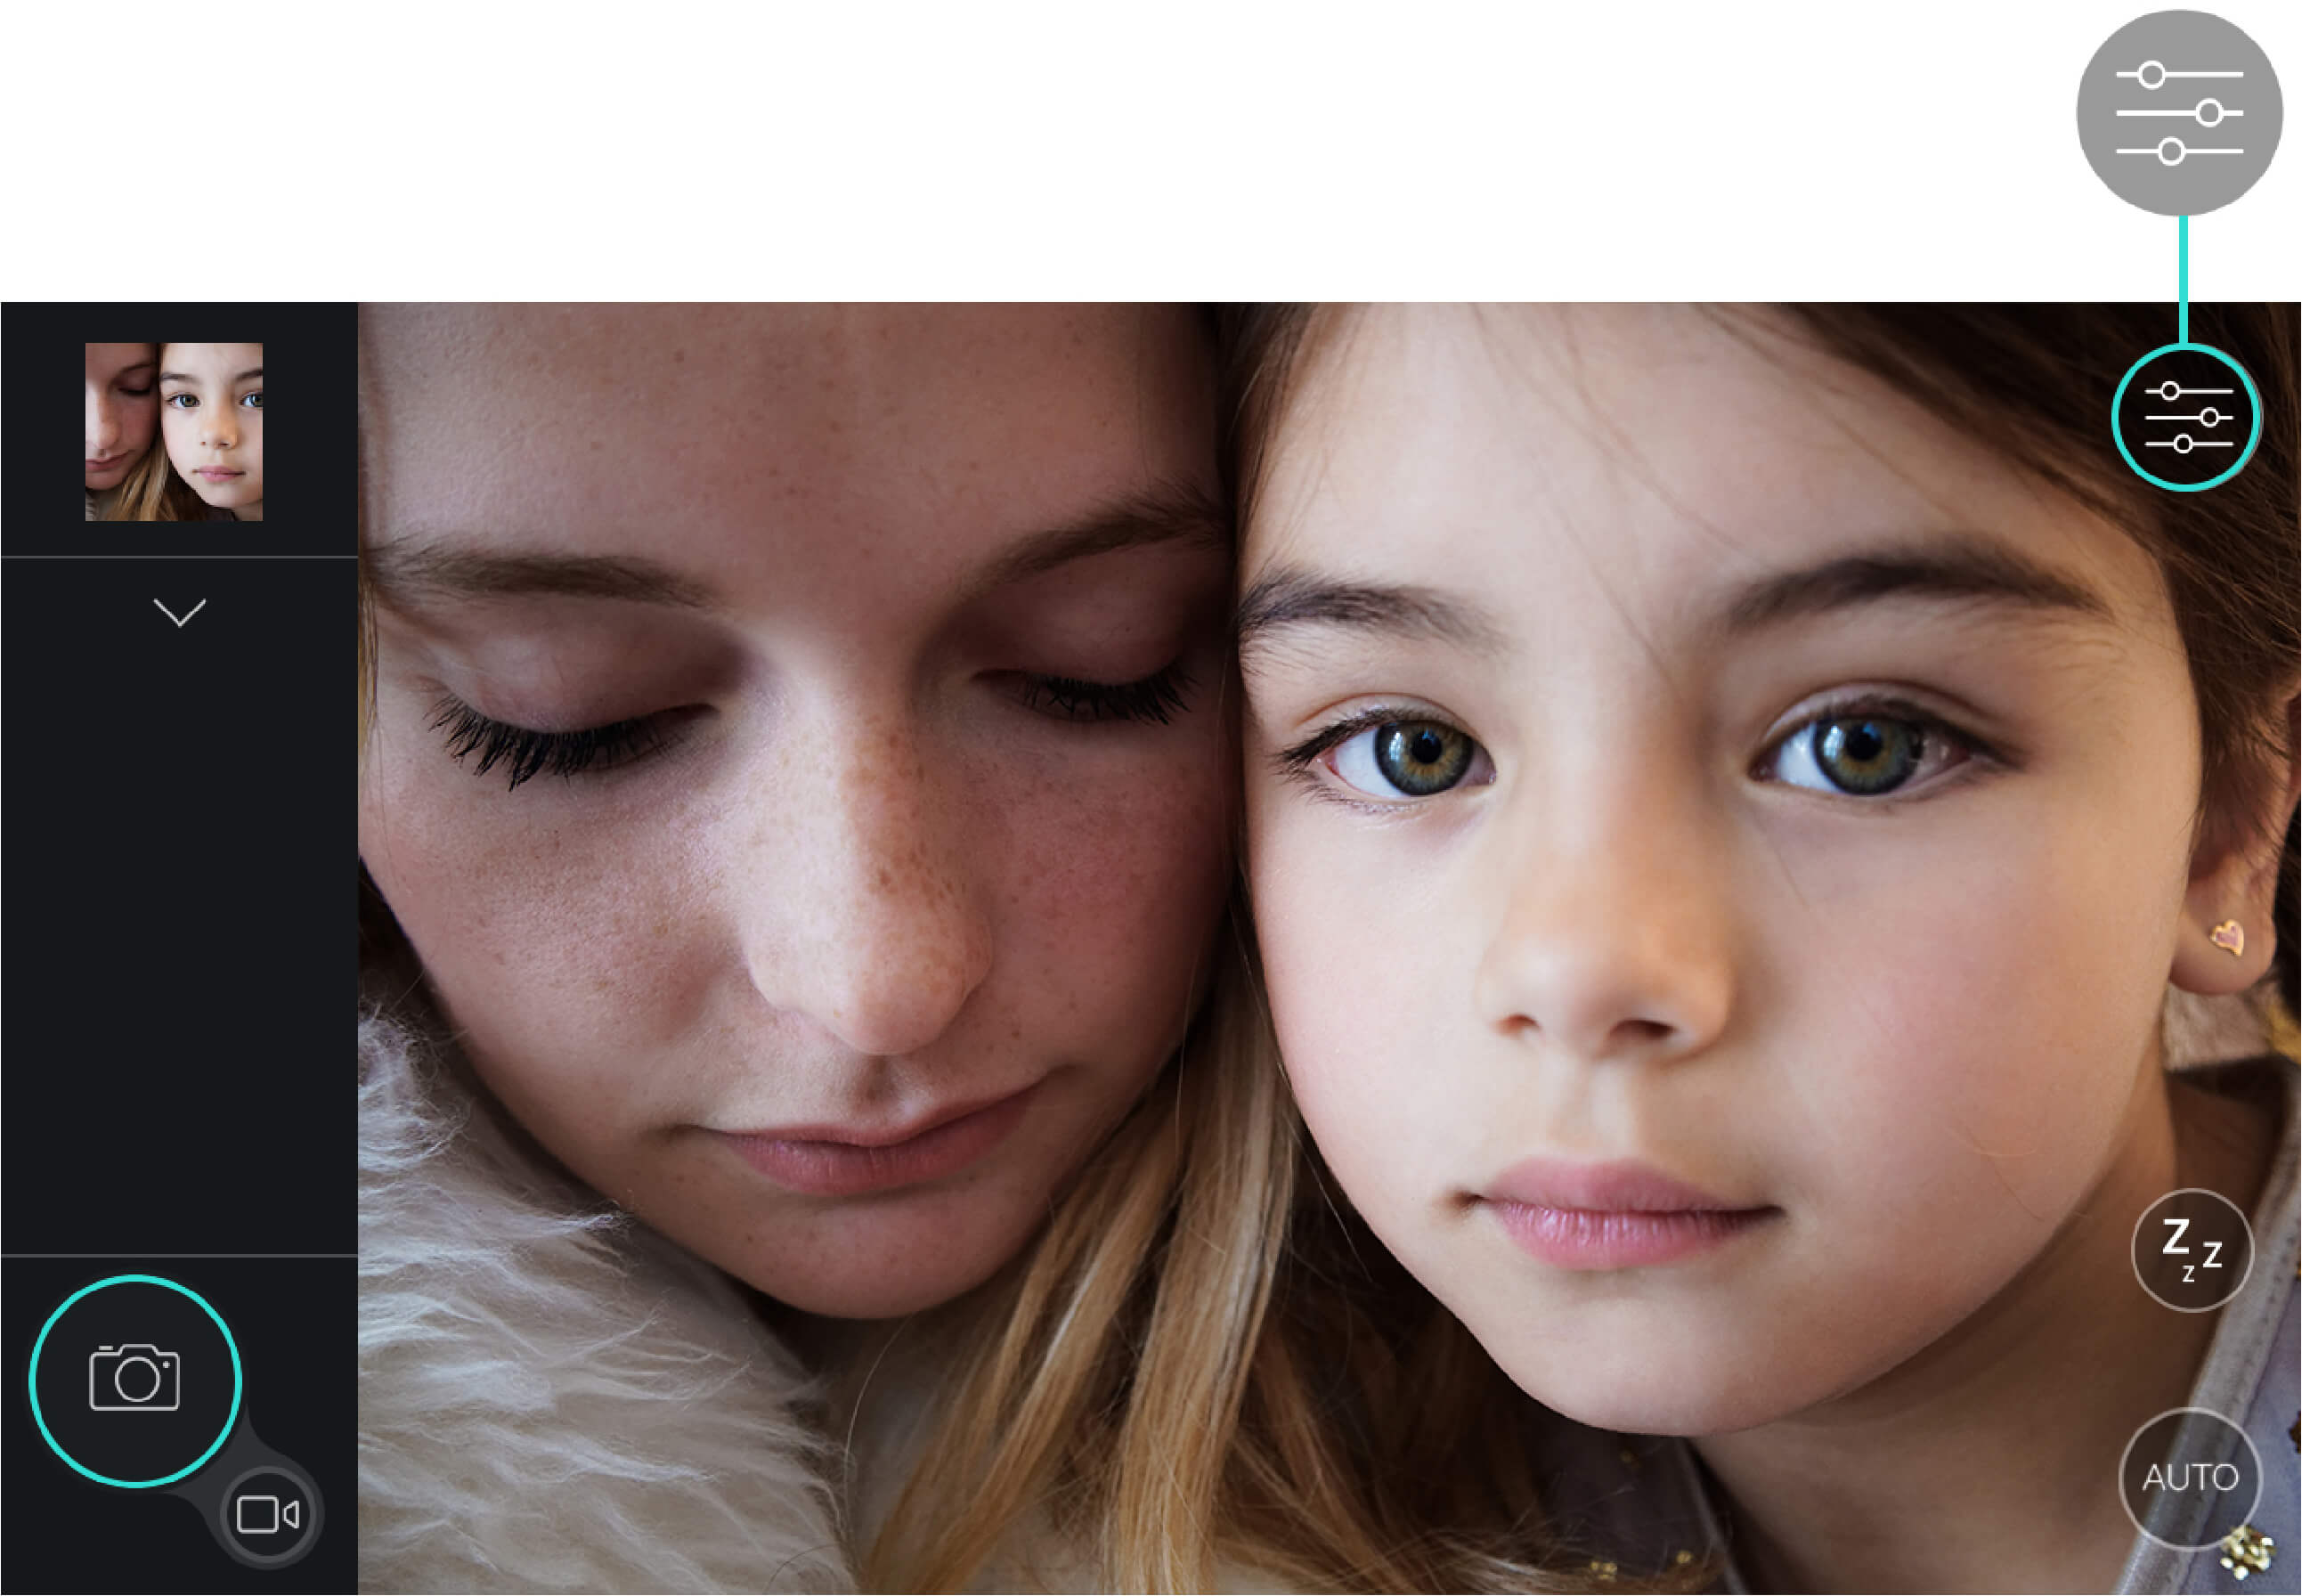
 Press the Shooting settings icon.
-
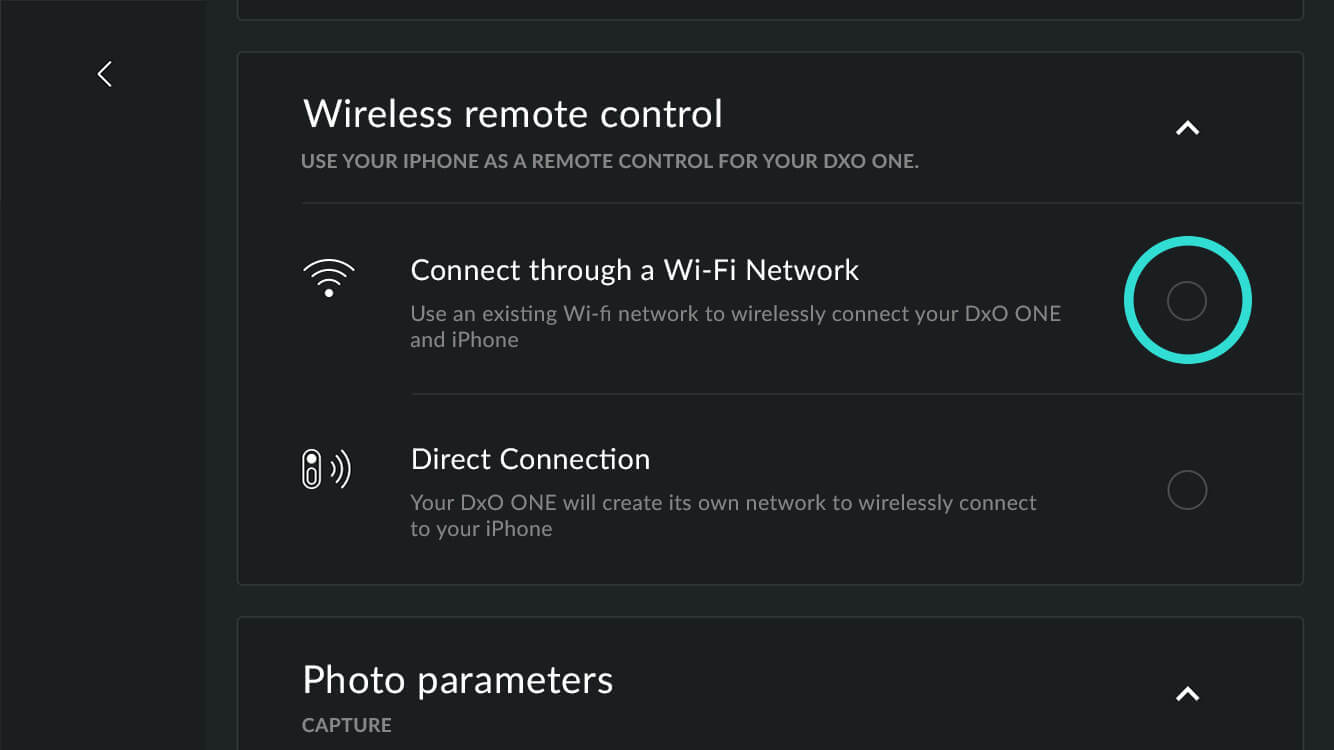
 Scroll through the settings to the Remote control section.
-
 Tap on the circle to the right of “Connect via an existing Wi-Fi network”.
-
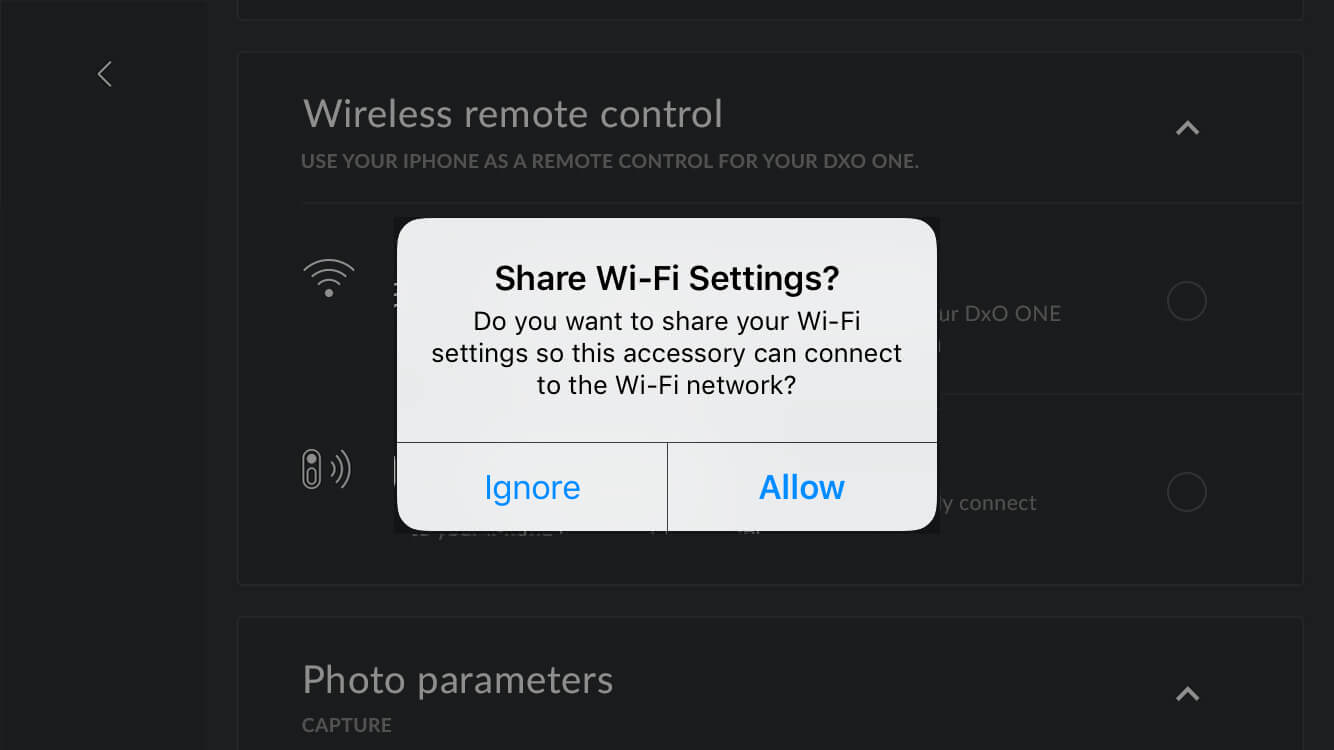
 In the iOS dialogue box, allow sharing for Wi-Fi settings.
-
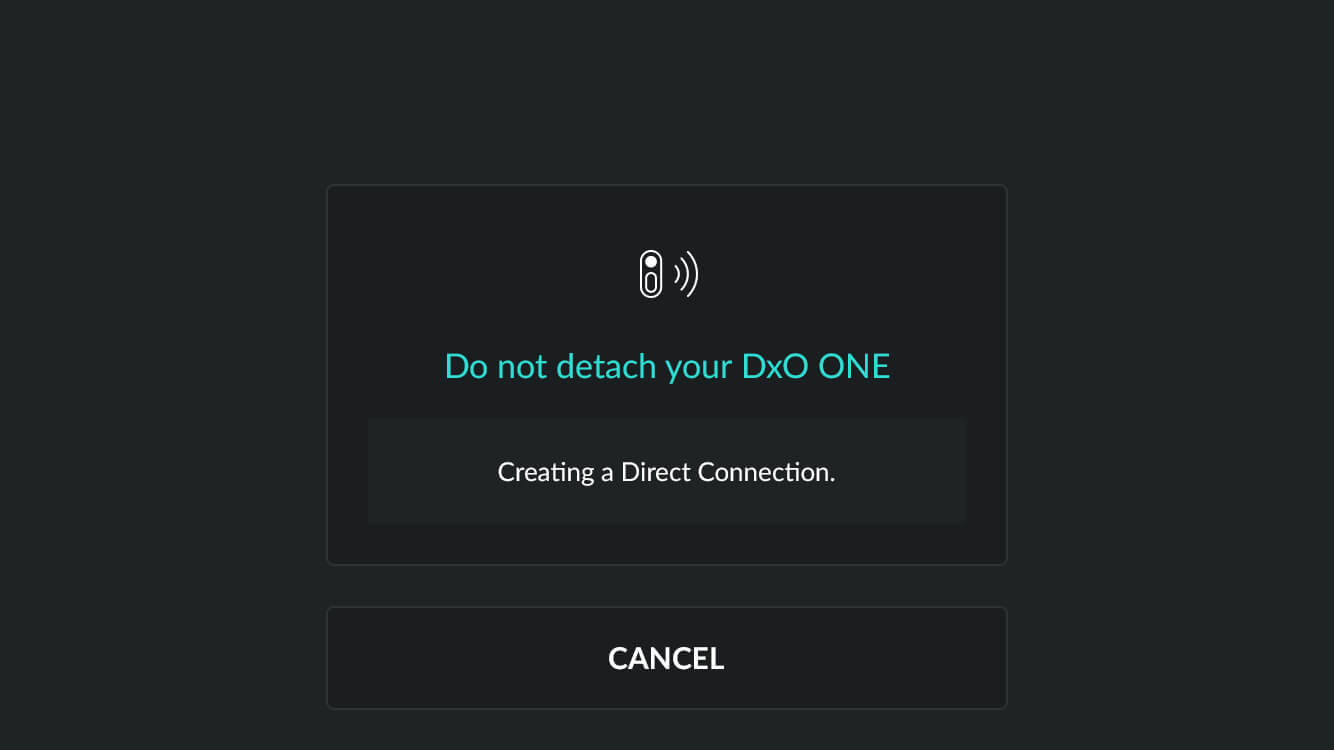
 A dialogue box will tell you the status of the current connection.
Do not unplug your DxO ONE from your iPhone until the connection has been established. This operation may take 15–20 seconds.
-
 When the connection is confirmed, a new message will tell you to unplug the DxO ONE from your iPhone. Your camera is ready to operate in remote mode.

-
 Unplug your DxO ONE from your iPhone. Your camera is ready to operate in remote mode.
Once you are in remote mode, a network icon will be displayed on your DxO ONE’s OLED screen, and a blue rectangle will appear around the DxO ONE application on your iPhone.
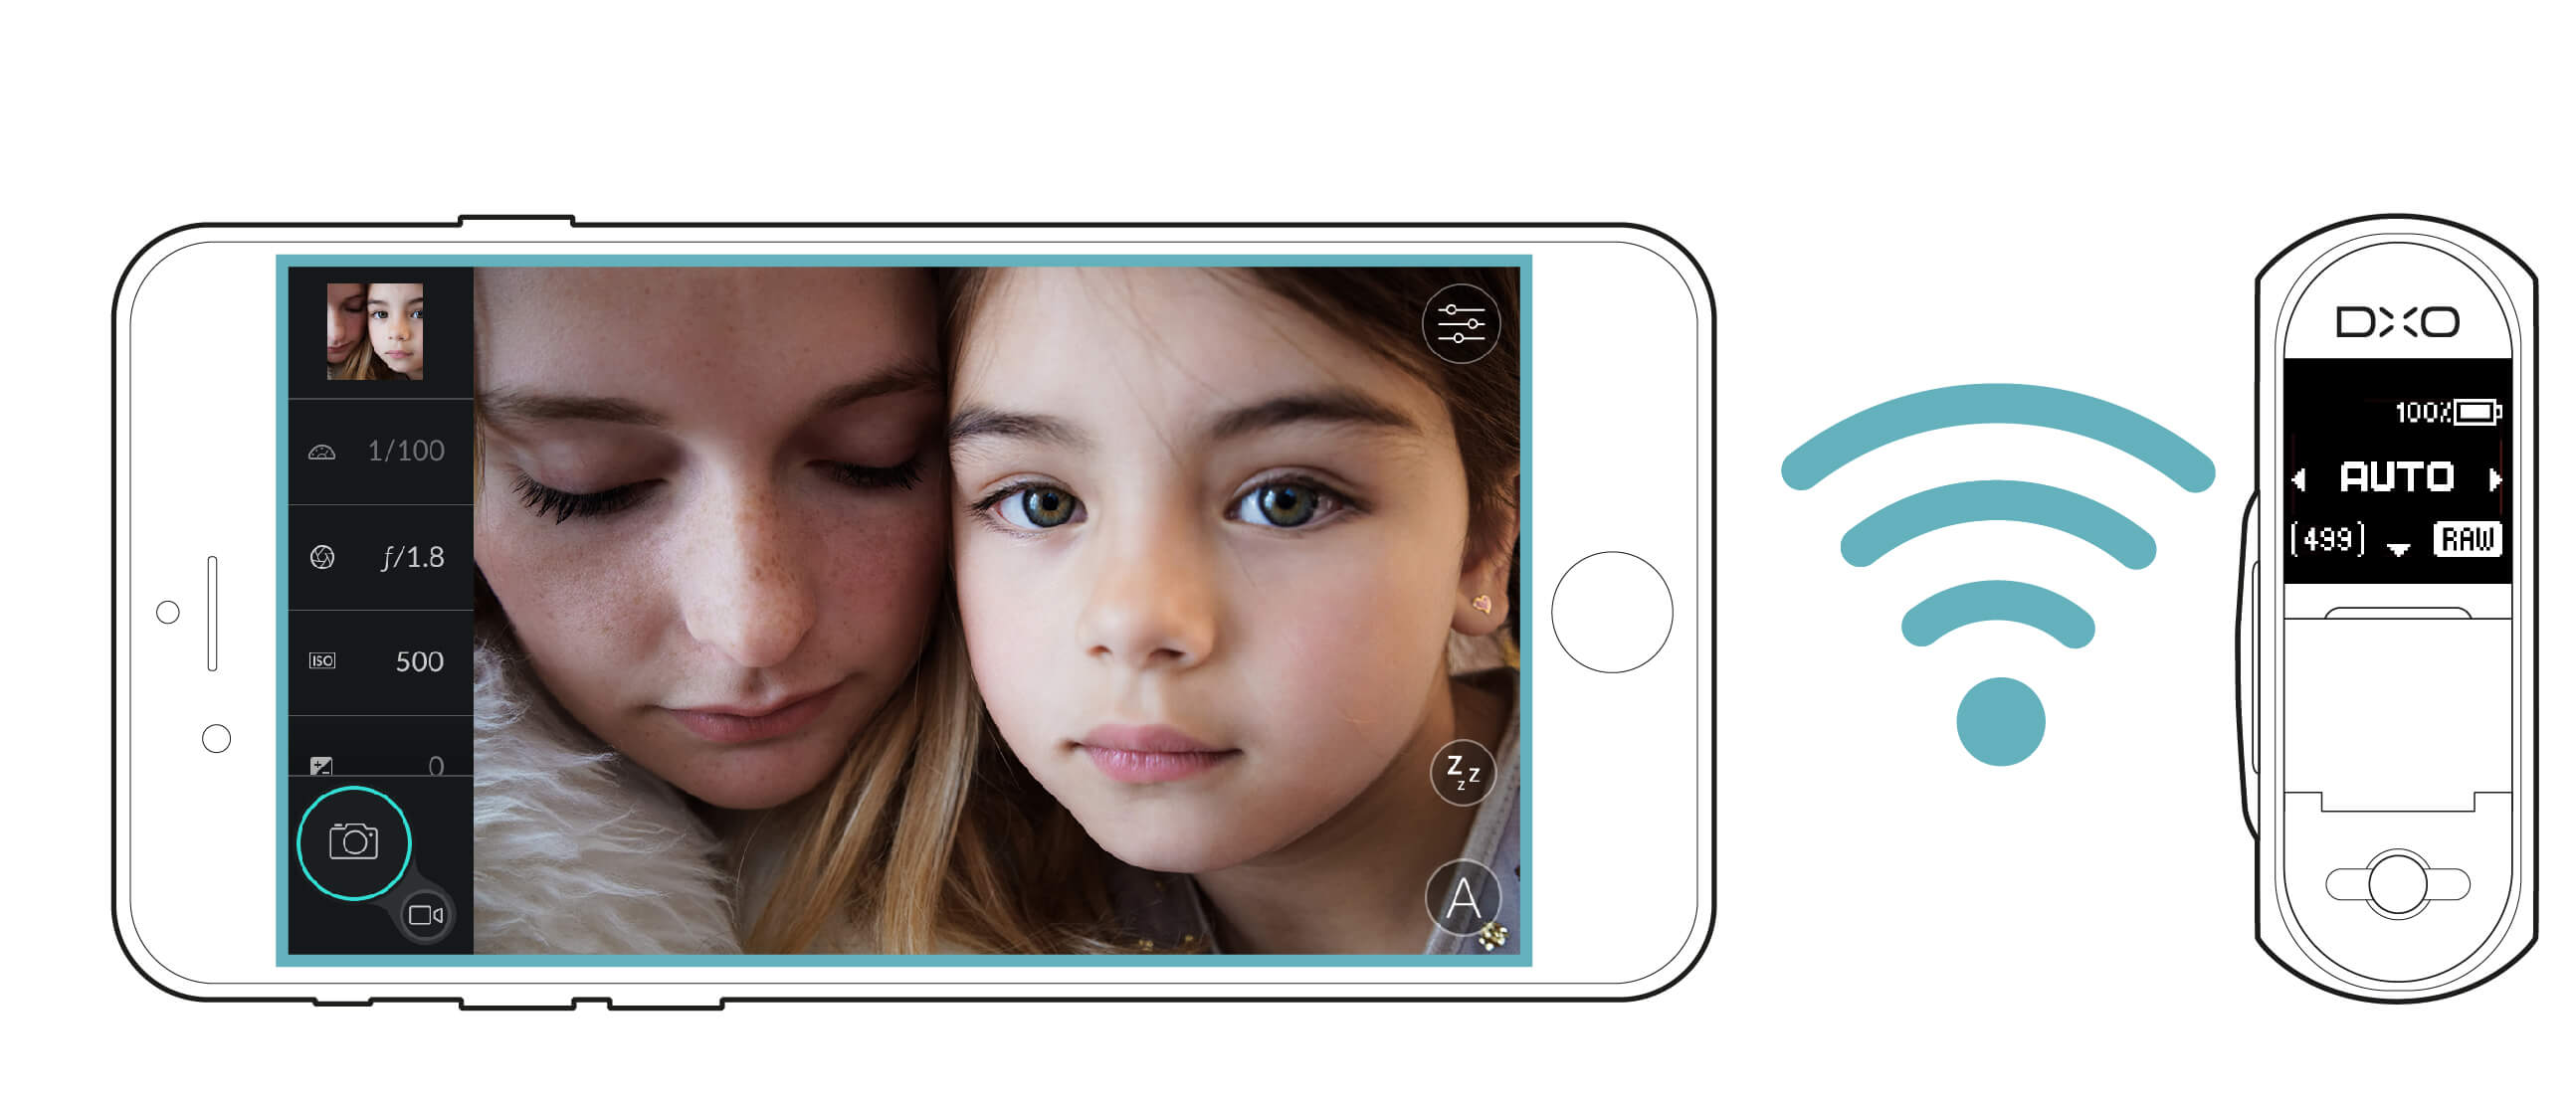
Automatic stand-by works in wireless mode, too. If your DxO ONE has gone into stand-by, tap the iPhone screen or press the DxO ONE shutter half way to reactivate it.
The camera’s ability to operate while using an existing Wi-Fi network depends on your network coverage. In certain cases, especially if there’s too much traffic on your network, the quality may be lower than with a direct Wi-Fi connection. If the quality of the connection deteriorates, the blue rectangle around the application will first blink, then turn orange.
The local Wi-Fi mode operates with domestic networks only. It won’t operate with public networks, e.g. networks in stations or airports. For security reasons, these are designed to isolate connected devices from each other.
-

Reconnecting after the camera turns off or switches to stand-by
Depending on the Shooting settings (described in section “Shooting settings” ), the DxO ONE and iPhone go into power-saving mode after 30 seconds, 2 minutes, or 5 minutes. The Wi-Fi connection will not be interrupted, and the DxO ONE can be reactivated instantly simply by tapping the screen or operating the ONE shutter. In power-saving mode, the DxO ONE will turn off (and interrupt the connection) after 1 minute and 30 seconds.
The Wi-Fi connection is also interrupted when you put your iPhone into stand-by; in this case, your DxO ONE will wait to be reconnected, which must be done from your iPhone. If the reconnection does not occur within a certain time, the camera may turn off automatically, according to the following rules:
-
 Battery level 50% or lower: the camera will wait to reconnect for 5 minutes, then turn off ;
-
Battery level higher than 50%: the camera will wait to reconnect for as long as the battery level is above this threshold ;
-
Camera connected to power plug: the DxO ONE will wait to reconnect indefinitely.
Reconnecting the DxO ONE after the iPhone is on stand-by
-
Take the iPhone out of stand-by.
-
In Direct Wi-Fi mode, check that the iPhone reconnects to your DxO ONE’s Wi-Fi network.
-
Go back to the application, which will be in Gallery mode.
-
Press the Capture button, at the bottom, to reconnect to the network.
-
The connection will be re-established after a few seconds.
Reconnecting the DxO ONE after it has been turned off (Direct Wi-Fi mode)
-
Turn your DxO ONE back on and wait for it to restart its Wi-Fi server.
-
Take the iPhone out of stand-by.
-
Connect to the camera’s Wi-Fi network.
-
Go back to the application, which will be in Gallery mode.
-
Press the Capture button, at the bottom, to reconnect to the network.
-
The connection will be re-established after a few seconds.
Reconnecting the DxO ONE after it has been turned off (via a Wi-Fi network)
-
Turn your DxO ONE back on and wait for it to reconnect to your Wi-Fi network.
-
Take the iPhone out of stand-by.
-
Go back to the application, which will be in Gallery mode.
-
Press the Capture button, at the bottom, to reconnect to the network.
-
The connection will be re-established after a few seconds.
Canceling a reconnection attempt
If your camera is trying to re-establish a Wi-Fi connection, but you want to use it in stand-alone mode, there are several options:
-
Swipe the screen left or right to access the stand-alone mode capture modes (works only with firmware version 2.2 or later).
-
Plug the camera back onto your iPhone, then unplug it again.
-
Re-establish the Wi-Fi connection according to one of the procedures described above, then go into the Shooting settings and press the checkbox opposite the active Wi-Fi mode. The Wi-Fi connection will be interrupted and you will be able to use your camera in stand-alone mode.
-

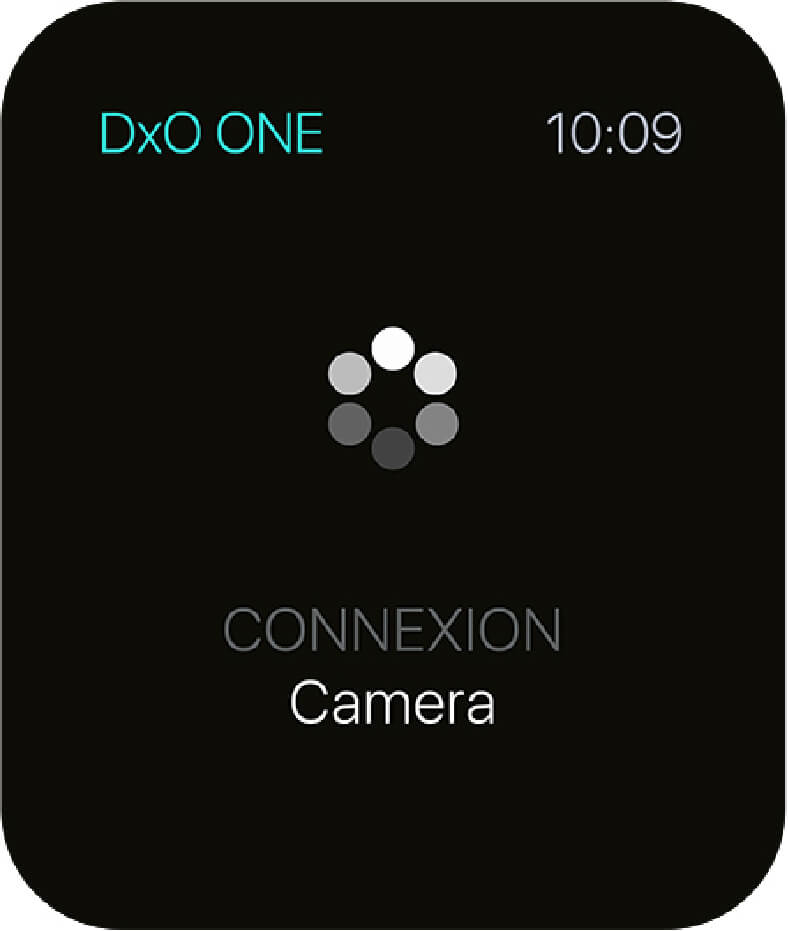
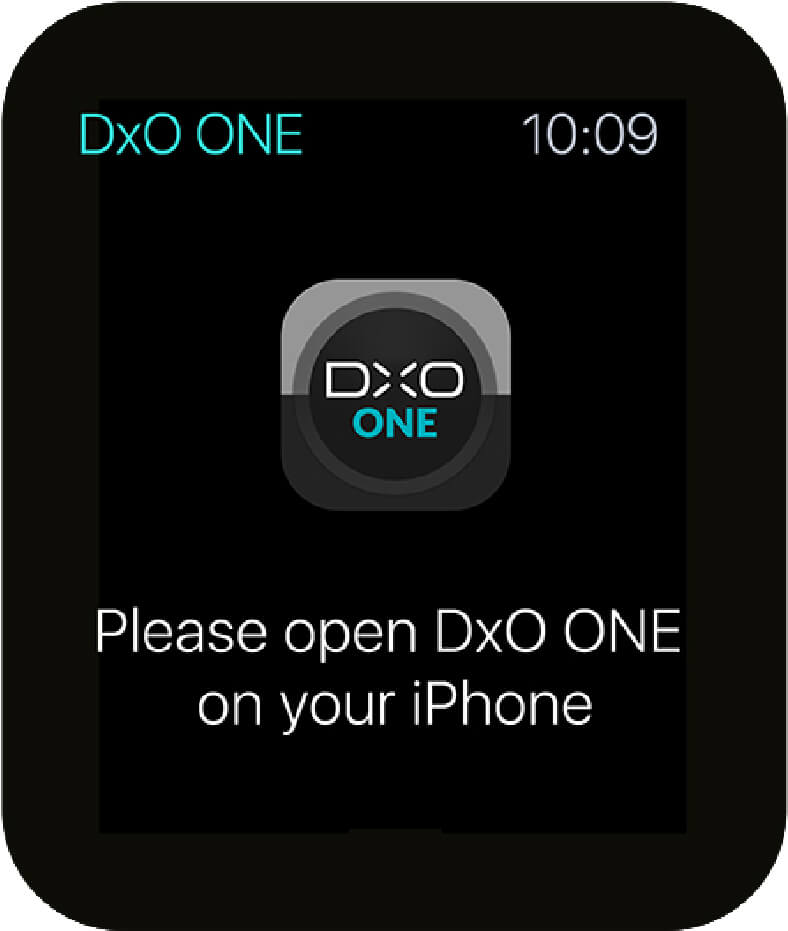
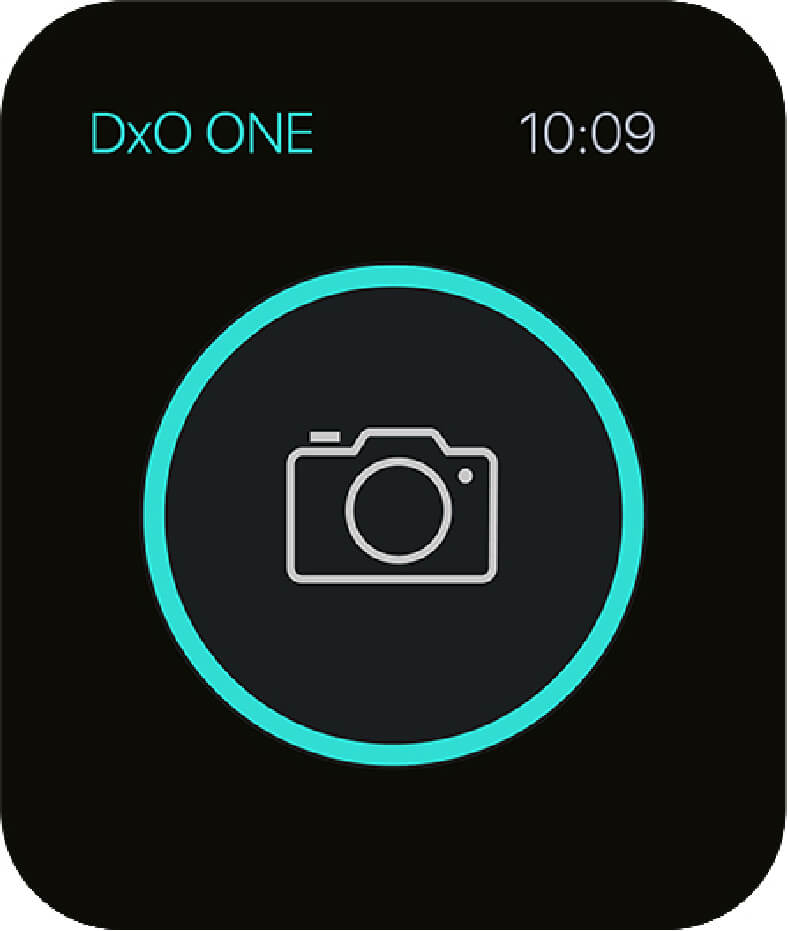
Releasing the shutter with the Apple Watch
Thanks to the DxO ONE application extension, you can take a photo or record a video remotely. If you don’t have an Apple Watch, you can also use the Wi-Fi connection to trigger the shutter remotely.
Releasing the shutter with the Apple Watch is only possible with watchOS 3 or later versions.
-
On your Apple Watch, run the DxO ONE shutter trigger application.
-
Connect the DxO ONE to your iPhone.
-
On the iPhone, run the DxO ONE application.
-
Once the connection is established, the shutter button on the Apple Watch will light up.
-
Tap the shutter button.
-
Once the photo has been taken, the shutter button will light up again to indicate the camera is ready to shoot again.
 Download page