
Shooting settings
Appendices
-

Accessing shooting settings
-
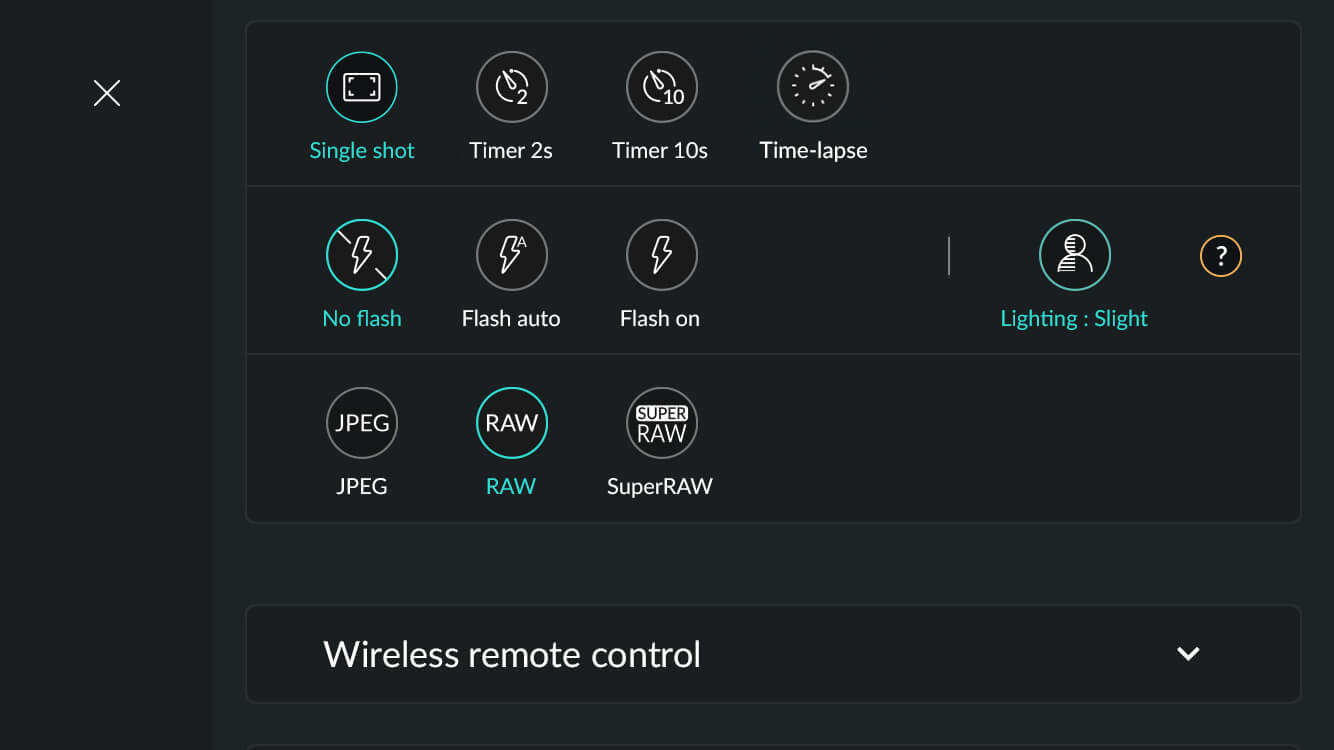
 When you are in capture mode, tap the Shooting settings button at top right-hand corner of the screen.
-
 To access the various sections, scroll through the Shooting settings page.

-
 A closed section displays only the title (down arrow). Tap on the title to open the dropdown content. Tap again to close the section.
-

Shooting settings
-
 Capture settings
Capture speed
-
 Shot-by-shot
 -
Timer (2 and 10 seconds) – more information in section “Shooting settings”.
Flash
-
Off
-
Automatic
-
On
-
More information in section “Shooting settings”.
Mobile Smart Lighting
The Mobile Smart Lighting function automatically analyzes each image and enhances its dynamic range, in the same way a fill light can be used to lighten shadows.
The higher the contrast in the scene, the more the “Mobile Smart Lighting” will have an effect. This is especially useful in the case of backlighting because it lets you recover detail in the darker areas without losing it in the lighter areas.
The intensity of the correction can be adjusted. Three levels are available: Low (default), Medium, and High.
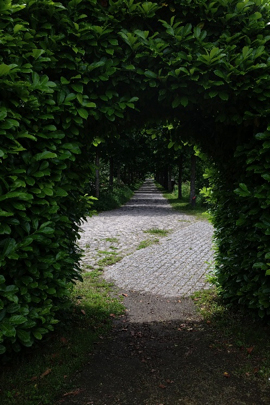
Mobile Smart Lighting – OFF
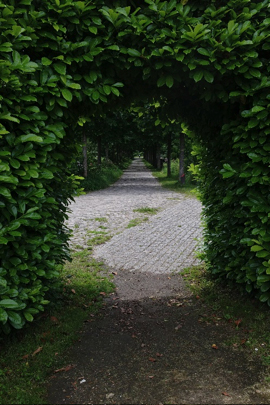
Mobile Smart Lighting – Low
Mobile Smart Lighting – Medium
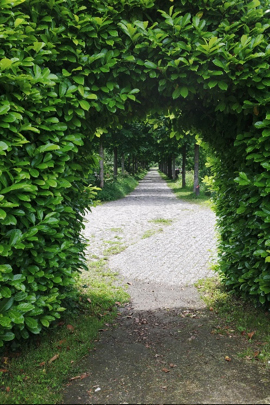
Mobile Smart Lighting – High
Note that this feature is enabled only for photos shot without the flash, and for sensitivities not exceeding 1600 ISO, so as not to increase the noise.
Mobile Smart Lighting only operates on the saved JPEGs. It does not affect the RAW files.
File format
-
-
JPEG
-
RAW
-
SuperRAW
-
For more information about file formats, refer to section “File format and managing RAW files”.
The Capture settings section cannot be closed.
-
Wireless remote control
To find out more about wireless connection, go to section “Shooting in stand-alone mode”.
-
Photo settings
Image quality
This lets you adjust the degree of JPEG compression, with a choice of High, Normal, and Basic. In Basic quality, the JPEG files require less space, but the photo quality is slightly impaired. In High quality, the photos are more accurate, but the memory card will fill up more quickly. The Normal quality represents the recommended compromise for everyday use.
Max ISO value
This lets you define a maximum sensitivity value in Auto ISO mode and when the ISO value sliding menu is on Auto ISO. This setting prevents your camera from using too high a sensitivity and makes it possible to limit the noise present in your photos.
This limit is not applied to manually selected sensitivities.
Max exposure time
This lets you set a maximum exposure time that will not be exceeded. This setting prevents the camera from selecting too long an exposure time and makes it possible to obtain sharper photos.
This limit is not applied to manually selected exposure times in S or M modes.
-
Metadata
Copyright
This lets you enter your copyright details. These details are saved on the EXIF metadata for the images.
Author
This lets you enter your name, which will also appear in the EXIF metadata for your photos.
-
Watermark
This lets you enter text that will be embedded onto shared photos in the form of small white lettering in the bottom right of the photo.
When text has been defined, an “Apply when sharing” option appears in the menu. When this option is enabled, the defined text is applied to all photos shared.
The watermark is applied only to images that are shared; under no circumstances does it affect the images stored on the memory card and in the iPhone.
-
Video settings
Video quality
-
Maximum quality (30 Mbit/s)
-
Superior quality (22 Mbit/s)
-
Standard quality (16 Mbit/s)
Just like the image quality setting, this setting affects both the accuracy of the video and the size of the files. If your memory card has limited space, you can reduce the quality so as to be able to film for longer, but otherwise we recommend you always shoot in maximum quality.
-
Display
Display composition grid
Enables or disables the display of the shot composition grid « more informations » (described in section “Composition grid”).
Display shooting settings
Enables or disables the display of the main shooting settings « plus d’informations » (described in section “Composition grid”): metering mode, AF mode, white balance, iPhone battery level, exposure compensation scale, shutter speed, aperture, and sensitivity.
-
Preferences
Show picture after shot
-
For 2 seconds: The photo will be displayed for 2 seconds after taking the shot, then the viewfinder will revert to showing the live preview image.
-
Hold: The photo will remain displayed until you touch the screen or the shutter is pressed.
-
Never: The photos will be displayed in the gallery only. This option lets you shoot more quickly.
Camera timeout
Your DxO ONE automatically goes to sleep after a certain period of inactivity. You can choose from:
-
30 seconds
-
2 minutes
-
5 minutes
When your DxO ONE is connected to a wall charger, these times are multiplied by four (2, 8, and 30 minutes respectively).
Your DxO ONE then turns off completely after 1 minute and 30 seconds of stand-by. If it turns itself off in this way, you will have to close the lens cover, then open it again to reboot your camera and take more photos.
We recommend a 30-second timeout to conserve the battery.
-
Storage
Store photos on:
-
MicroSD card and iPhone: lets you transfer a full-resolution JPEG file to your iPhone for all photos taken while the DxO ONE is plugged into your iPhone.
-
MicroSD card only: the JPEG files are not saved on your iPhone. Video files are always stored on the microSD card only.
Photos taken in stand-alone or wireless modes. To find out more about transferring files, see section “Navigating and managing images (part 2)”.
Format microSD card
Formatting the microSD card lets you not only erase its entire contents in one go, but also optimize its performance. Reformatting, which must be done in the camera and not on the computer, reinitializes the card contents. Performed regularly, this helps maintain good read/write performance for the card.
All the existing data on the microSD card will be erased.
Do not unplug the camera during formatting.
 Download page