
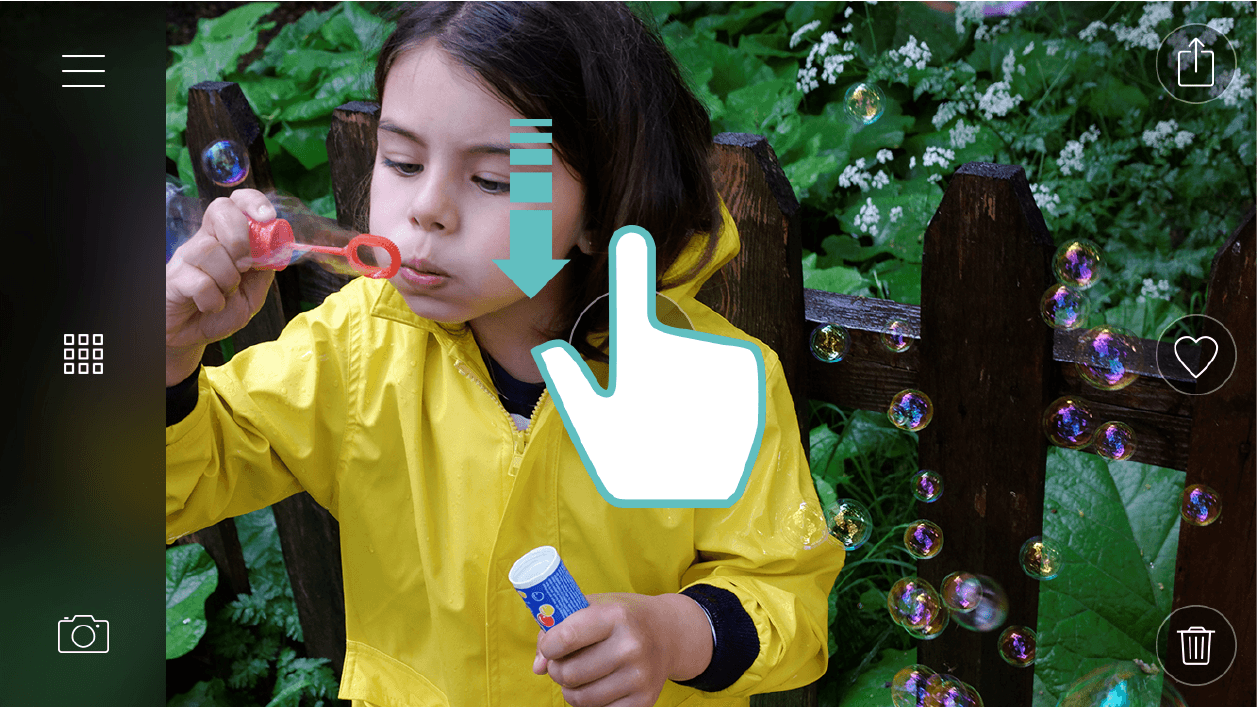
Navigating and managing images
After taking a photo
-

Viewing videos
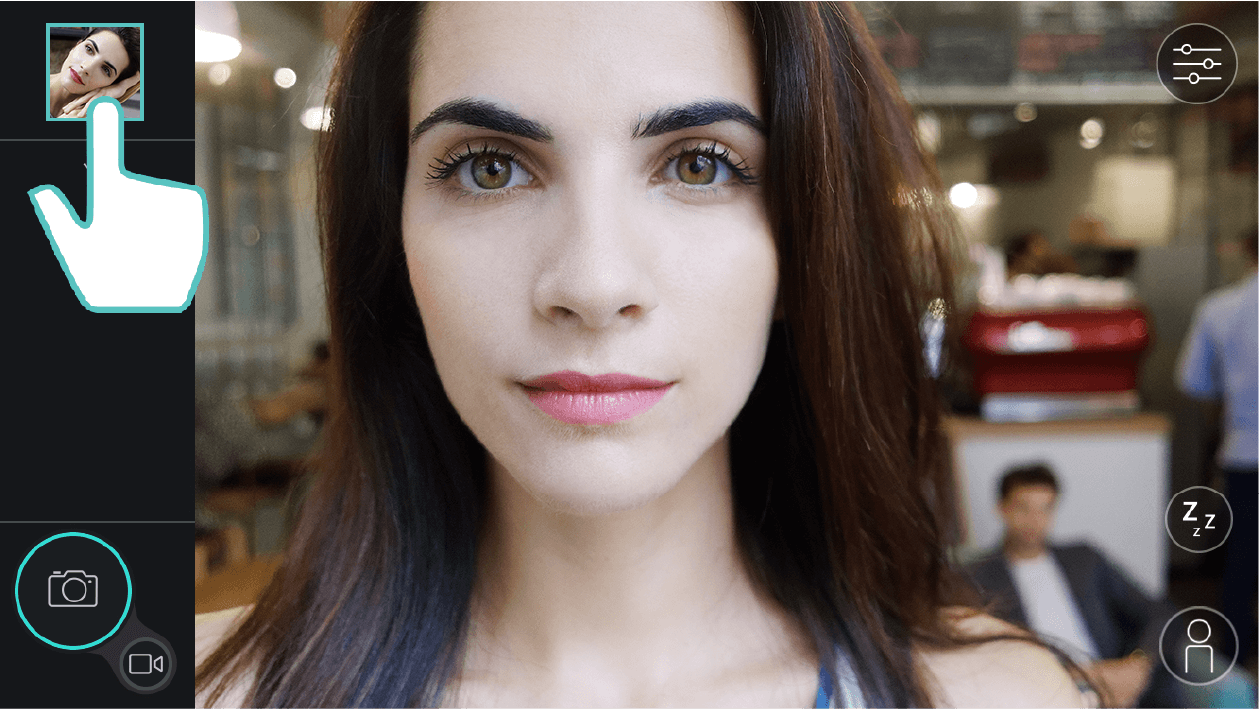
When you display a video (either by accessing the Gallery from the capture screen, or by pressing this video in Grid view), you have access to the following controls:
-
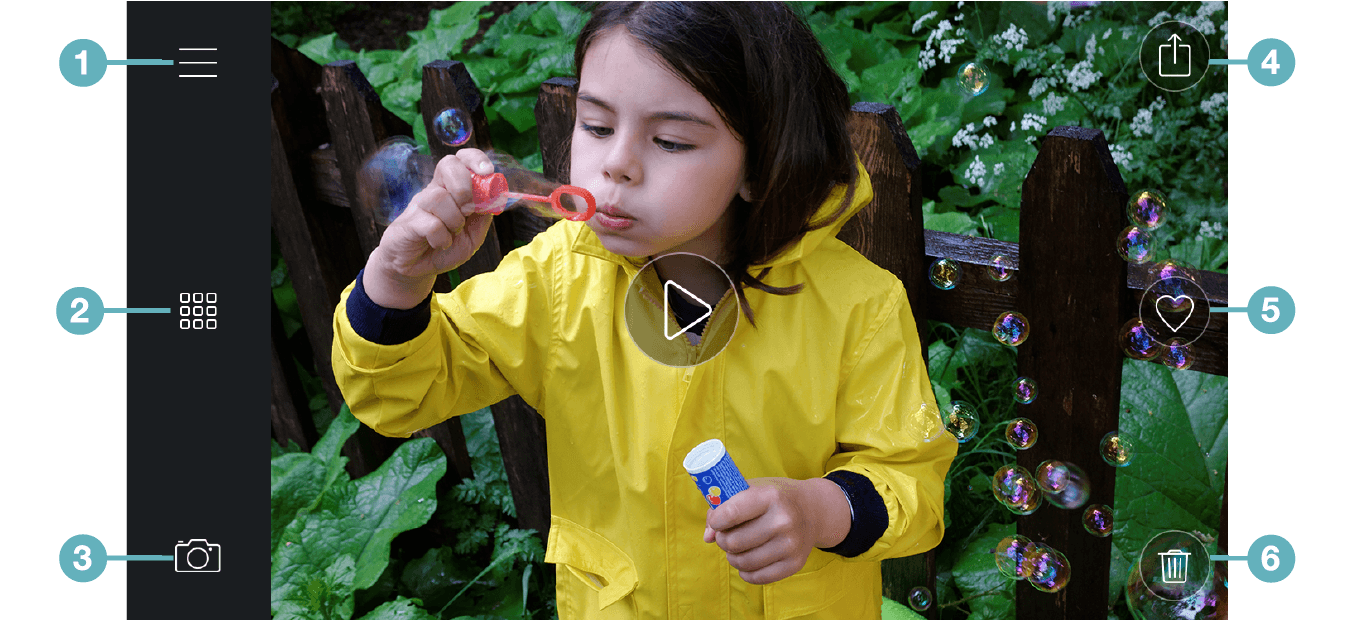
 Access the application menu (more information in section “Managing battery life”).
 -
 Access Grid view (more information in section “Navigating and managing images (part 1)”).
 -
 Go back to the capture screen.
 -
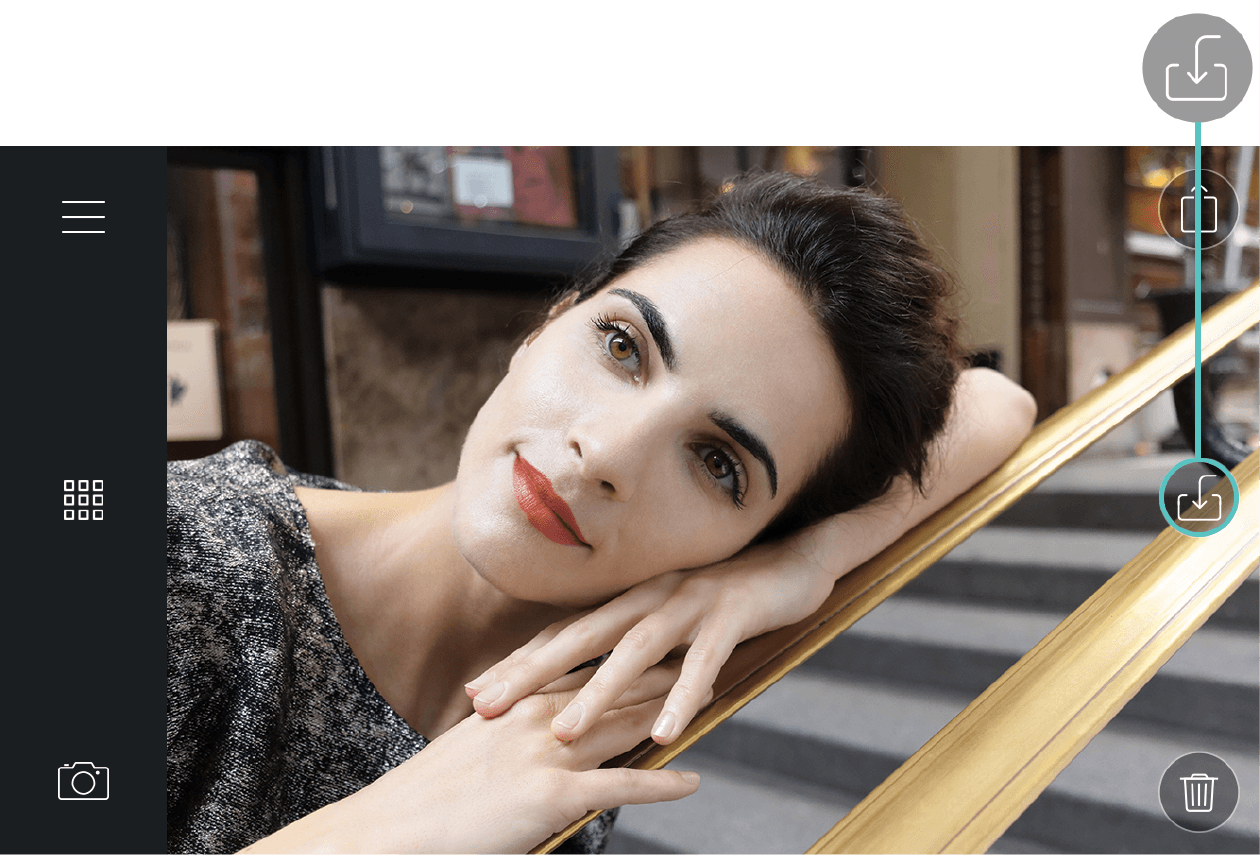
 Share the video (more information in section “Navigating and managing images (part 3)”).
 -
 Transfer video to iPhone/add to favorites (more information in this section and in section “Navigating and managing images (part 3)”).
 -
 Delete video (more information in section “Navigating and managing images (part 3)”).
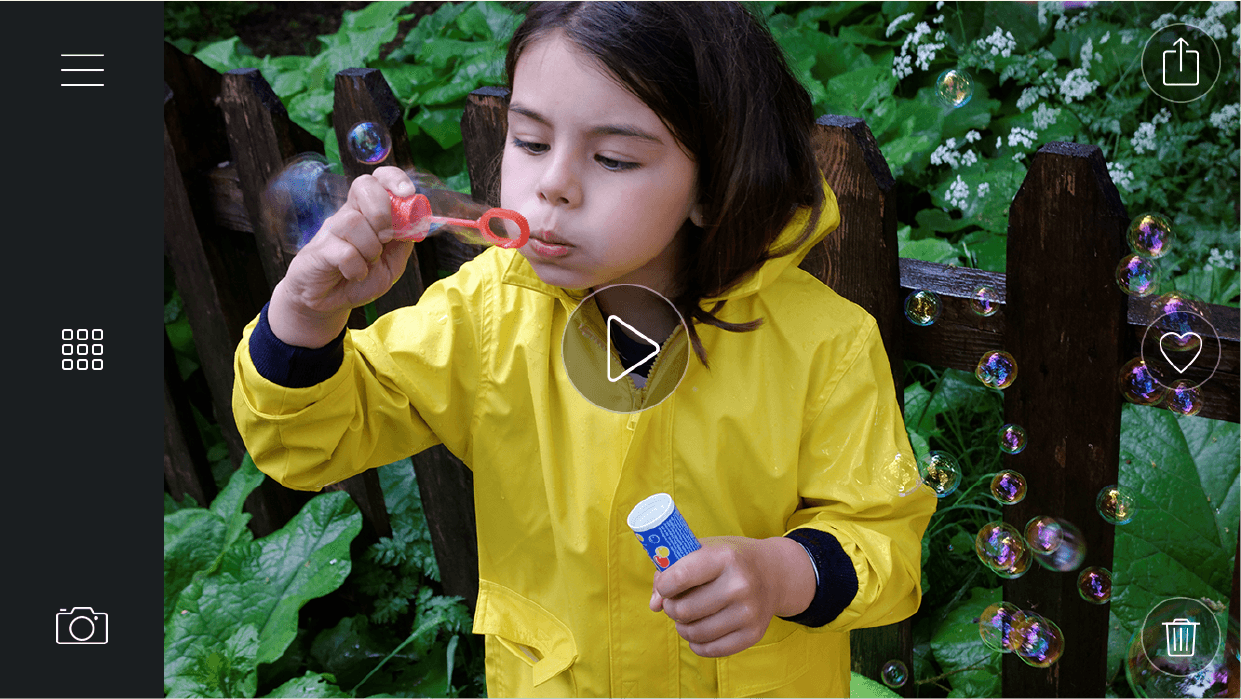
Open the video and press the play button in the center of the video.
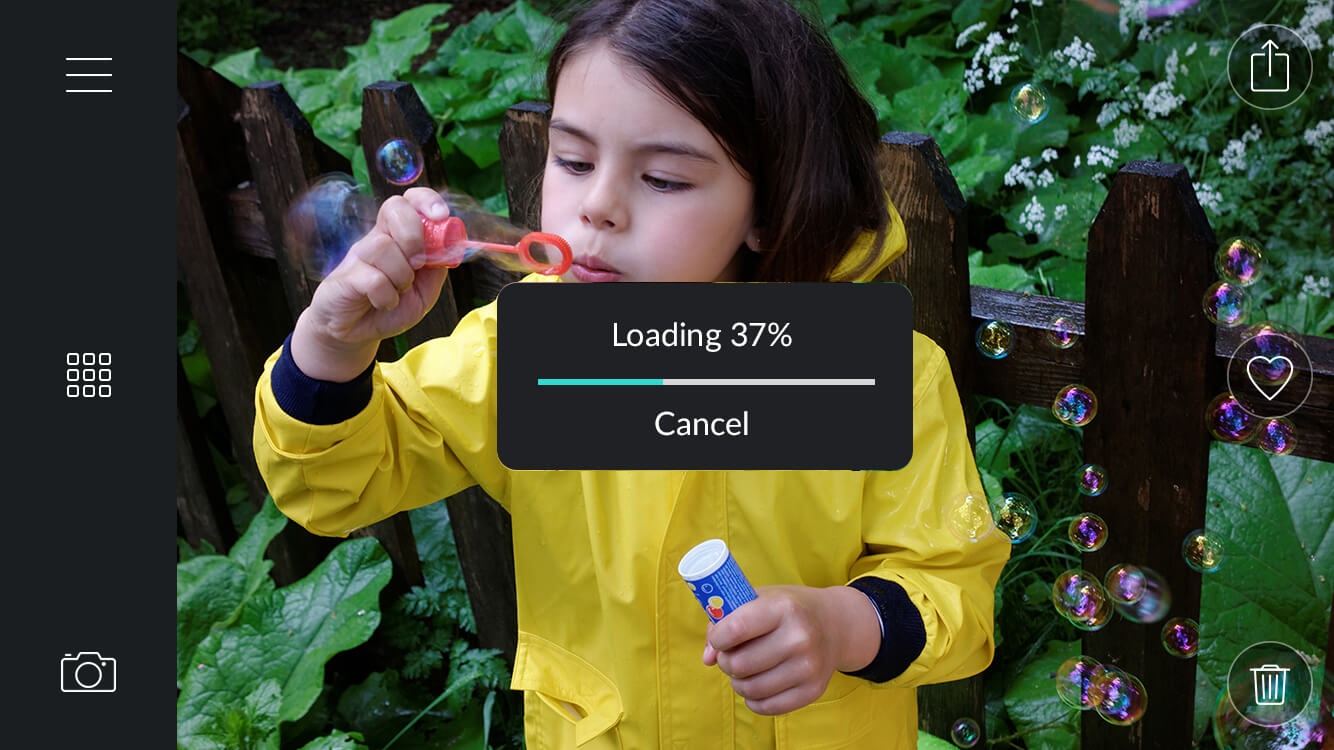
Videos are saved onto the DxO ONE microSD card. To view them, they have to be temporarily transferred from the card to the iPhone. A progress bar will tell you when the transfer is finished.
If you want to transfer a video to your iPhone for good, use the transfer button (more information on this subject in this section).
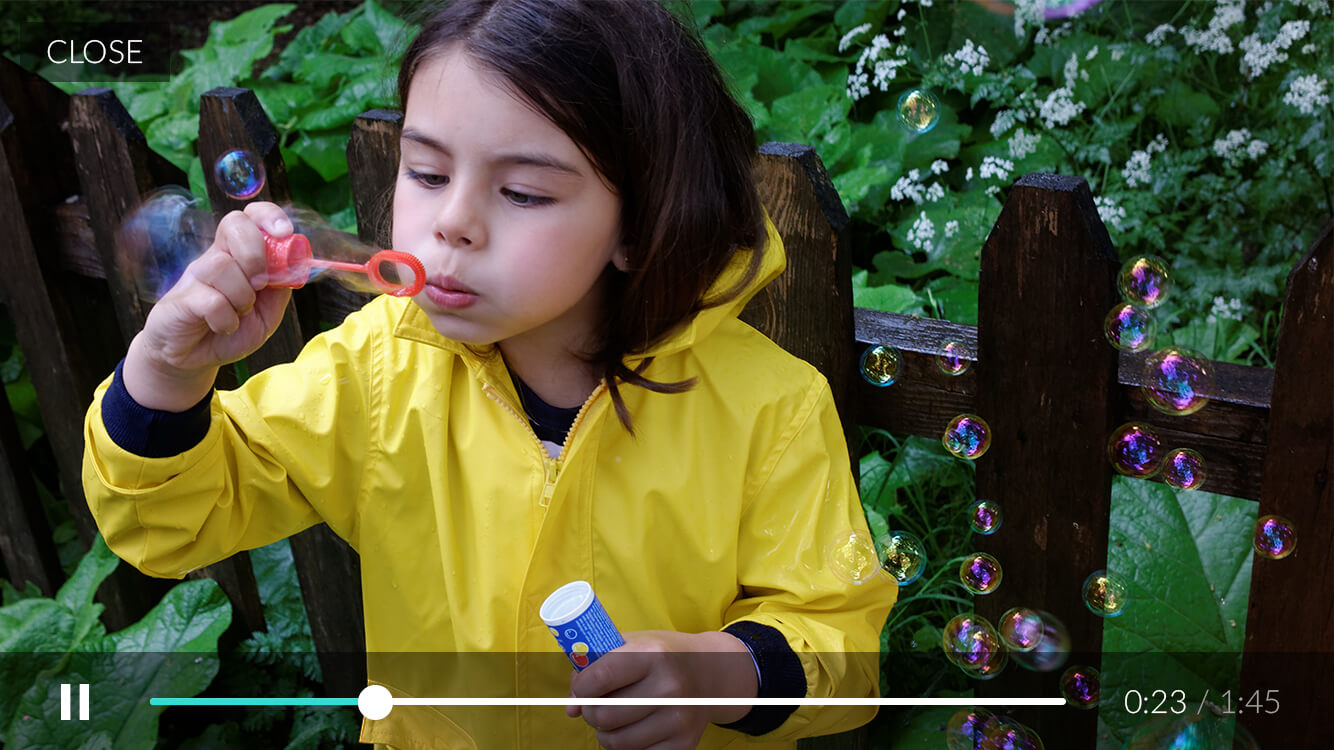
If you watch a video in Slow motion mode, the video player will display a Slow motion icon to the right of the play progress bar. Tap this icon to switch between standard and slow-motion playback modes.

Swiping from top to bottom will display the metadata for the video:
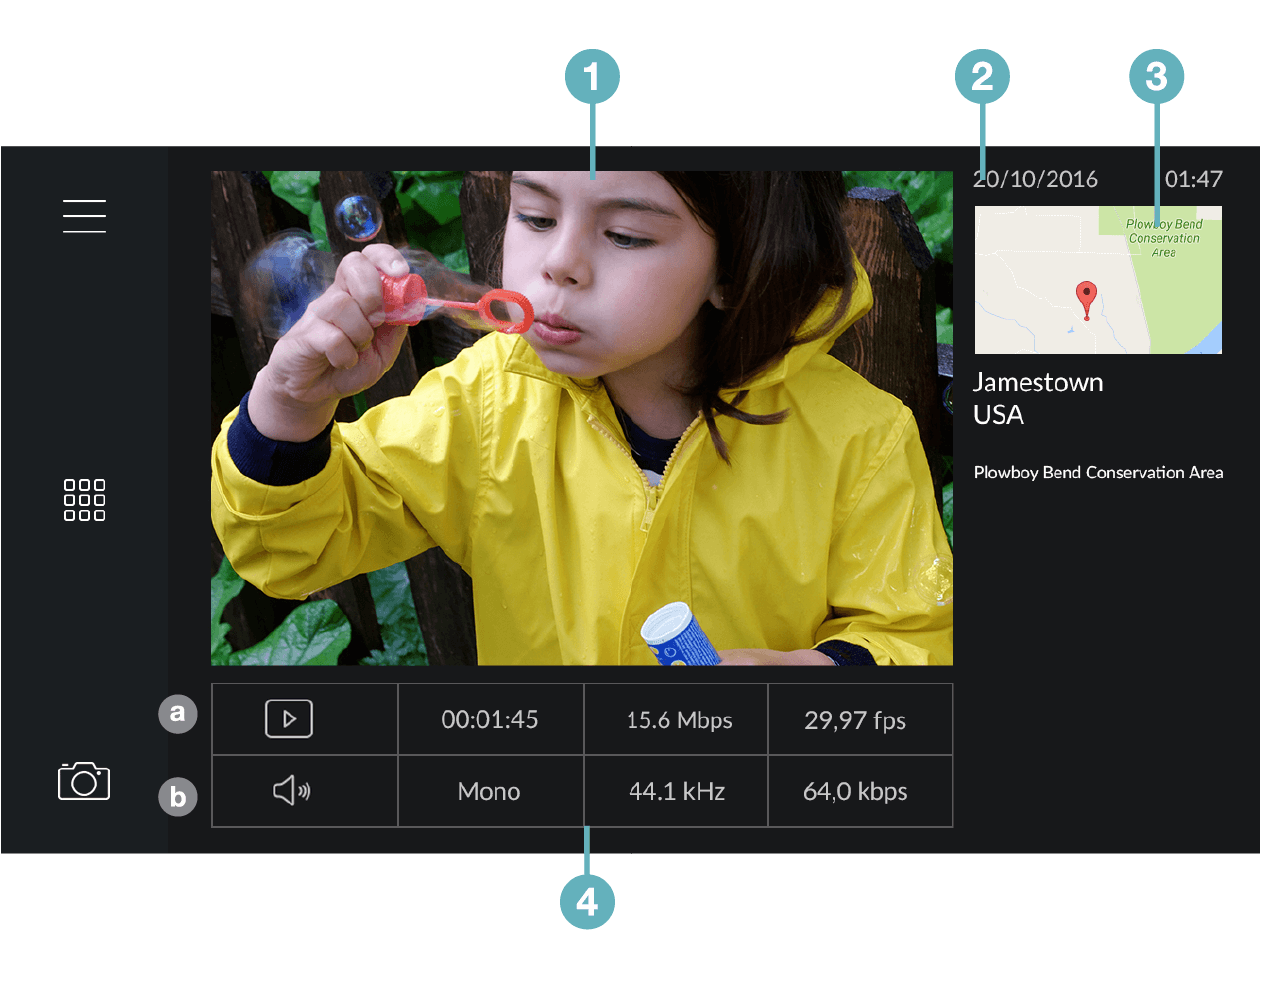
The metadata includes:
-
A preview of the selected video.
-
Date and time filmed.
-
Location information, including a geographical map and the location of the shot.
-
A table summarizing the following information:
-
 1st line: Information about the video: duration, bit rate, and frames per second.
 -
 2nd line: Information about the sound: mono/stereo, sampling frequency, and bit rate.
-

Transferring photos or videos to your iPhone
When you have configured your DxO ONE to save its photos to “MicroSD Card and iPhone”, all photos taken while your DxO ONE is physically plugged into your iPhone will be automatically transferred to your iPhone. They are then visible in the Photos application under the album “DxO ONE.”
If your DxO ONE is unplugged or turned off before an automatic transfer is completed, your photos will be stored in the memory. The transfer will automatically restart when the camera is plugged in again.
You will be prompted to activate the setting for this option the first time you access the photo gallery. You can also change the setting later in the Shooting settings described in section “Shooting settings”.
However, the following will have to be transferred manually:
-
 All videos, regardless of the connection mode.
-
All photos taken while the “Store on…” option (described in section “Shooting settings”) is set to “MicroSD card only”.
-
All photos taken via a Wi-Fi connection or in stand-alone mode.
To transfer a photo or video manually:
-
On the capture screen, press the Gallery button.
-
Find the image you want to transfer in the list, and tap to open it.
-
Tap the transfer button on the right of screen to transfer your image to the Photos application.
If you see a heart-shaped icon in place of the “Transfer” button, this means that the photo or video has already been transferred. The button then lets you add the photo to your favorites (or remove it). For more details, see section “Navigating and managing images (part 3)”.
To transfer several photos and/or videos manually:
-
On the capture screen, press the Gallery button.
-
Press on the title “All photos” to open the filter menu and select “On microSD card only”. This will let you display only those photos that have not yet been transferred.
-
Press the button for selecting multiple photos at once.
-
Select all the photos and/or videos you want to transfer.
-
Press the transfer button and wait for it to finish before putting your iPhone on stand-by or turning off your DxO ONE.
When transferring a photo, the button described above automatically transfers a JPEG file to your iPhone. If you want to transfer a RAW file to your iPhone, refer to section “Navigating and managing images (part 3)”.
 Download page