
Navigating and managing images
After taking a photo
-

Viewing the last photo (or video) taken
From the capture screen, press the Gallery button at the top left of the screen to open a preview of the last photo (or video) taken.


-

Displaying the gallery in Grid mode
After accessing the gallery from the capture screen, press the Grid mode display button in the center of the toolbar to access Grid view.


-
 Access the application menu (more information in section “Managing battery life” ).
 -
 Access multi-selection mode (more information in section “Navigating and managing images (part 3)” ).
 -
 Go back to the capture screen.
 -
 Filtering storage (more information in section below).
In Grid view, the photos are grouped by the month in which they were taken in descending order (most recent at the bottom).
-

Filtering storage spaces
Your photos may be in your DxO ONE and/or in your iPhone. By default, in Grid view, you see the photos in either of the two devices. The filtering menu then lets you view the specific contents of each device.
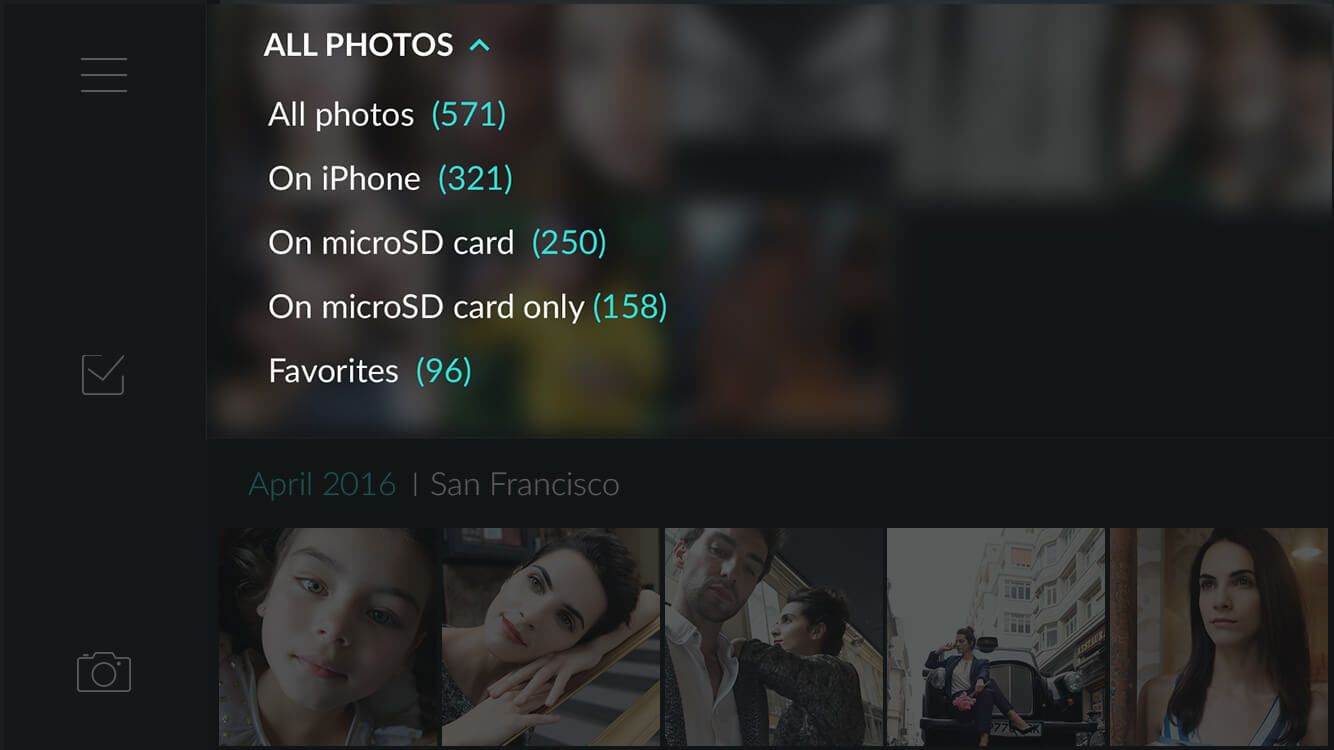
Tap on the dropdown menu at the top of the screen to select which photos are displayed in the gallery:
-
 « All photos » displays all the photos and videos on the microSD card and in the DxO ONE album on your iPhone.
-
« Favorites » correspond to the photos or videos you have marked as favorites by using the heart symbol. Note that only photos or videos present in the iPhone can be marked as favorites.
-
« On iPhone » displays all DxO ONE photo and video files stored on your iPhone.
-
« On microSD card » displays all photo and video files stored on the SD card in the camera.
-
« On microSD card only » displays all photo and video files stored only on the SD card and not present on the iPhone. This can be handy for checking and transferring photos taken in stand-alone mode.
To find out more about transferring photos from your DxO ONE to your iPhone, refer to section “Navigating and managing images (part 2)”.
-

Viewing a photo
When you display a photo (either by accessing the Gallery from the capture screen, or by pressing this photo in Grid view), you have access to the following controls:

-
Access the application menu (more information in section “Managing battery life” ).
-
Access Grid view (more information in this section, part “Displaying the gallery in Grid mode”).
-
Go back to the capture screen.
-
Sharing and printing photos (more information in section “Navigating and managing images (part 3)” ).
-
 Transfer video to iPhone/add to favorites (more information in sections “Navigating and managing images (part 2)” and “Navigating and managing images (part 3)”).
 -
 Delete photo (more information in section “Navigating and managing images (part 3)”).
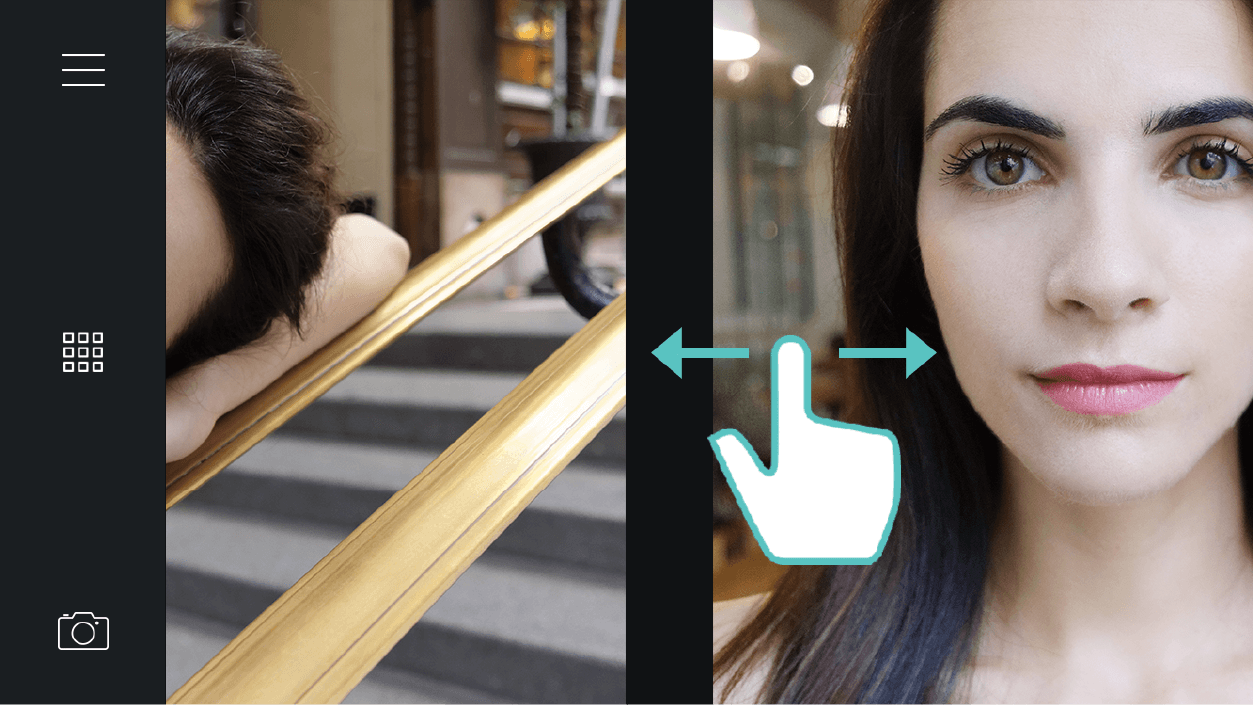
Swipe left to right (or right to left) to scroll through and view the photos.
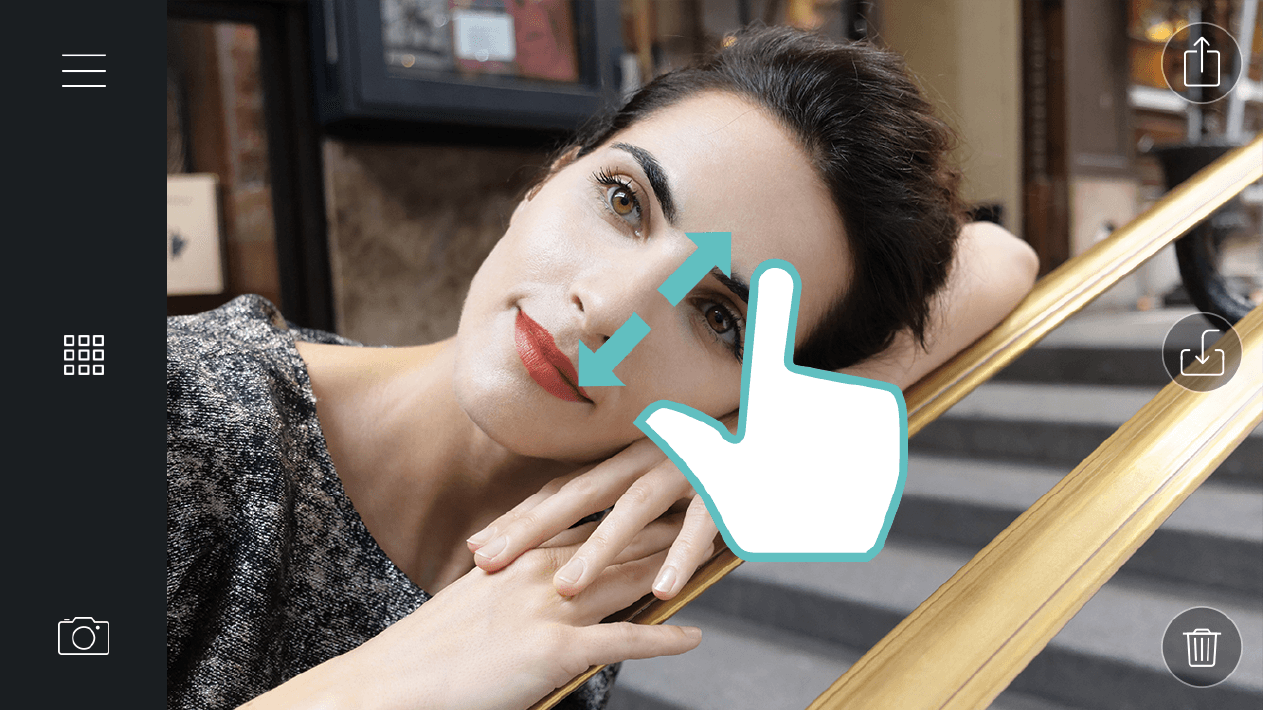
When a photo is displayed, you can enlarge it to view a detail or check that it’s focused. To do this, spread two fingers on the screen or tap it quickly twice. Next, drag your finger across the screen for a close-up view of another area in the image. To return to displaying the whole image, pinch with two fingers or tap twice quickly.
To hide the toolbar and view your photo full screen, tap on the photo.


To bring back the toolbar, tap on the photo again.
Swiping from top to bottom will let you display the metadata for your photo:
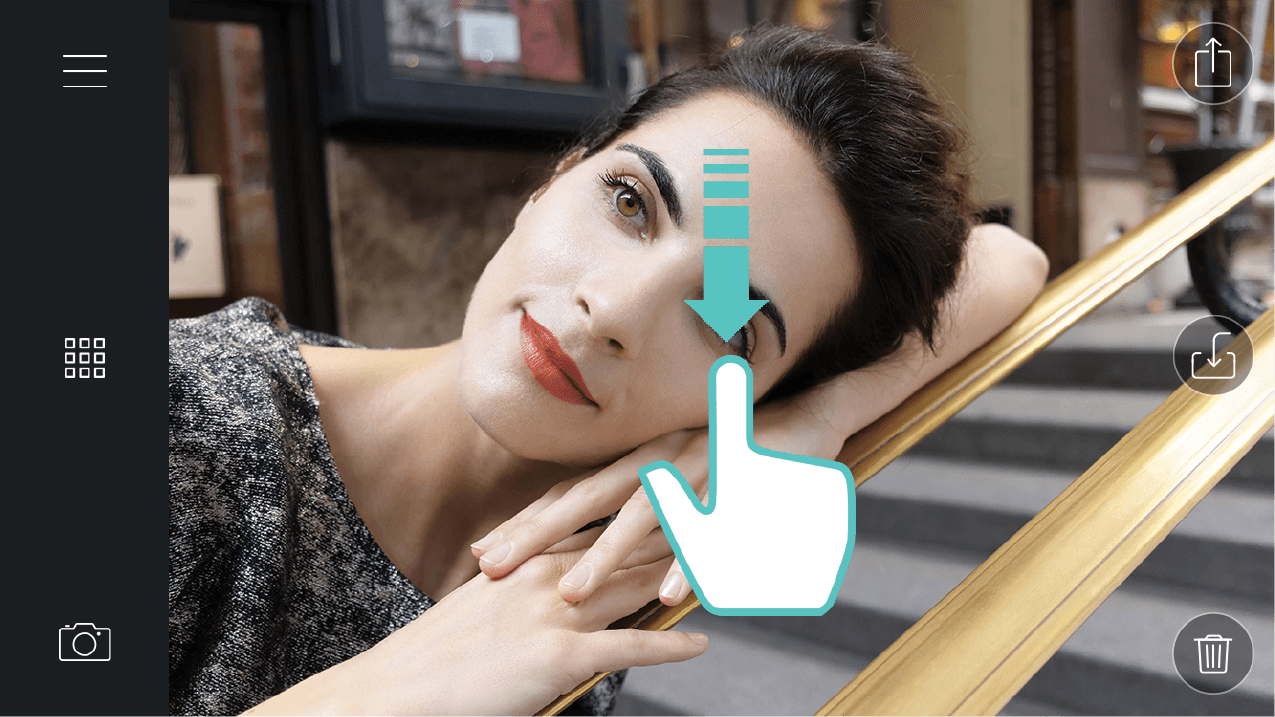
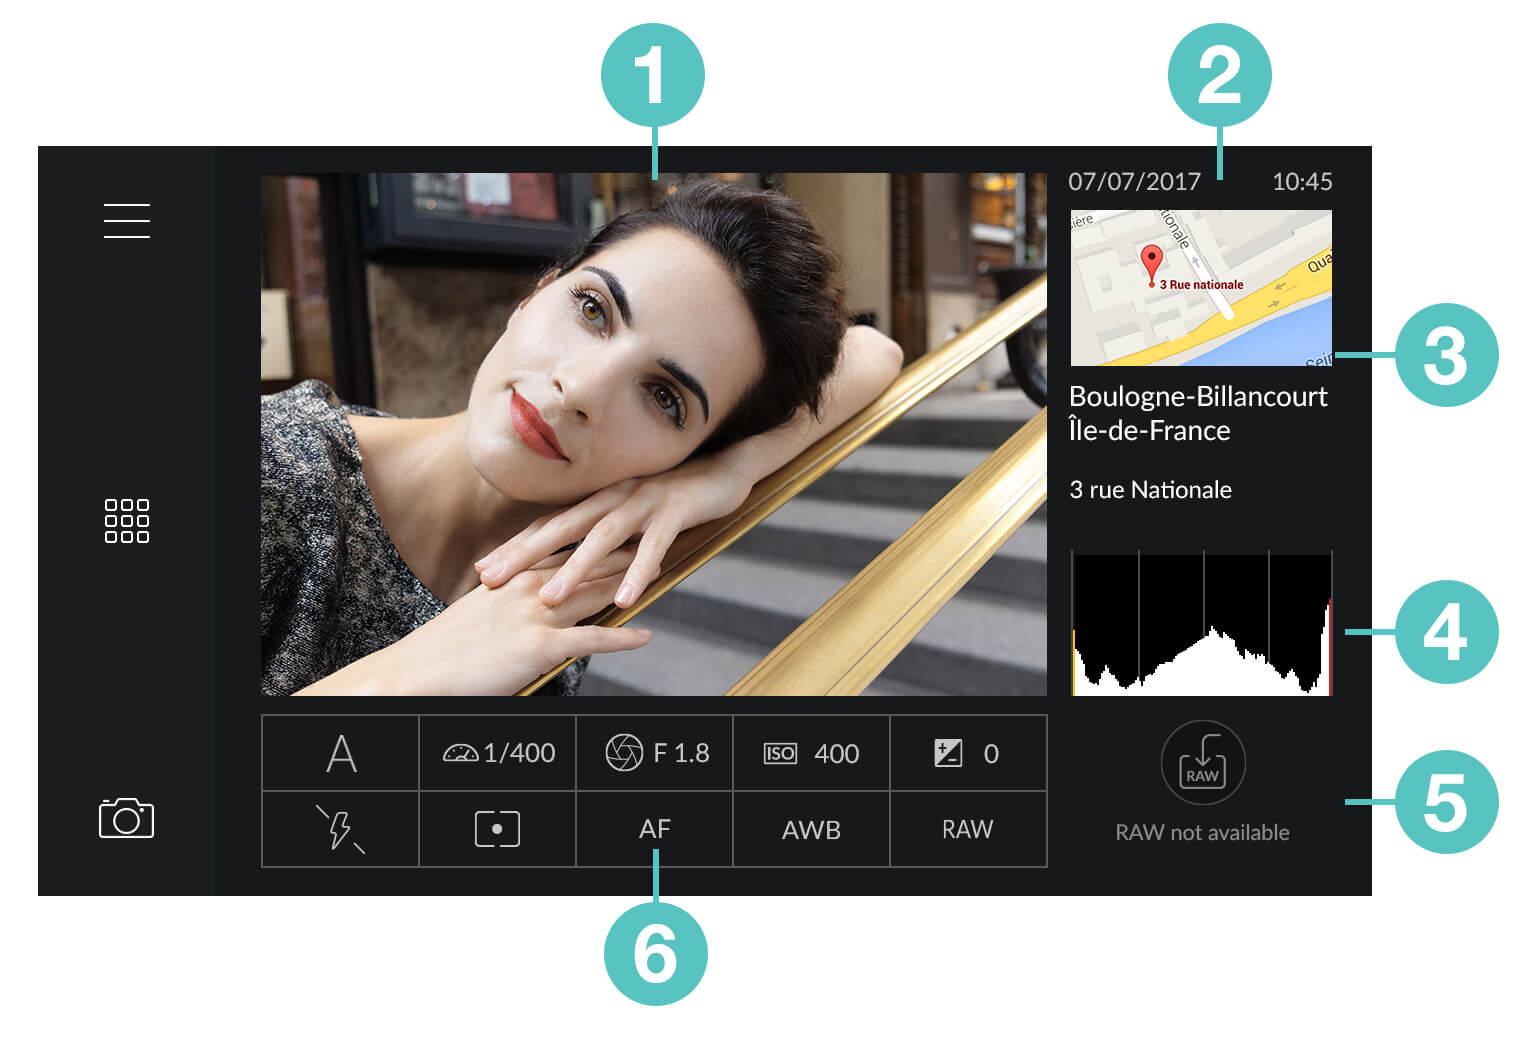
The metadata view contains:
-
A preview of the selected photo or video.
-
Date and time taken.
-
GPS information about the location, including a geographical map and the location of the photo.
-
A histogram.
-
A table summarizing the following information:
-
 1st line: Exposure mode, shutter speed, aperture, sensitivity, and exposure compensation.
 -
 2nd line: Flash status, metering mode, AF mode, white balance, and file type.
The histogram lets you check the exposure of your photo. It represents the distribution of the pixels in the image according to their brightness, with dark pixels shown on the left of the histogram and light pixels on the right.
If the image is correctly exposed, there will be no empty space on either the left or right of the histogram.
If the image is too dark, the histogram appears shifted to the left (= lack of lighter pixels).
If the image is too light, the histogram appears shifted to the right (= lack of darker pixels).
If part of the photo is overexposed, the right-most bar will show as red.
You can correct the exposure of your photo with the help of retouching applications, on your iPhone or on a computer. If you find you can’t fully correct an over-exposed or under-exposed shot, you can use the RAW file.
For more information about RAW files and processing them, refer to section “File format and managing RAW files”.
 Download page