Low-light conditions ISO / Sensibility
Use an exposure time of around 1/40 s when shooting handheld to maintain the ambience and to avoid having to increase the sensitivity too much. Depending on your subject and the desired effect, try Night scene mode, A mode, or S mode.
Photography goes hand in hand with light, which in large part determines the ultimate look of your image. While our eyes can easily adapt to different amounts of light, that’s not always the case for our camera.
It’s harder to shoot in a dimly lit room or outside at night than it is in the middle of the day when the light is bright. However, shooting with your DxO ONE’s auto mode even in low light will give a satisfactory result. You can take it a step farther by changing a few more easy-to-use settings.
-
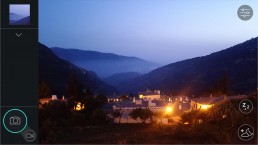
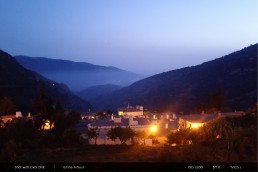
Shooting handheldNight scene mode can easily produce a beautiful effect. This mode adapts the exposure time and caps the sensitivity at 2500 ISO, producing an image with limited digital noise.
Night mode also produces images that are slightly darker so as to maintain a nighttime atmosphere. This mode is designed for handheld shooting, so you don’t have to use a tripod.
(Photographer Émilie Arfeuil)
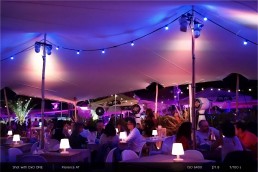
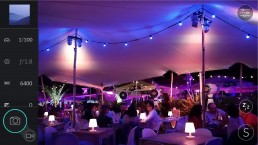
Shutter priority (S) mode is useful when the lighting is dim and it’s hard to take a good portrait inside without an additional lighting source. Turn on as many lights around you as possible and move the subject closer to the light source. To capture the ambient light in the background, it’s best to use a slow speed of around 1/40 s with the sensitivity value set to Auto. Ask the subject not to move, and press the shutter button while staying as still as possible.
(Photographer Florence AT)
If the subject moves, switch to a faster shutter speed. Increase it to around 1600 or even 3200 ISO if the sensitivity option isn’t in Auto mode. The exposure will then be adjusted to achieve the best result.
Take a couple of test photos to find the best compromise between sharpness and digital noise, or use the SuperRAW format to get the best image quality possible using a high sensitivity (see tutorial “SuperRAW”).You can use this mode to photograph subjects in motion, such as people performing on a stage.
In these kinds of conditions, the light is uneven and difficult to control; the background is often dark and the stage is backlit. You should check the exposure often and change it if you need to.
or more flexibility and when shooting in shutter priority (S) mode, set the shutter speed to around 1/60 s or 1/125 s to capture a sharp image of the performers, and set the sensitivity to Auto. This mode will constantly adapt the exposure to match the lighting conditions. This way you can be sure to always take clear and well-exposed photos. All that’s left is to click the shutter button at the right moment!
The Spot Weighted setting precisely measures the light in bright areas on the image. Be careful when using it, however, to avoid skewing your exposure.
Note that S mode will try to obtain the same exposure level as auto mode; this can produce images that are a bit too light. In this case, use a slightly negative exposure compensation.
-
Using a stable surface or tripod when shooting
Depending on the lighting conditions, a “slow” speed between 1/50 s and 1/4 s will produce beautiful indoor images. It’s best to use a tripod to stabilize your DxO ONE and to avoid motion blur. You can also use a flashlight or the built-in flash on your smartphone as a lighting source to light the subject during the exposure.
In the case of the stage performance mentioned above, if you can place a tripod in the room, you’ll capture beautiful motion effects with a slow shutter speed and a low sensitivity.
At night, urban street lighting and neon signs cause the ambience in the city to change. Regarding exposure, it’s best to use aperture priority (A) mode, set the sensitivity to 100 ISO, and close the aperture to around ƒ/5, ƒ/6, or ƒ/8 to have a large focal area. Using a tripod is essential, since the exposure time lasts several seconds. Business signs sometimes turn on one part at a time. A long exposure time will let you capture the entire sign. Finally, exposure compensation lets you create contrast in the scene to achieve an artistic effect.
Sometimes in the early dawn, the sky turns a beautiful shade of pink for a few minutes before changing to yellow-orange and then blue. The lighting is low during this time and you’ll have to use a long exposure time to capture it. You’ll need to use a tripod to avoid having to increase the sensitivity too much.


 Download page