
Time-lapse
Motion Time-lapse
What you need for this tutorial
To progress
Settings used in this tutorial
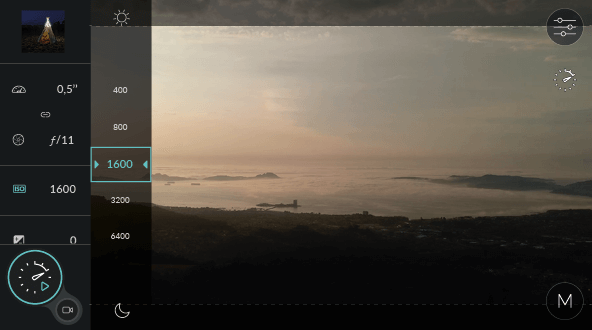
– M mode, adapt aperture (preferred: ƒ/2.8 to ƒ/4) and ISO to obtain long exposure time, or mode S with slow speed
– Manual focus on infinite

Introduction
We all know that movement is key to what makes time-lapse images so appealing—being able to speed up the world and see it in a totally different way. But now it’s time to take things to the next level and add movement to our camera.
This way we will create even more impressive and dynamic videos, playing with different speeds and perspectives, thus giving viewers the feeling of being immersed in our creation.
In this tutorial, we will see how to create these images using the DxO ONE and different motion control systems.

Get to know your rig
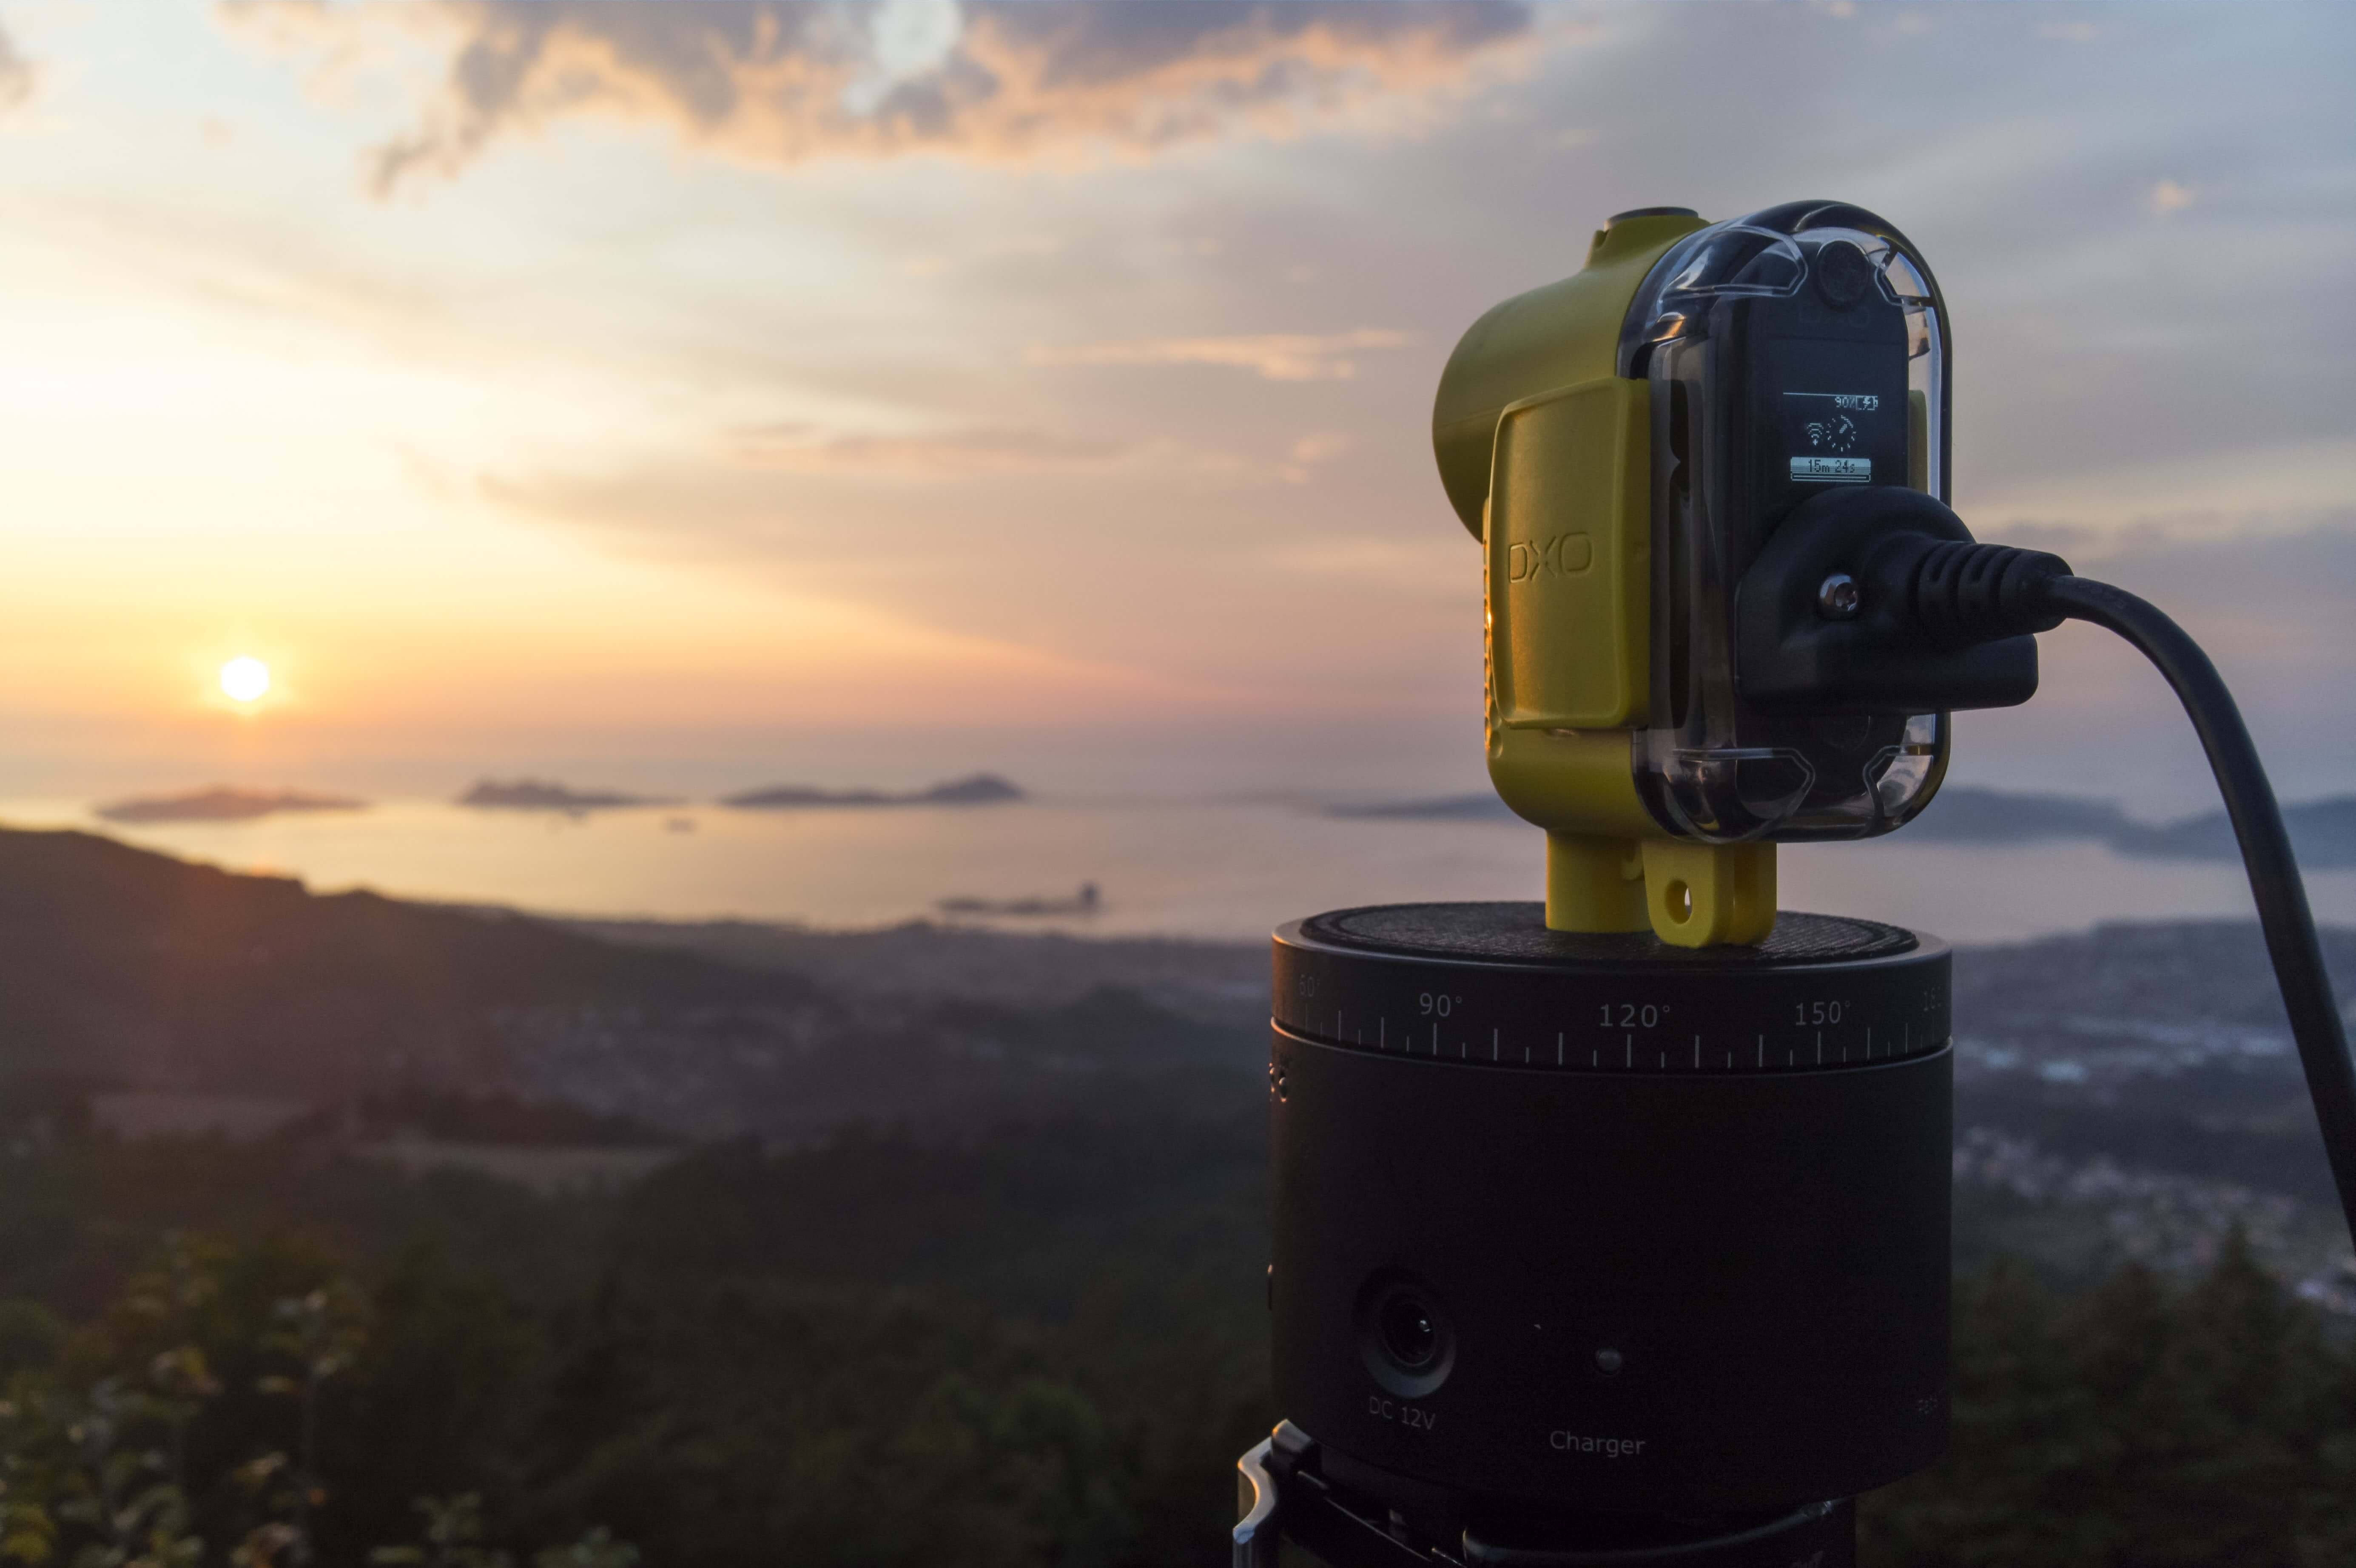
When working with motion control systems, it is very important to understand how the equipment (“rig”) and all of its features work, so carefully read the manual and get familiar with the rig before hand.
Whether it is just a pan or tilt head, a motorized slider, or a 3-axis rig, knowing all the features is a must before going to shoot. I recommend starting with a small, basic left-right pan head that lets us create a wide panorama, thus revealing parts of the scene that we couldn’t capture with a single wide lens.
After you get more experience, you might want to try a motorized slider, which will give you more options and will create even more dynamic images—because moving the camera changes the perspective and accentuates the feeling of camera movement much more dramatically than a pan/tilt device.
Of course, the downside is the slider’s size and weight, making it less portable than a pan/tilt head. But since the DxO ONE is so small and light, you won’t need a big rig: even the smallest and most portable devices will work fine.
Sometimes less-experienced time-lapse photographers focus too much on camera movement and forget the basics. There are two things you should never forget: look for a good location and wait for the best light (sunset or sunrise) before dealing with your motion control system.

Exposure setup
Choosing the right shutter speed is very important when shooting with motion control systems. As we explained in previous tutorials, the shutter speed controls the amount of motion blur in our scene, and we know how important that is to achieving smooth images.
Many beginners think that the picture will be blurred if the camera moves while shooting—that is, they think they must stop the motion control system when shooting, and that they should use it to move the camera only between shots (a technique known as “move-shoot-move”), but this belief is totally wrong.
We actually need the motion control system to move in order to add motion blur to the final video. Remember that 30 blurred pictures can create a sharp image in motion—so no matter what kind of device we use, we should always set a reasonably long exposure with our DxO ONE to get motion blur. I usually shoot at at least 0.5s or 1s.

Interval setup
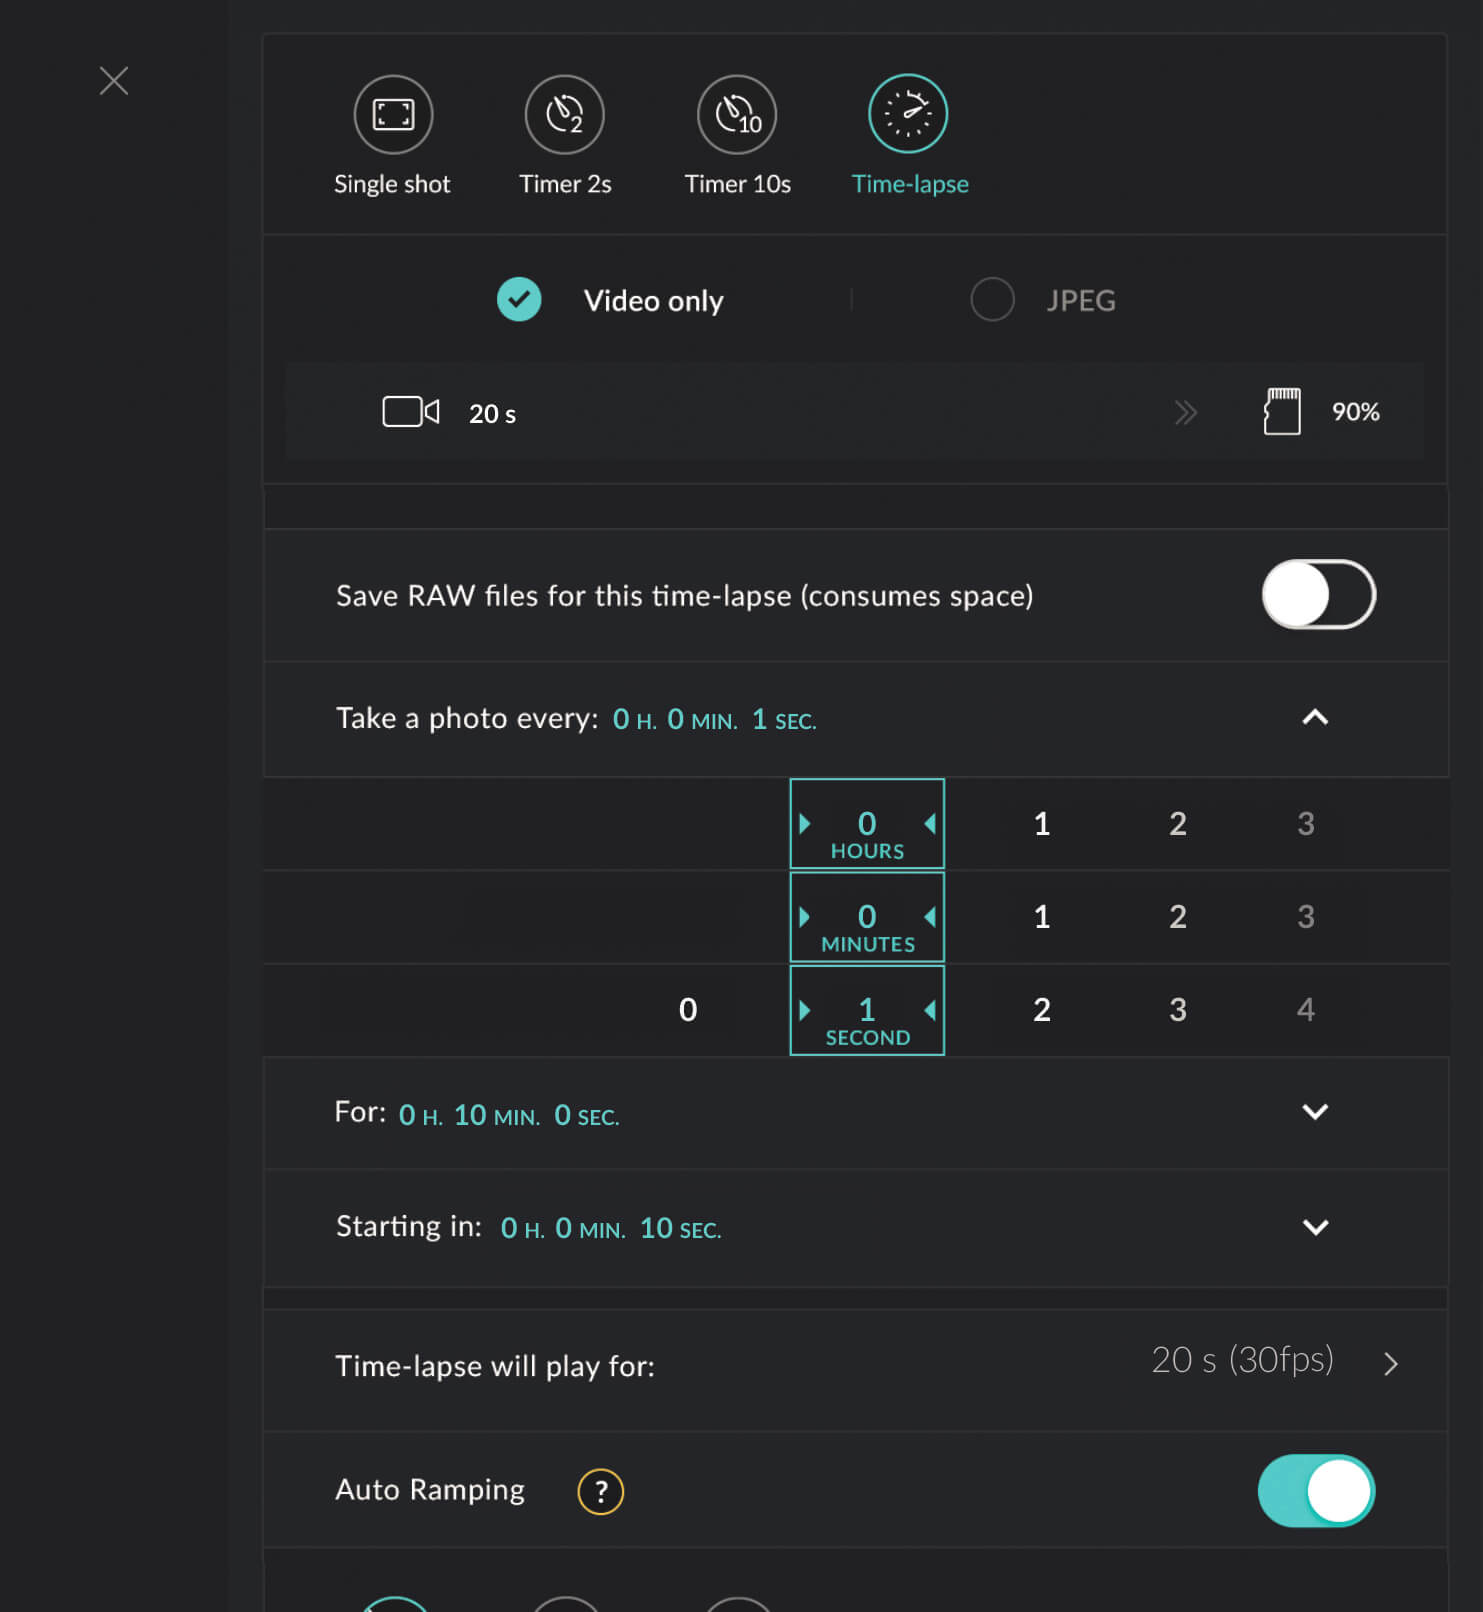
If you’ve followed our other time-lapse tutorials, you are familiar with setting the interval. You know that the higher the speed of our scene, the shorter the interval that you should select.
So when capturing city scenes, we must choose the shortest interval possible, an interval of 1s, and for slow landscapes or night shots, we will choose 20 or 30 seconds.
Since the DxO ONE doesn’t have a port to fire the motion control system externally, we have to manually synchronize it with our rig. This is pretty simple: to synchronize, set the slider or pan/tilt device to the same interval, shooting time, and frame rate as the DxO ONE. Press the DxO ONE’s shutter and then start your rig, and wait until both finish the cycle.
They should end at the same time and the final clip should be perfect. If you own a simple pan/tilt device, set its rotation speed and adapt the duration of the time-lapse on the DxO ONE accordingly. Start the rotation device first, then the DxO ONE.

Evaluating results
If you have followed all the steps properly, you should get a very dynamic video clip—one with perfect synchronization, one that has the camera and the motion control system end at the same time. The two most common errors are :
1 – Setting different values on the devices (in particular, stopping one device before the other)
2 – using a very fast camera movement (producing a choppy and blurred image)
So try setting a long and slow movement on your device, roughly 20s or so, and then perhaps slow down the shutter speed a bit to safer values such as 1/3 or 1/2 second. (And by the way, using an external battery and the DxO One’s Wi-Fi option is very helpful when using a motion control system.)

Enrique Pacheco
Travel cinematographer
& time-lapse specialist
enriquepacheco.com
 Download page