
Time-lapse
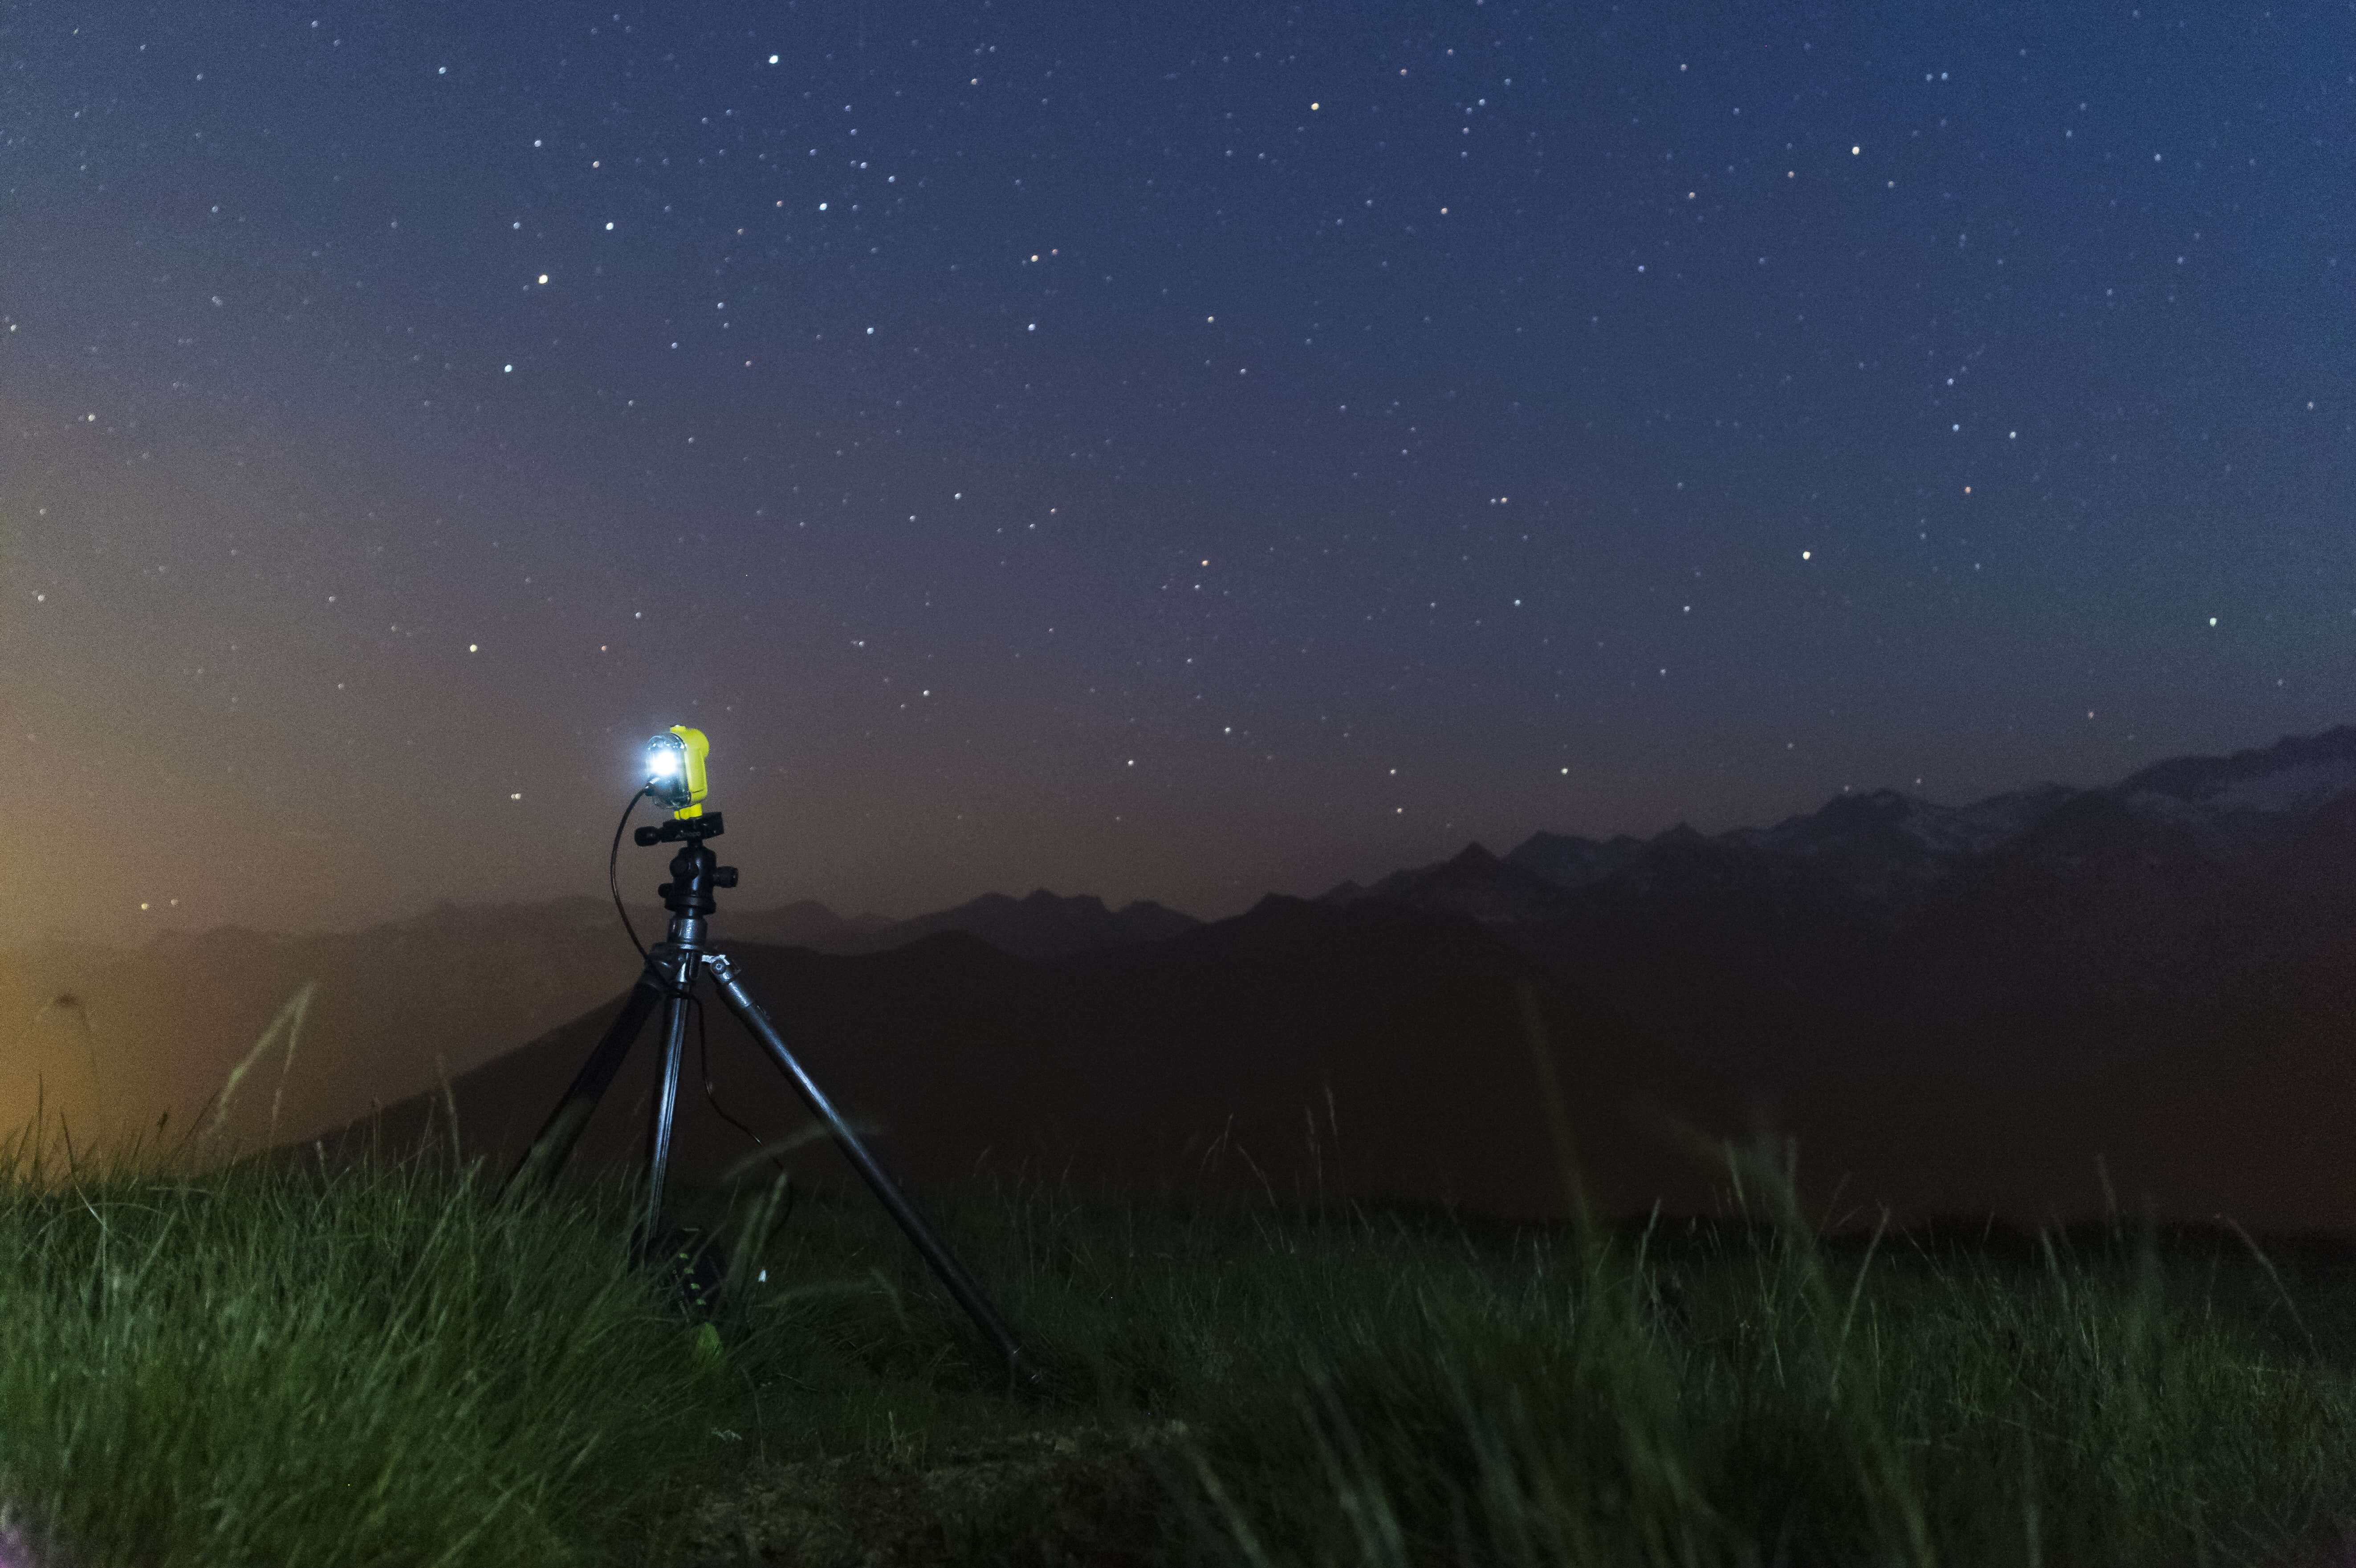
Night Landscape
What you need for this tutorial
To progress
Settings used in this tutorial
– Output video + RAW
– Auto-ramping activated

Introduction
There is probably nothing that fascinates human beings more than the universe — the planets and stars and galaxies.
Being able to photograph them with a camera and show them to the world is one of the most gratifying forms of photography. But with the technique of time-lapse, we can also show the movement of our planet and other celestial bodies.
Unfortunately, creating a time-lapse at night is perhaps the most difficult form of all, but don’t worry, the DxO ONE is designed to make this task easier. Let’s see how.

Before shooting
Planning is always important, but this is especially true when we’re doing time-lapse at night.
The first thing to do is to choose the right night. If we want to photograph a sky full of stars, or see the Milky Way, we must choose a moonless night, as the light of the Moon makes the stars less visible.
On the other hand, if we want to photograph a moonlit landscape, the ideal is to choose a night in which a full or almost-full moon rises quite late, after it is already dark, to see the effect of its light on the landscape.
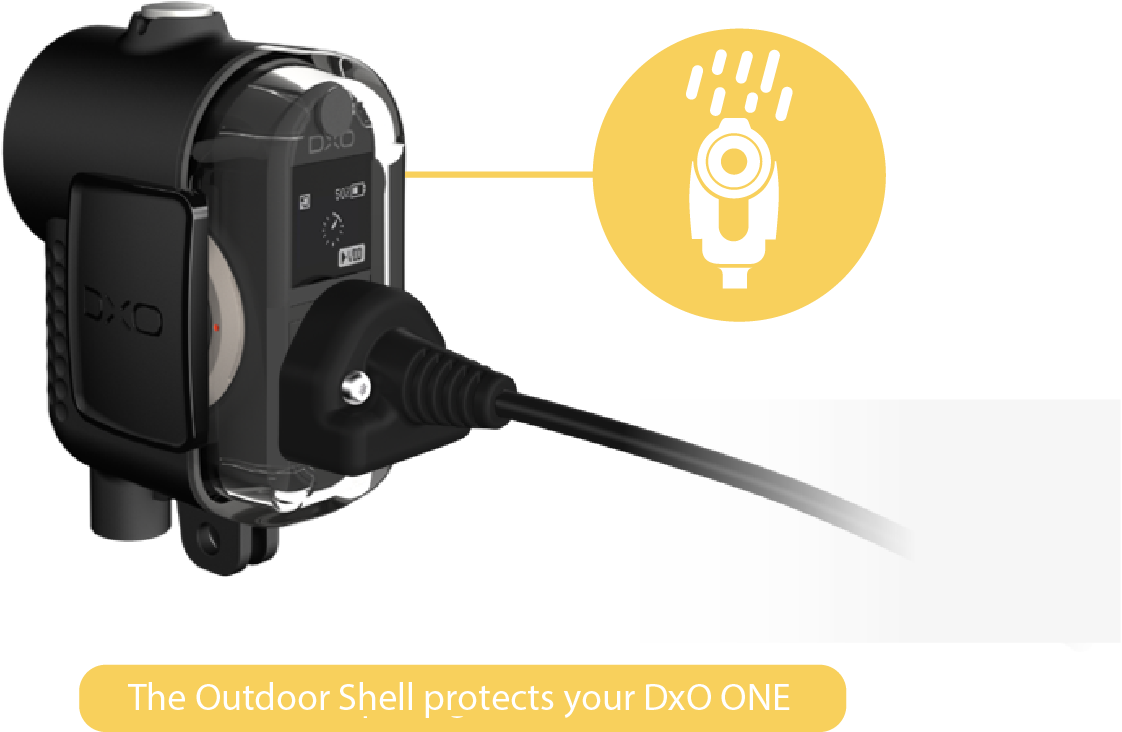
Of course it is very important to make sure that the night will be clear and not very humid (and even if it’s not supposed to rain or be humid, it is always best to put the DxO ONE into its Outdoor Shell to protect it in case of sudden rain or dew).

Exposure setup
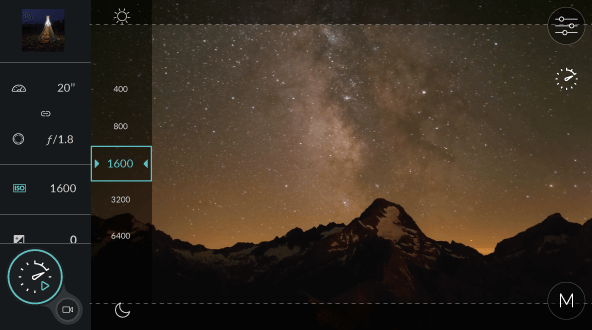
Exposure in night time-lapses can vary a lot, depending mostly on whether we are going to shoot the stars and the Milky Way on a moonless night, or if we’re seeking the light of the full Moon on the landscape.
In the first case, we will need more exposure, so we must open the aperture of the DxO ONE to the maximum (ƒ/1.8), raise the ISO to the highest that the DxO ONE sensor allows (taking into account noise, about ISO 1600), and use the DxO ONE’s exposure meter as we adjust the shutter speed to the scene. In the case of a dark night, the shutter speed would be about 20 seconds. Photographing with a full moon, on the other hand, means that we can lower the ISO to 800 to reduce the noise, and adjust the shutter speed as needed.

Interval setup
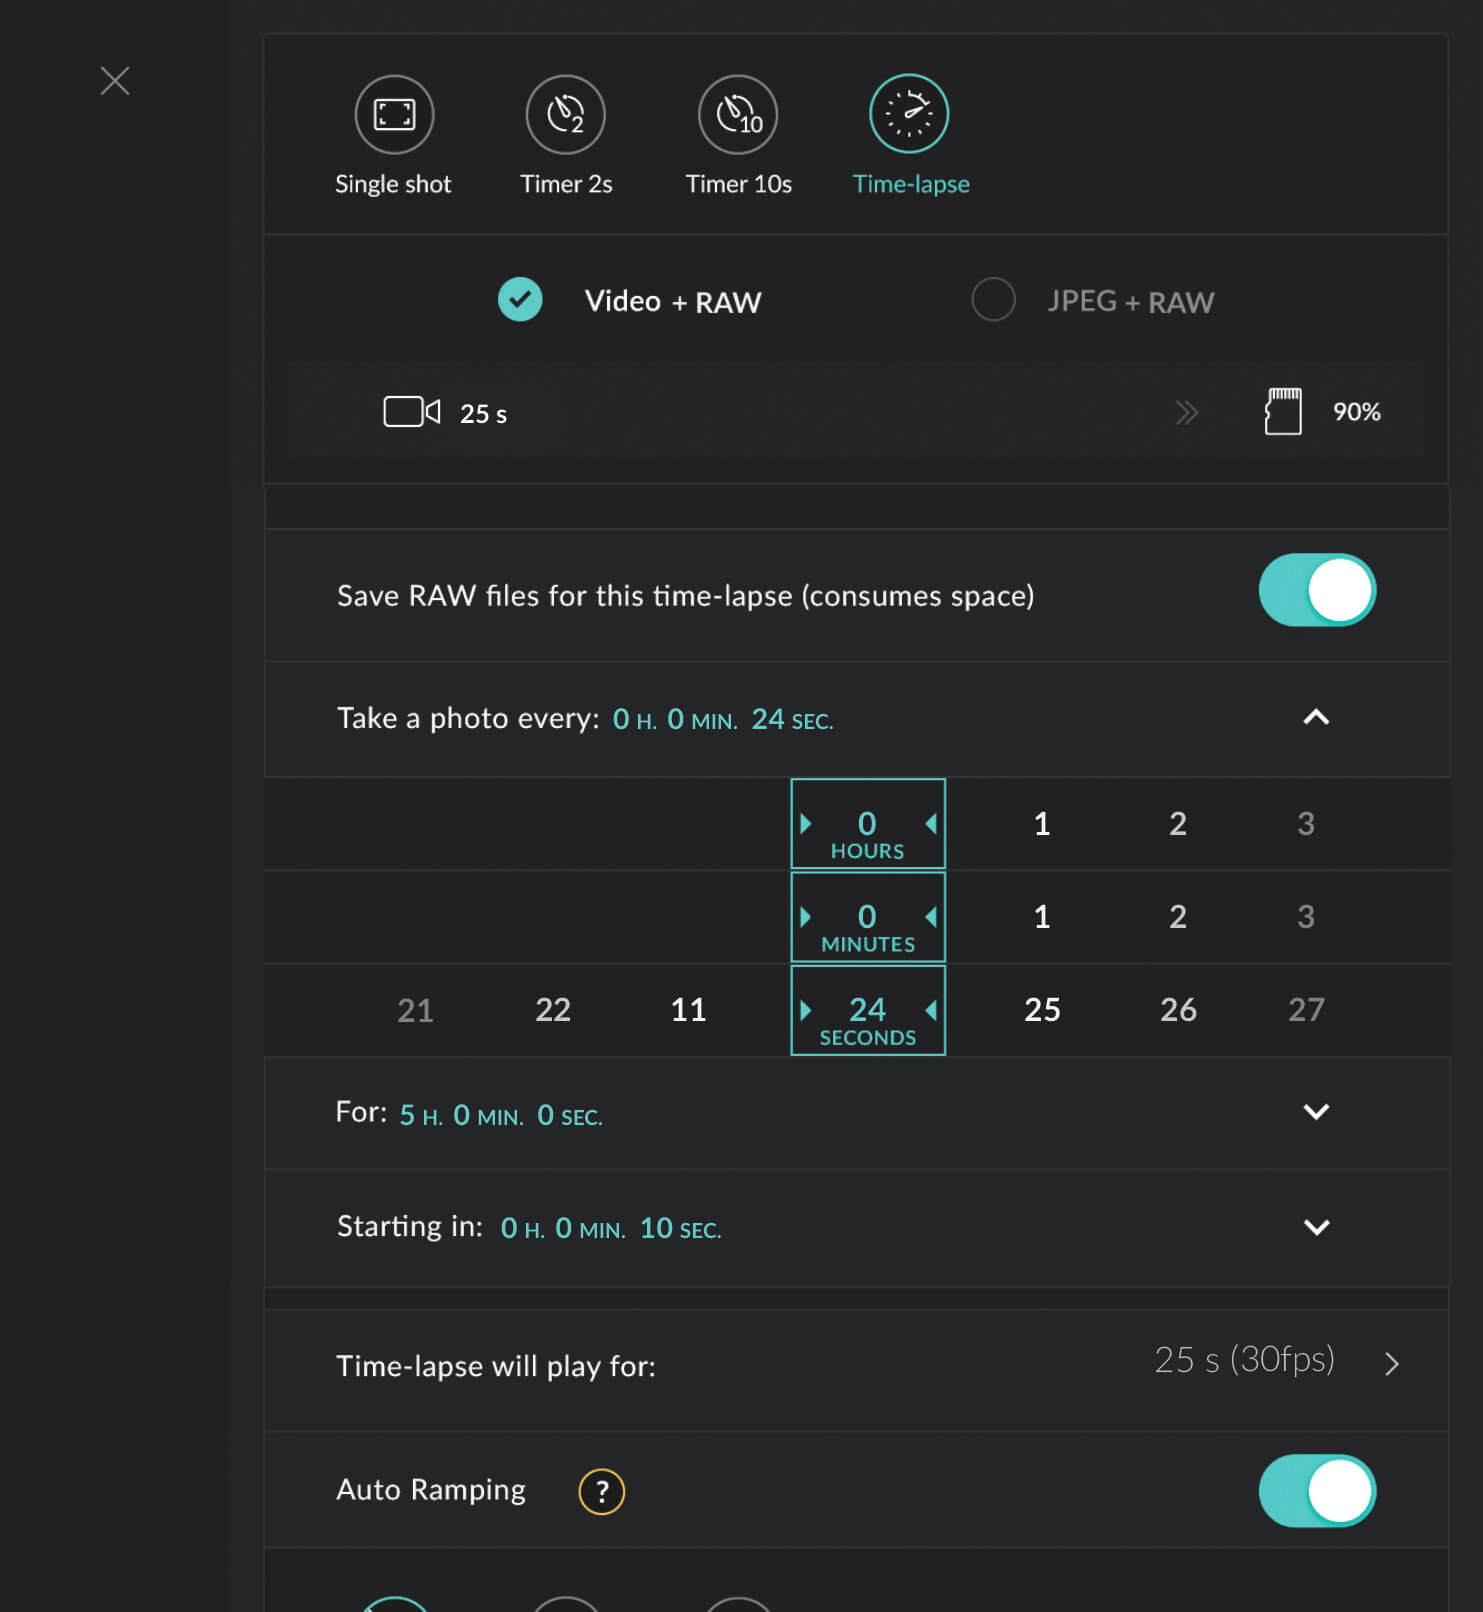
Setting up the interval in night time-lapses is perhaps the easiest to calculate or choose: just look at the shutter speed you have selected and add 2 or 3 seconds.
For example, if we are going to photograph the stars on a moonless night and we have selected 20s of exposure, the ideal is to use an interval range of 23 or 24s.
This way the DxO ONE will have enough time to record the image and shoot the next without filling the buffer.

Evaluating results
After a night of shooting, and maybe of sleeping under the stars, it’s time to check the result.
If you have used the “video + raw” option, you will be able to see the clip directly on your iPhone, and to check that the exposure is correct, that the camera has triggered the entire sequence, and that your external battery lasted through the night. The most common mistakes for time-lapses at night are usually focusing and exposing.
Make sure you have manually focused on a bright star and have used the DxO ONE’s exposure meter to choose a correct exposure.

Enrique Pacheco
Travel cinematographer
& time-lapse specialist
enriquepacheco.com
 Download page